11 Jun Plant Feedback Form Training
The plant feedback form training article is intended to walk you through the steps to create, and share a link or PDF of all the plants in a given project. Using this form, your customers can easily provide their feedback on the plants they love, the plants they like, and the plants they don’t like at all.
First, what is a plant feedback form?
A plant feedback form is any plant list you’ve created (any project) sent to your customer as a form where they can give you feedback on the plants they love, the plants they think are ok, and the plants they truly don’t like. By using this form, you can simplify the back and forth of the plant selection process.
To create a plant feedback form, first navigate to any project. Once you are in the project, go to the “Build Section” This will take you to the plant schedule page.
In the tabs at the top, select “Print/Export” to see all of your schedules, reports, and feedback forms.

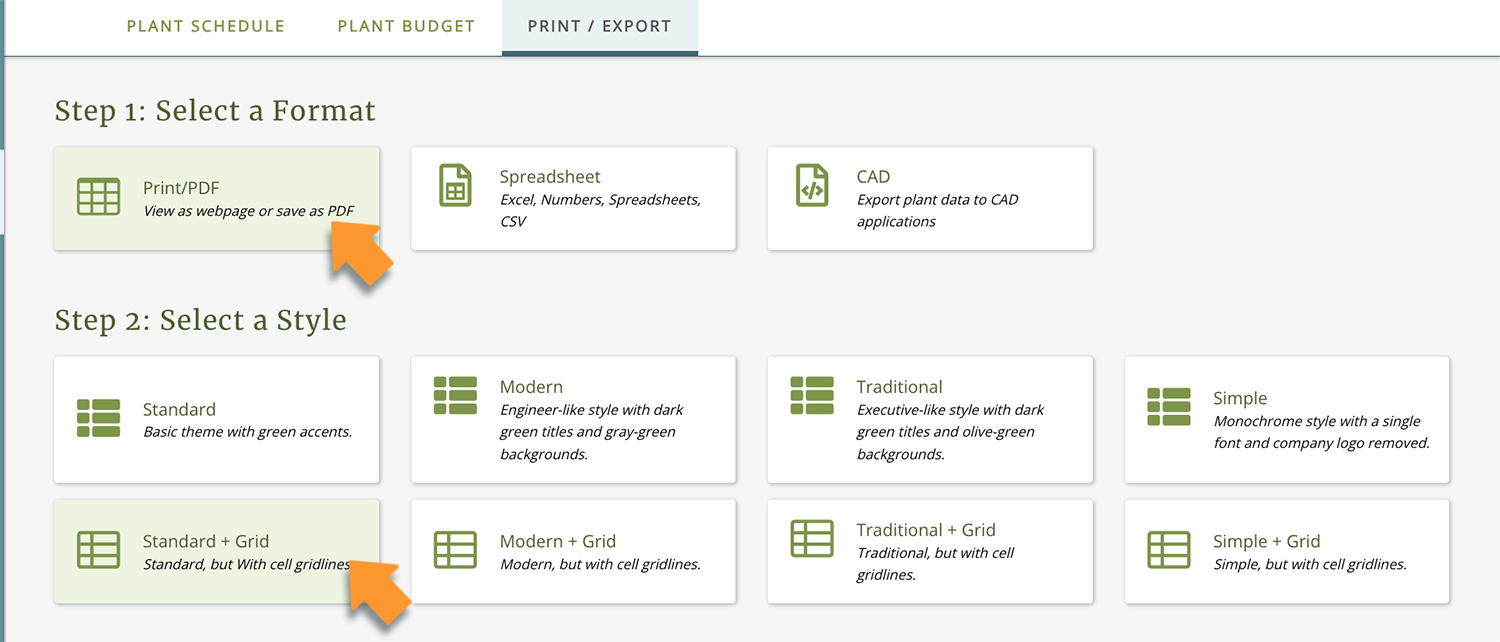
Step 1: Select your Format – select “Print/PDF” under “Select Format”
Step 2: Select your Style – select whatever style you want to use. For this example, we selected “Standard + Grid” style.
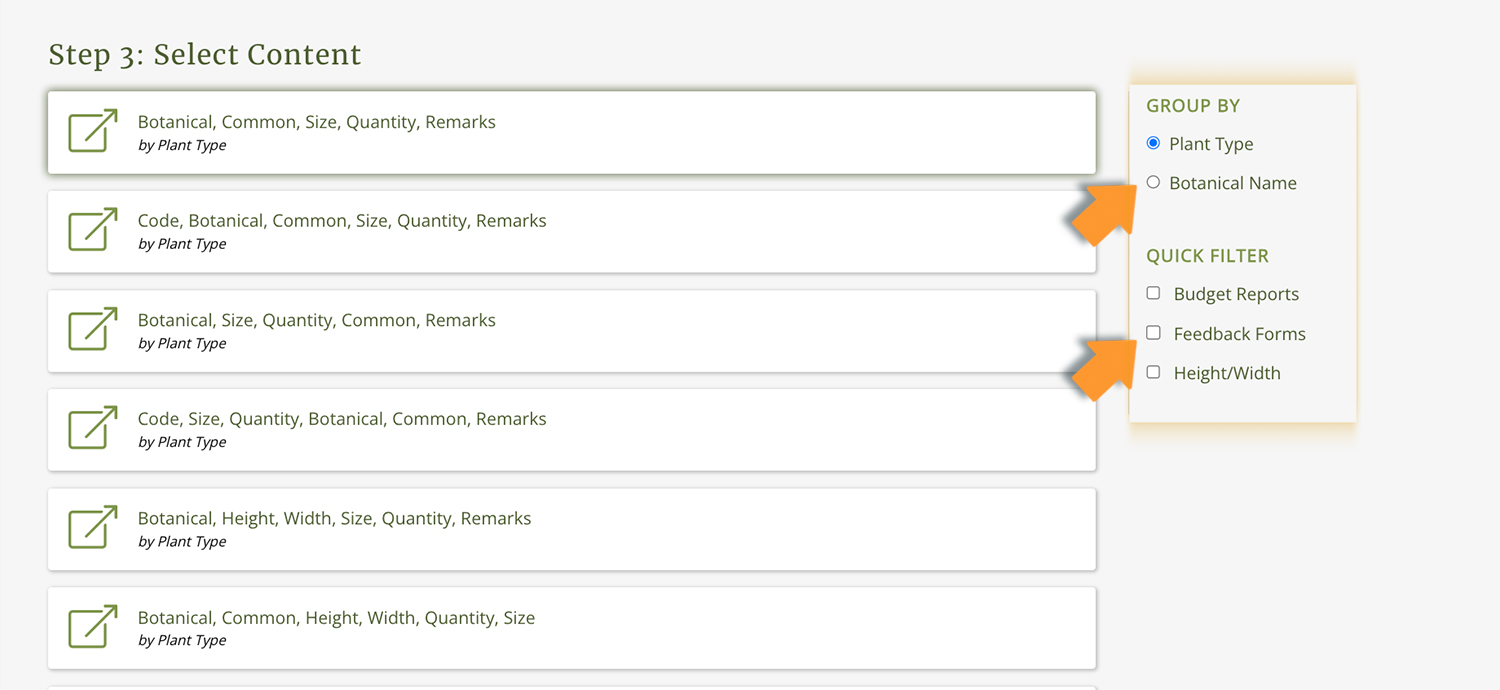
Step 3: Select your Content – Once you select your style, the last section will expand to display all the content options. Navigate about halfway down the page to see the filtering options. Then select “Feedback Forms” under “Quick Filters”.
You can also choose if you want the plants organized by plant type or botanical name by clicking on the two options under “Group By”.
For this example, we’ll pick a Feedback form organized by botanical name.
Here you will have two options. Plant Feedback form organized by Botanical Name, or Plant Feedback form organized by Common name. Pick whichever you think your clients will prefer (if you send this form as a link, the responses you get back will be in botanical order no matter what you send your client). Click on the button to see a preview.

Next you’ll see a preview of the Plant Feedback form. It the gray bar at the top, you’ll see several options for formatting and for how to send this form.
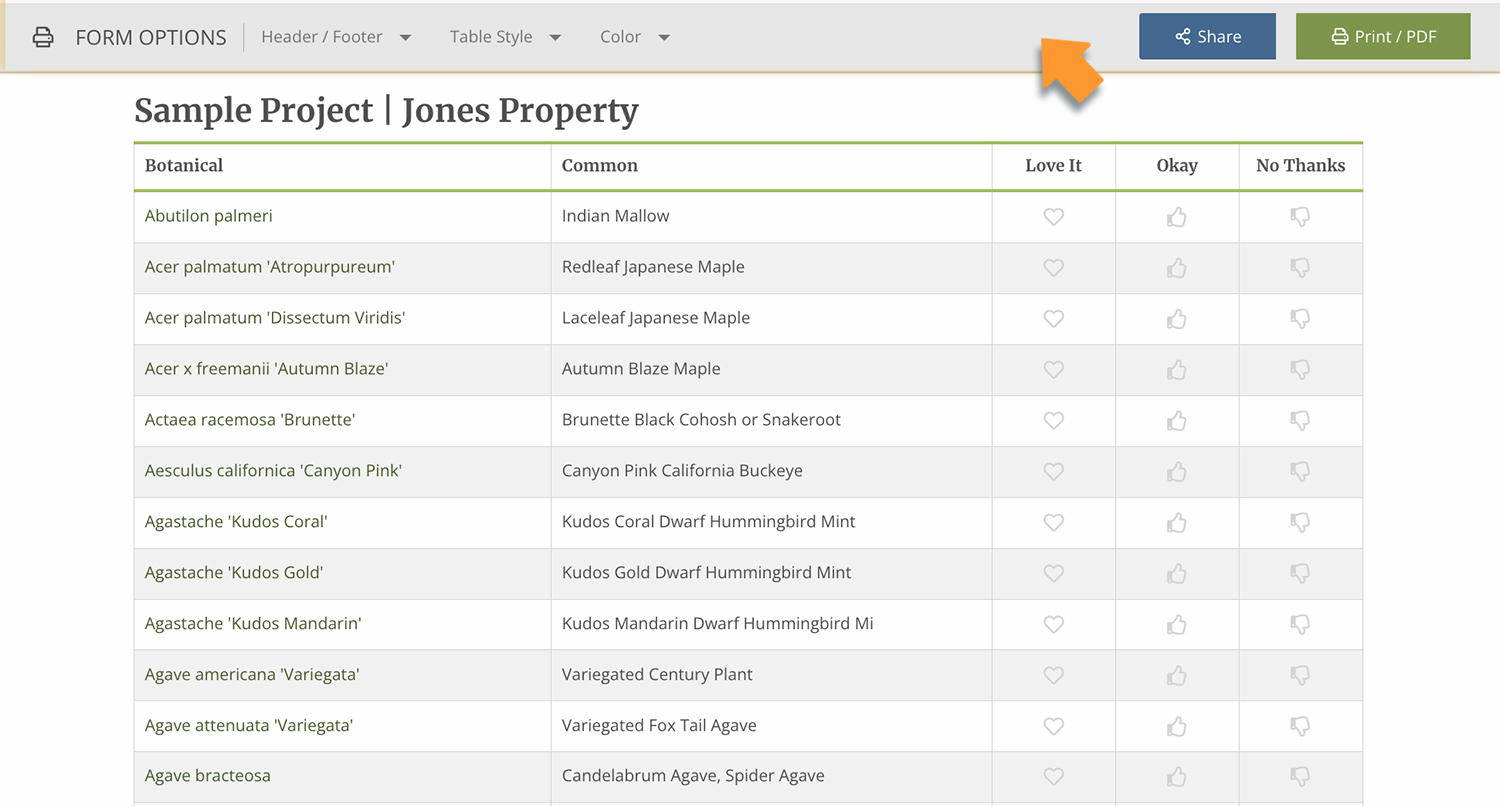
The most important choices are whether to send the form as a link or to create a PDF. Here is a little more information about both.
If you click “Share”, you’ll be able to send a link directly to your customer. They will be able to open the webpage and review the plants directly from the page. When they are done filling out the form, they will click “Submit” and all of their responses will be delivered to your email.
If you click “Print/PDF” you can create a PDF of this form. You can include it in any email or any PDF packages you send to your customer. This PDF is not an editable PDF, so your client will need to download the file and fill it out to return it to you. For obvious reasons, we strongly suggest that you send the form as a link. But you have both options!
If you are creating a PDF, you also have a few more options along the top. You can remove the title and extra information at the top of the page, you can remove page breaks (this will take away the organization where each plant types starts on a new page).
How to share the form
To share this form as a living document, click “Share”.

You’ll get a modal window that looks like this:
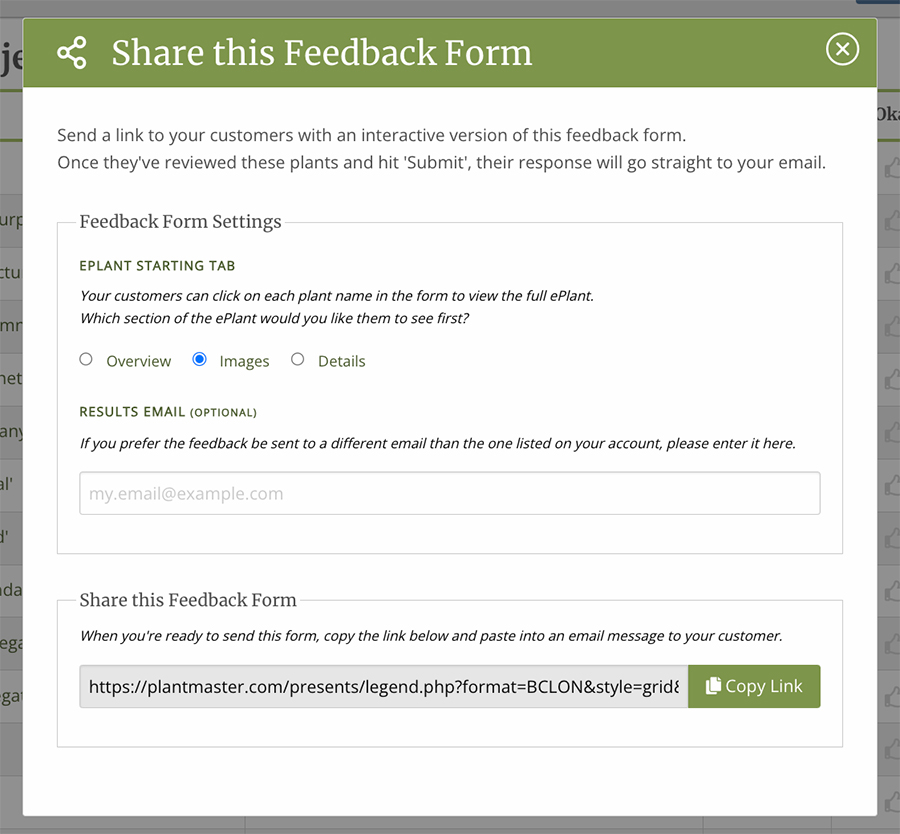
Now you have a few choices to make before you grab the link and send the Plant Feedback form.
First, because it is an interactive webpage, your clients can click on each plant name to see more information about the plant. Here you can decide if you want them to see images of the plant or all the plant details. If you do nothing it will default to opening each plant to view more images.

Next, determine where you want their responses to go. If you leave this form blank, their responses will go right to the email address you use to login to your PlantMaster account. So add a different email here if you want their responses to go to a specific email.

As the last step, click the button to the right of the link to copy the entire link. Now you can send this entire form to your client in an email.

Here’s how your customer should use it
Once your client gets the Plant Feedback form, they can choose whether they like, love, or dislike a plant.


They can click on any of the plant names to see more information about the plant and refresh their memory. In your email, we recommend that you give them additional instructions like “If you don’t have strong feelings about a plant, just leave it blank and make sure to note all the plants you love and the ones you hate, etc.”

Once your client fills out the form, they will click the “Submit” button in the top right corner.

They will also get a chance to add any comments or notes. Lastly, if more than one person is reviewing the plants, they can add their name and submit more than one response.

 This will send an automatic email to the email you listed. Please note: This form does not save their responses, so once they click “Submit” or leave the form, it will not save their work. They can fill out the form as many times as they want, but each time it will create a new email for you.
Here is what the email looks like:

You can easily see all the responses, organized in alphabetical order by botanical name. Plus, you’ll get an spreadsheet attachment you can use.

Create a PDF or print this form
To send this file as a PDF, please review this training article titled “Create a PDF or Print Your Reports”>
Once you have saved your PDF, you can attach it in an email or include in a packet of other PDF materials.
How to use the PDF with your clients
Your clients will be able to click on the plant names to see images of the plant, but they will not be able to fill out the PDF. To be able to fill out any PDF, they will need to have a PDF viewer/editor to convert the PDF to an editable PDF :(. The best way for them to fill it out is to print the file, fill out the document, and take a picture of their responses.
That’s it!


