
01 Feb Create a PDF or Print your Reports
This article is intended to help you create a PDF or print any of your reports. There are a few tricks to consider.
PLEASE NOTE: PlantMaster uses your internet browser to generate these PDFs or send the files to print. You will need to click Command + P or Control +P (or the print button in the top right corner) to get to the browser’s print settings. Once you are in the print settings you can determine if you want to save to PDF or directly print the file. You can also change the document size and orientation in this workspace.
Before you open the print settings, let’s make sure the report is formatted the way you want. There are several different options:
Set up your report.
Once you’ve selected the report you want to use, you’ll be taken to a screen where you can preview the report.
At the very top of the page you’ll see a gray bar with some options.

The first item in the list is “Header/Footer”. This is where you determine if you want the report to include a cover page, a full header with your logo, or just the name of the report. Here is what each option looks like:
Title Only:
This option will only include the project name and the report name at the top of the first page. It will not include your company name or logo.

Full Header:
This option includes the project name and report name, PLUS your company logo, company name, and email address at the top of the first page.

Cover Page:
This option includes a full page in front of your report that includes your company logo, contact information, and the name of the project + report type. (You won’t see this page in the preview, but when you get to the print settings you will see the full cover page in view)

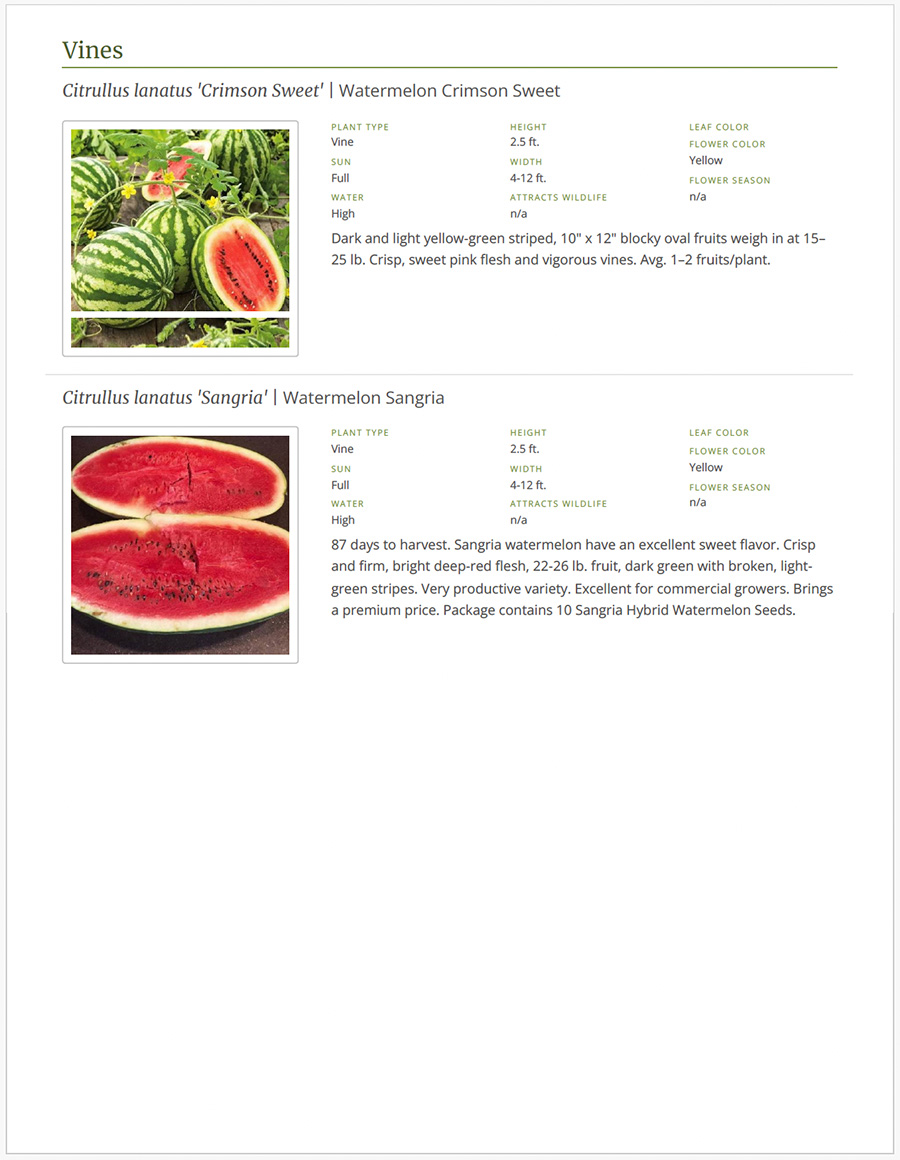
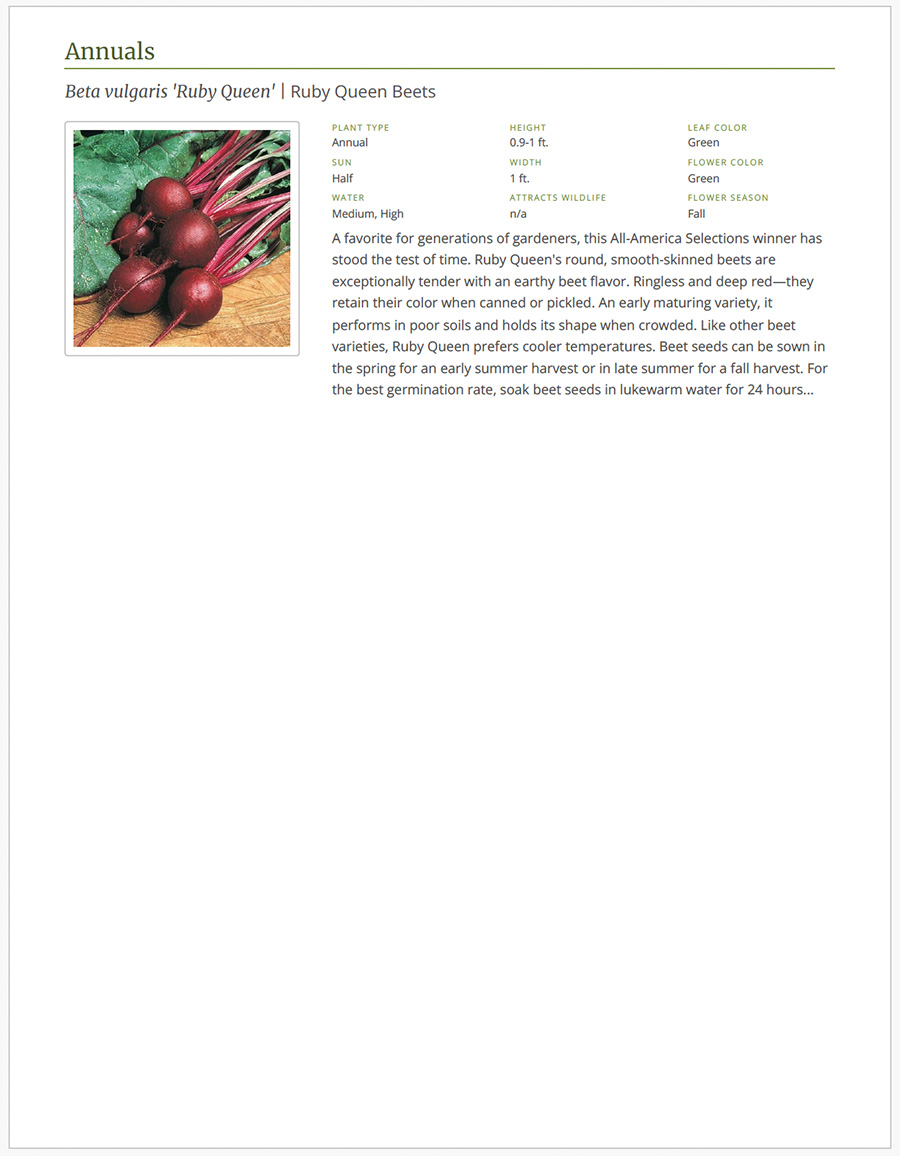
The next option is called “Page Breaks”. This is where you’ll decide how you want your plants organized. If you select a report that is organized by Area or by Plant Type, the report will have different headings for each Area or each plant type. By default, each new heading will start on a new page. For example, all Annuals will be grouped together on as many pages as needed, then Trees will start on a brand new page. Here is a closer look at both options:
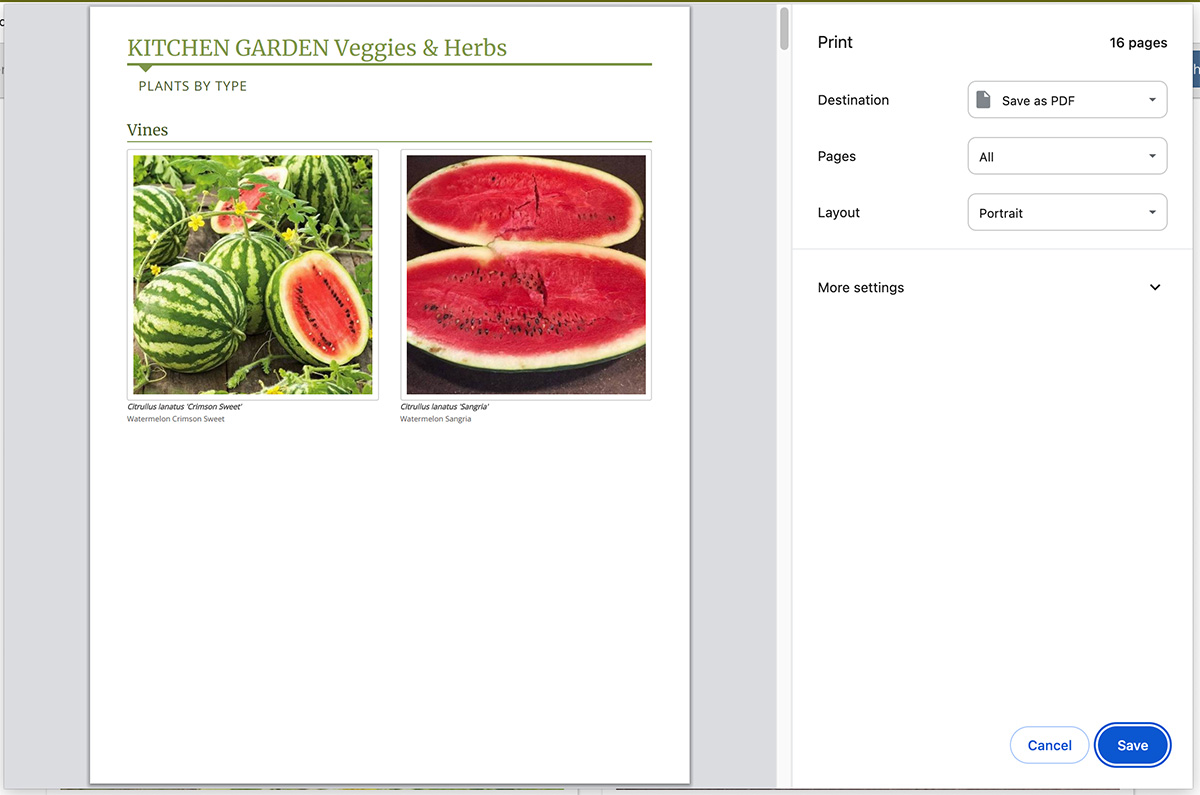
Page Breaks = Enabled
Take a look at this Plant Details report. Here are kitchen garden veggies that are organized by plant type. If you look at the first two pages, you’ll notice that Vines are on one page and Annuals start on their own page. If you want separate the plants by type, this is a great layout. However, if you’re printing or you just want less pages, you’ll wan to select to disable the page breaks.
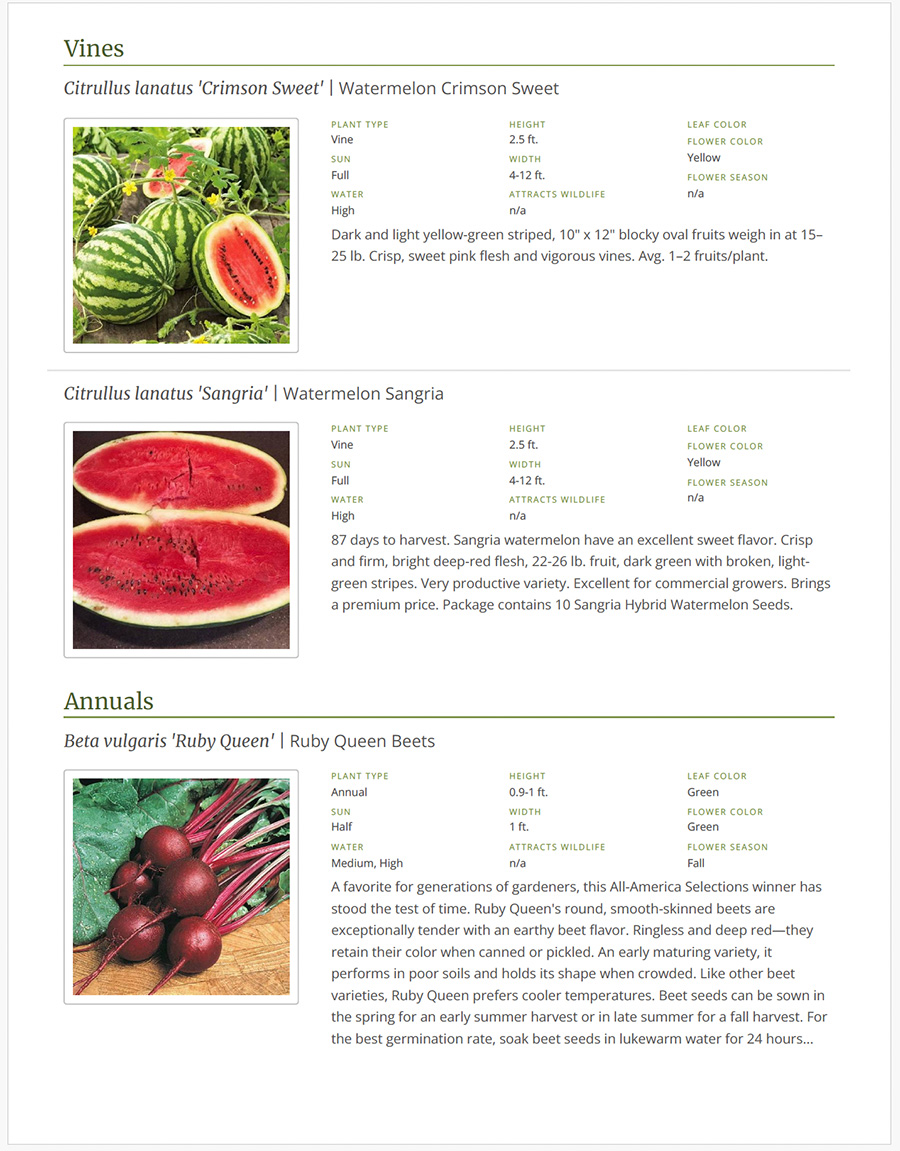
Page Breaks = Disabled
Below is the exact same report, but with the page breaks disabled. Notice how both the Vines and Annuals are on the same page. This option is great if you want to reduce the number of pages in your report.
Next, the print settings look slightly different in each browser, so we’ll walk through examples in both Chrome and Safari.
Let’s start with Chrome.
Using Chrome to PDF or print your report.
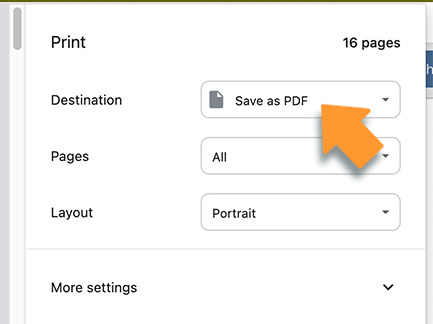
To save your report as a PDF, first click the green button at the top right of your screen that says “Print/PDF”.

This will open the print settings modal from Chrome. It will look like this:
Print or PDF:
Save as PDF – Select Destination “Save as PDF” from the options.
Print the File – Select Destination “Other” or find your printer from the list of options.
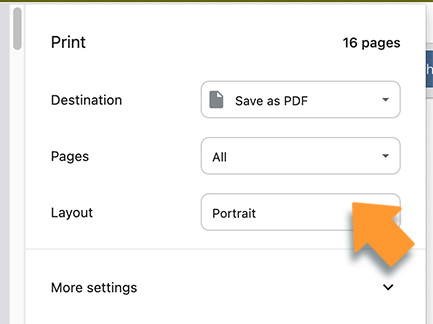
Set Page Orientation/Layout:
From the “Layout” options, you have two choices.
Select Portrait if you want a taller page.
Select Landscape if you want a more horizontal layout (recommended)
Set Page Dimensions and More:
Just underneath “Layout” you will see an option that says “More Settings”, click the arrow to the right of this text to see all additional settings.
It will look like this.
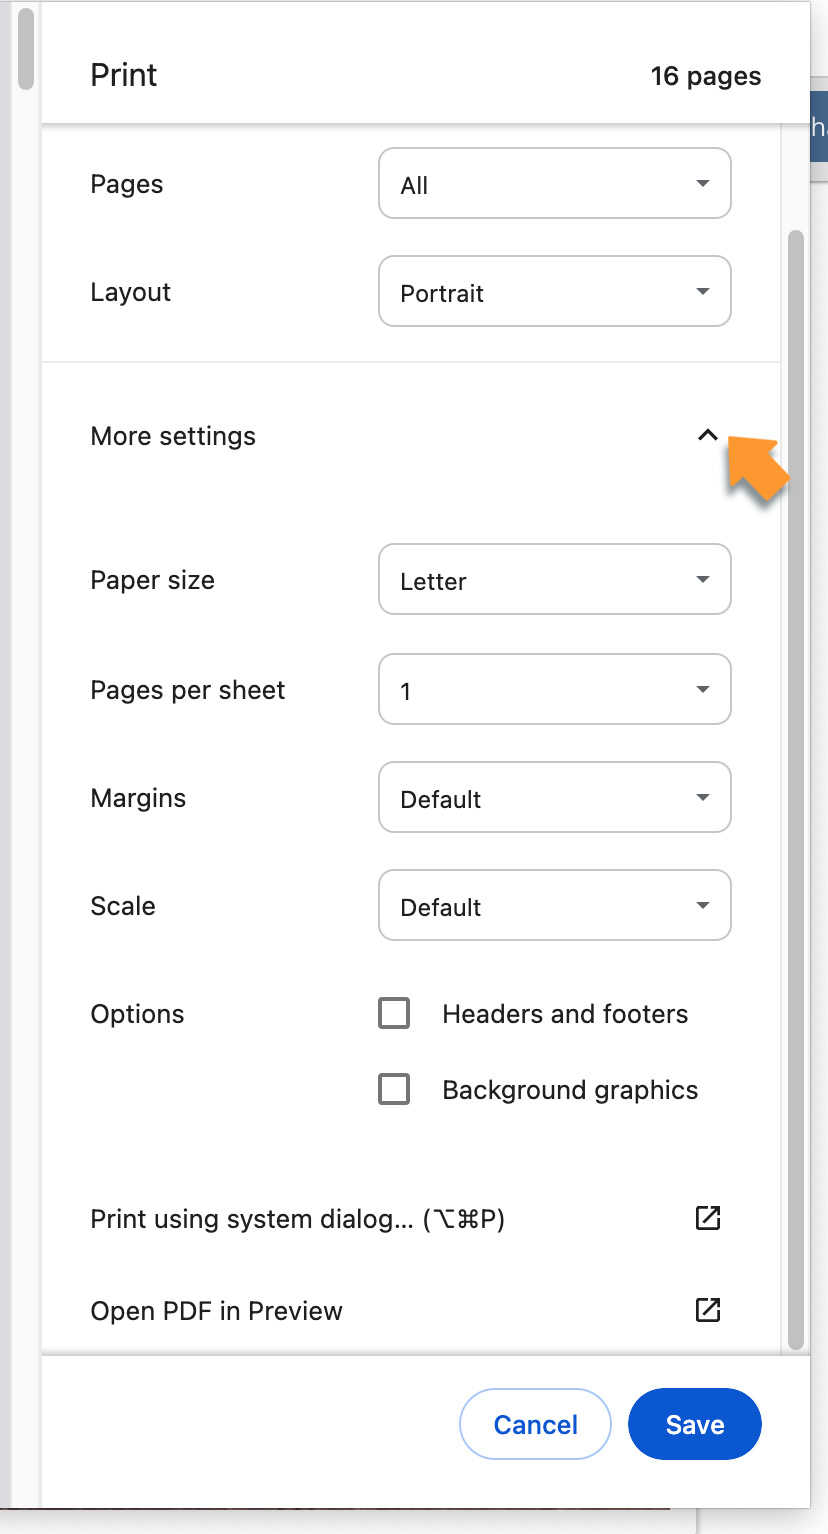
Here are all the settings you can manipulate:
Paper Sizes:
Letter = Standard 8.5 x 11 (Portrait or Landscape)
Tabloid = 11 x 17 (Portrait or Landscape)
We don’t recommend printing or saving a PDF any larger than 11 x 17. This will use an astronomical amount of ink OR it will be massive file size to account for such large imagery. However, if you want to choose a larger page size, you can.
Pages Per Sheet: You should keep this to 1 page per sheet.
Margins: You can play with how much space you want around the edges of your document, but we recommend that you leave it at Default.
Scale: If things aren’t fitting exactly the way you want, you can always change the scale. This will shrink or enlarge the information on the page to better fit the space.
PLEASE NOTE: Make sure the “Print backgrounds” and “Print headers and footers” are UNCHECKED. This will remove the timestamp and other text that appears at the top and bottom of each page.
Once you have everything just the way you like – Click “Save” or “Print” and you are all done!
Using Safari to PDF or print your report.
To print or save your report as a PDF in Safari, you need to use your keyboard shortcuts to pull up the printer settings.
Hold down the Command Button and Click the letter “P” (Command + P)
Here is the print screen you will see (from your computer, tablet or phone will look different):
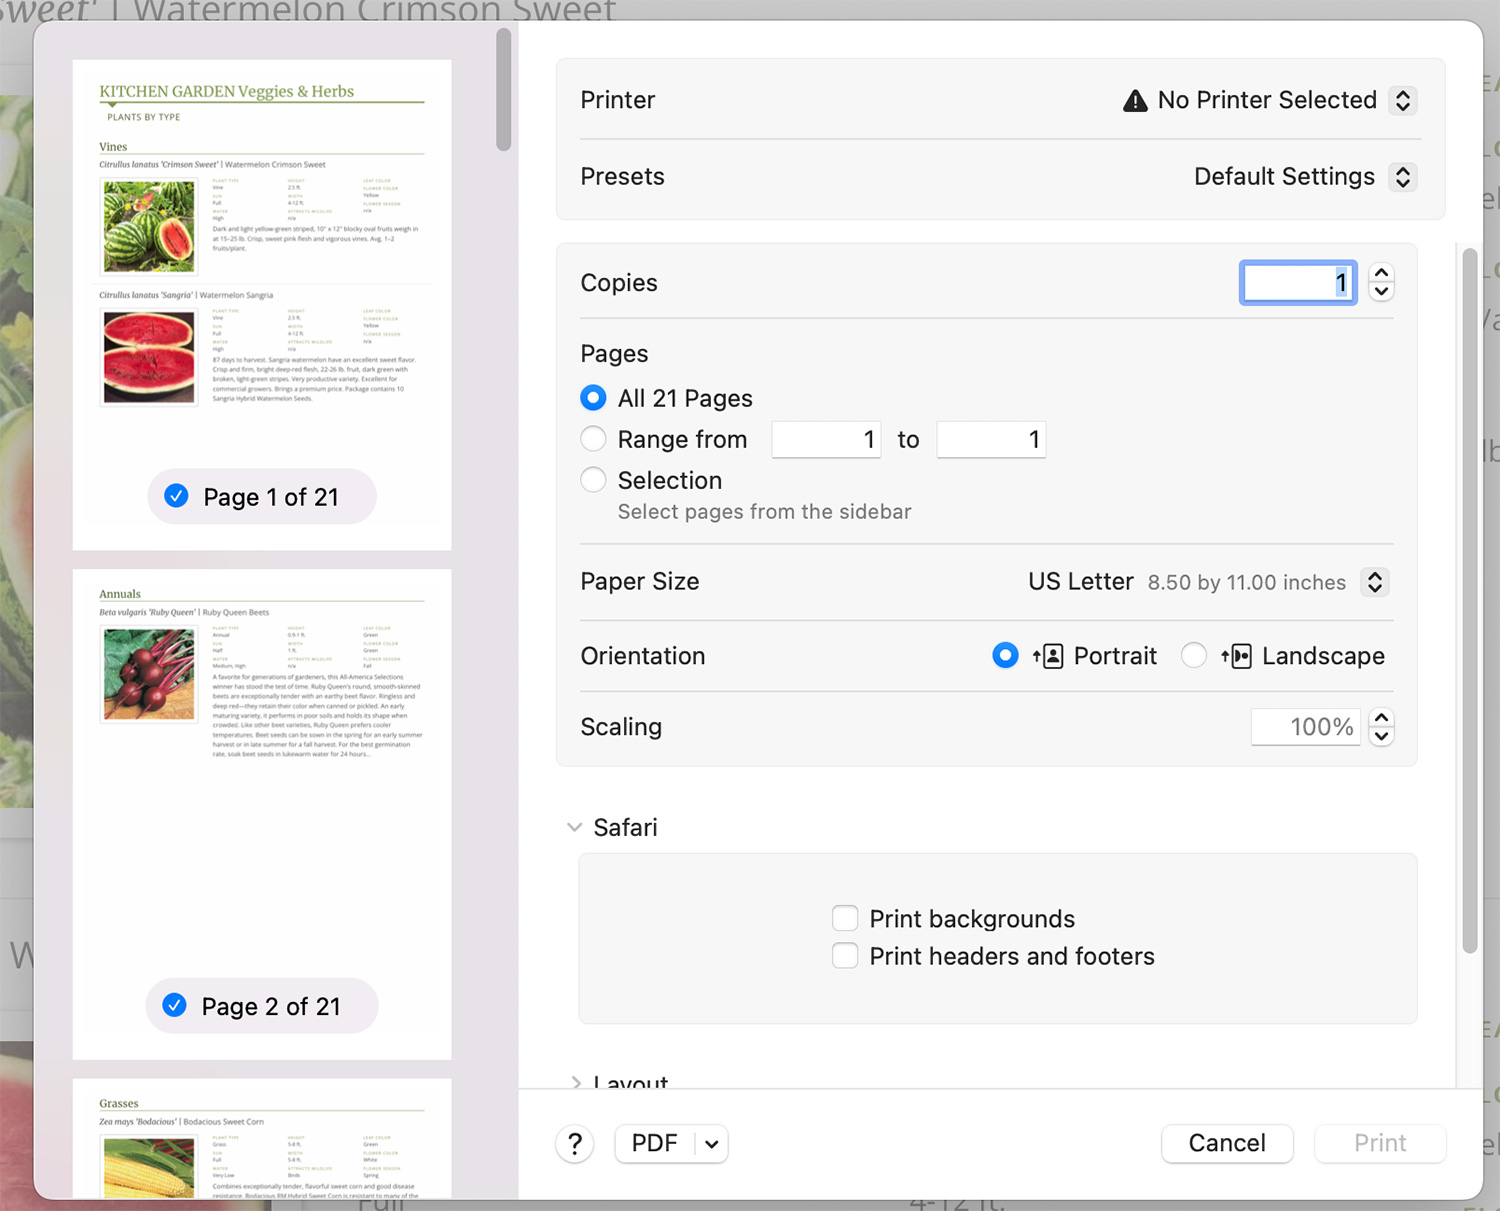
Print or PDF:
Print the File – Select Printer – If you want to print your file, select your printer in the first step.

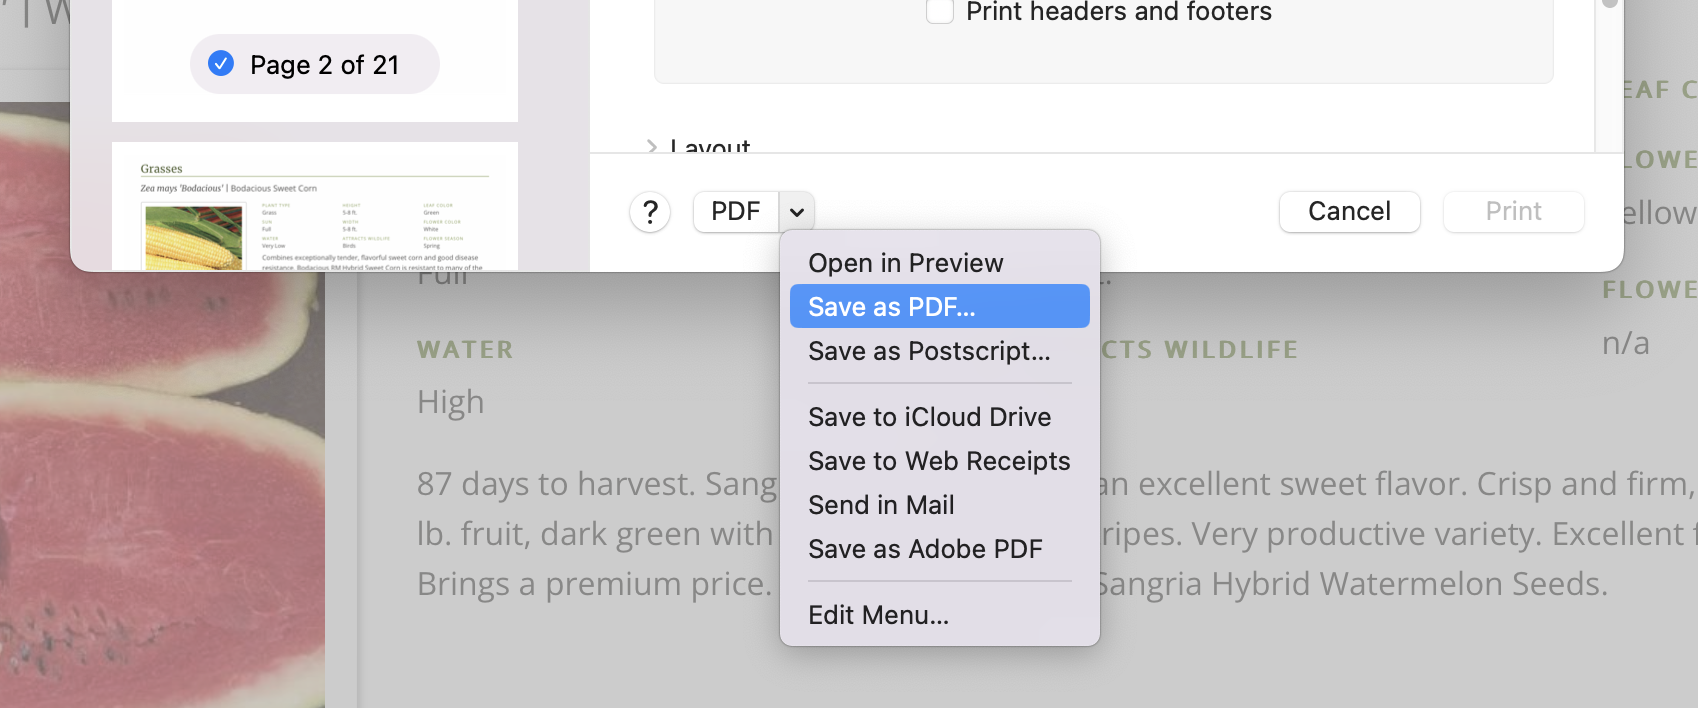
Save as PDF – Go to the very bottom of the print screen where it says “PDF” and choose “Save as PDF” from the options. Make sure you set up your dimensions and orientation first.
Set Page Dimensions and More:
Here are all the settings you can manipulate:
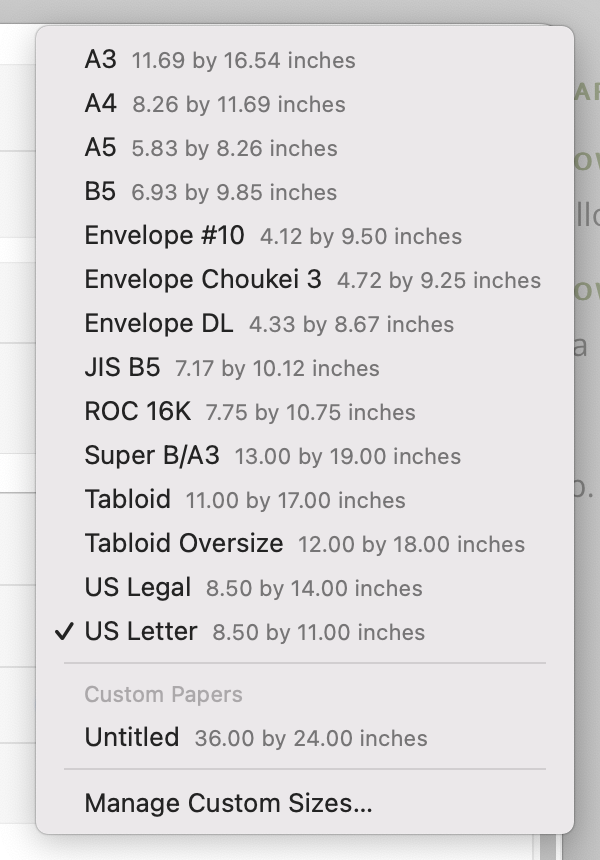
Paper Sizes:
US Letter = Standard 8.5 x 11
Tabloid = 11 x 17
We don’t recommend printing or saving a PDF any larger than 11 x 17. This will use an astronomical amount of ink OR it will be massive file size to account for such large imagery. However, if you want to choose a larger page size, you can.
Orientation: Select if you want Portrait or Landscape (we recommend landscape).
Scale: If things aren’t fitting exactly the way you want, you can always change the scale. This will shrink or enlarge the information on the page to better fit the space.
PLEASE NOTE: Make sure the “Print backgrounds” and “Print headers and footers” are UNCHECKED. This will remove the timestamp and other text that appears at the top and bottom of each page.

We recommend that you skip the Paper Handling section.
Once you have everything just the way you like – Click “Print” or select “PDF” at the very bottom of the screen.
Save as PDF – Go to the very bottom of the print screen where it says “PDF” and choose “Save as PDF” from the options.
That’s it! You’ve printed or saved your report as a PDF.