

15 Dec Add an ePlant
In this article you will learn how to add an ePlant to PlantMaster. This includes adding your own data, description, and any images you choose. If you are trying to add images or edit data for an existing plant, please read the article titled “Edit an ePlant” >
Please Note: Often our users don’t find plants that actually exist in the database. So, before you add a plant that might already exist, we recommend that you try the search by name again. When you do, try typing the first three letters of the Genus name, instead of the entire plant name. The search is looking for an exact match, so its possible that the spelling might be different and you may be missing a plant. For a complete overview on how to get the most out of your searches, please read the article titled “Search by Plant Name”. It will be far less work to revise an existing plant than to start from scratch.
Let’s get started – Add an ePlant!
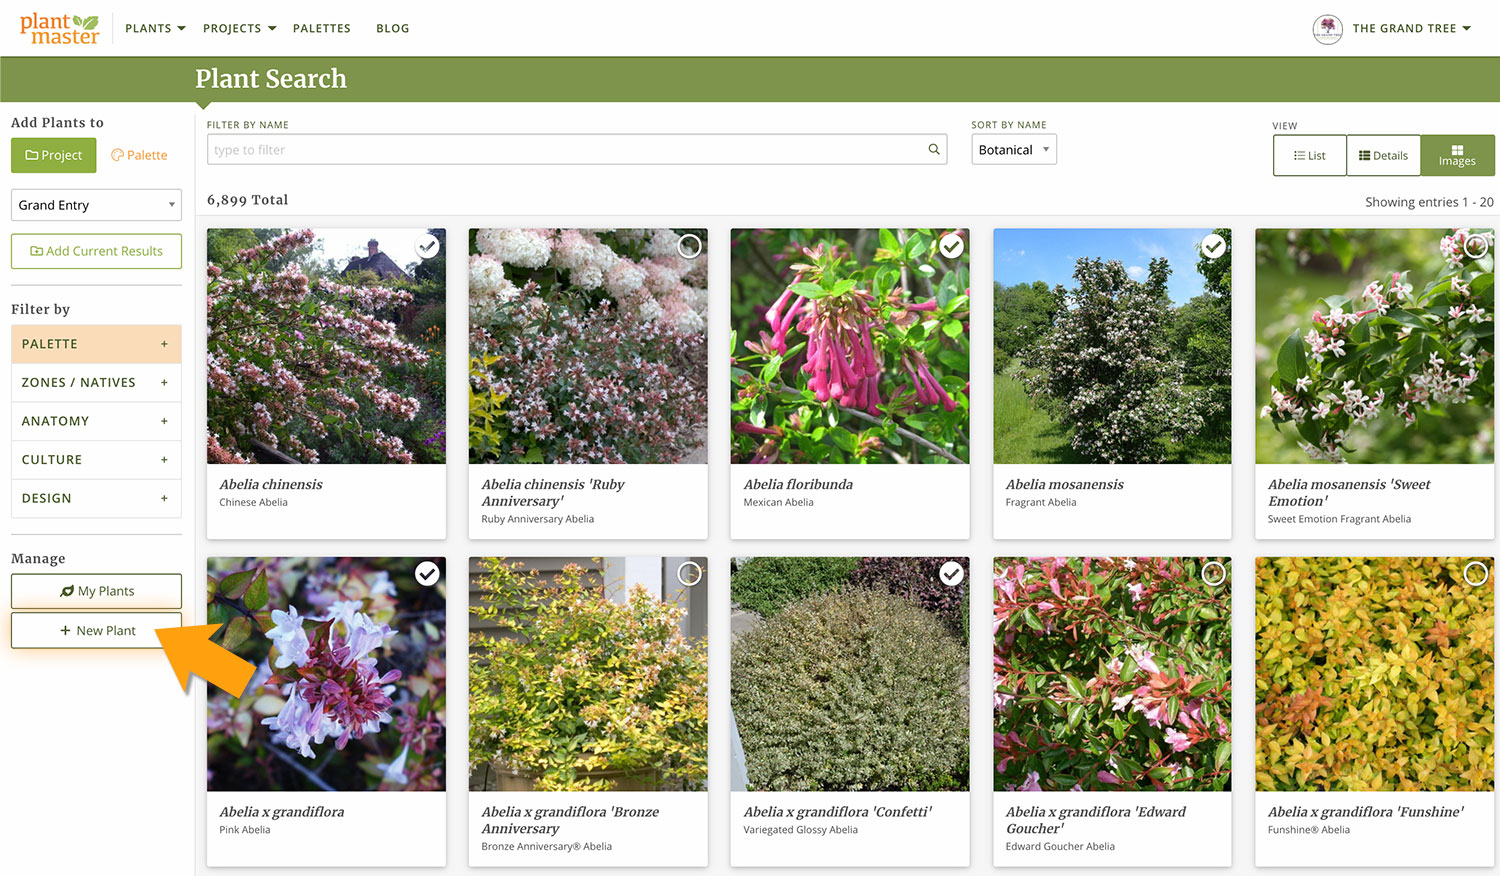
On the plant search page, look for a button that says “+ New Plant” on the left sidebar. Click to create a new ePlant.
Now you can enter in the plant information for your new ePlant. This new plant will be added to your private account and will be stored in the “My Plants” folder. Here is what the page will look like.

As your first step, fill out this key information. The fields listed below are required to save your new ePlant. Any other information is optional.
- Botanical Name
- Common Name
- Description
- Plant Type
You can skip any of the other fields, but we highly recommend that you fill out as much information as you can. Remember, every field you fill in is a characteristic you can use in a search later. So if you don’t fill in the height or width of a plant, it won’t come up in a search for a specific size plant. The more information you add, the better!
Add an ePlant – General Information
The ePlant is broken down into sections. The first section is all the general information.

Botanical Name
Enter the complete botanical name of your plant, including genus and species name
Common Name
Enter whatever common name you prefer.
Family
The family this plant belongs to.
Location
This information
Synonym Name(s)
The database can search through various names, so if your plant has a different nickname, or the name has changed recently, please enter those names as well so you can reference the plant by any name.
Plant Code
This is the code that will be used in all of your plant legends. Use a naming convention you will use across all projects.
Description
The description of this plant. Be sure to include anything that will help you differentiate this plant from others in the description. Include things like size, leaf color, flower color, flower season, and any unique uses or characteristics of the plant.
Description by
This is a credit for the description. So be sure to put your name here! If you share the ePlant with anyone it will include your name as the creator of the description.
Notes
Write any designer notes you have about this plant. It can be viewed in the Designer showcase report and Plant Details report.
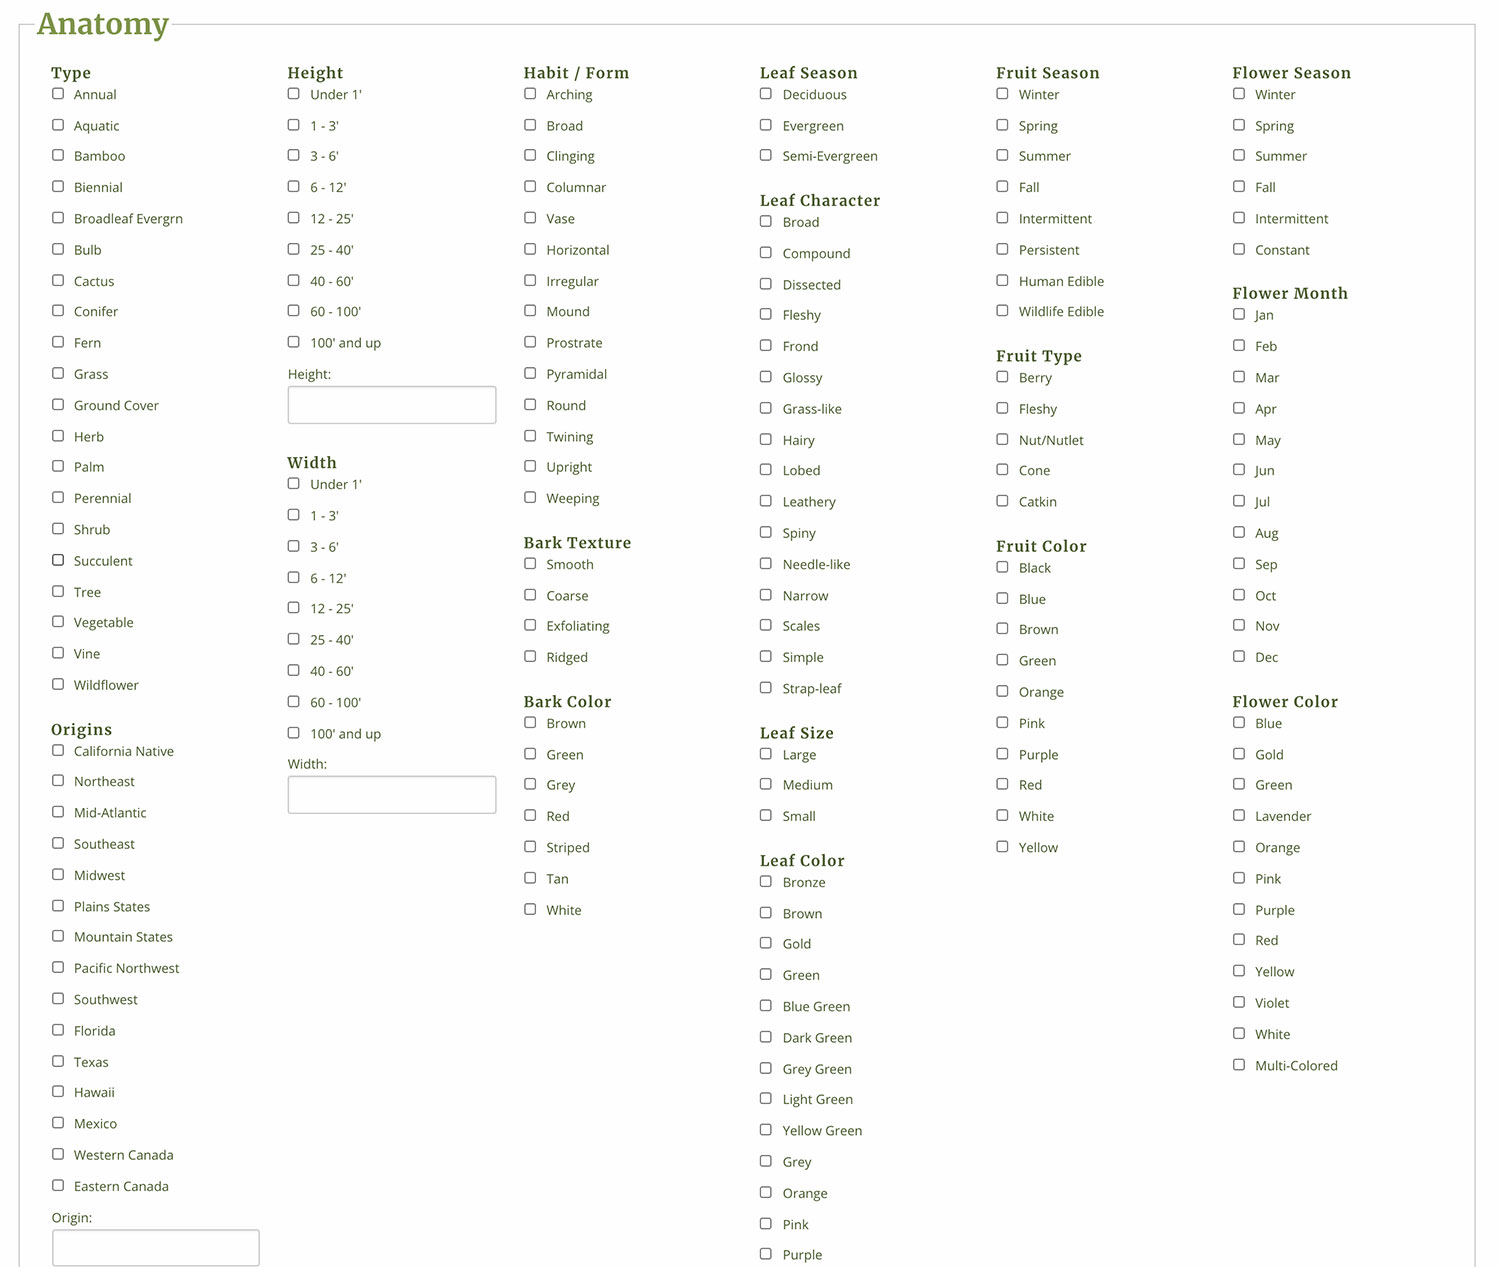
Now you can fill out any information you choose for the next sections, titled Anatomy, Culture, and Design. Make sure you fill out the plant type, it’s required to save the new ePlant.
Anatomy
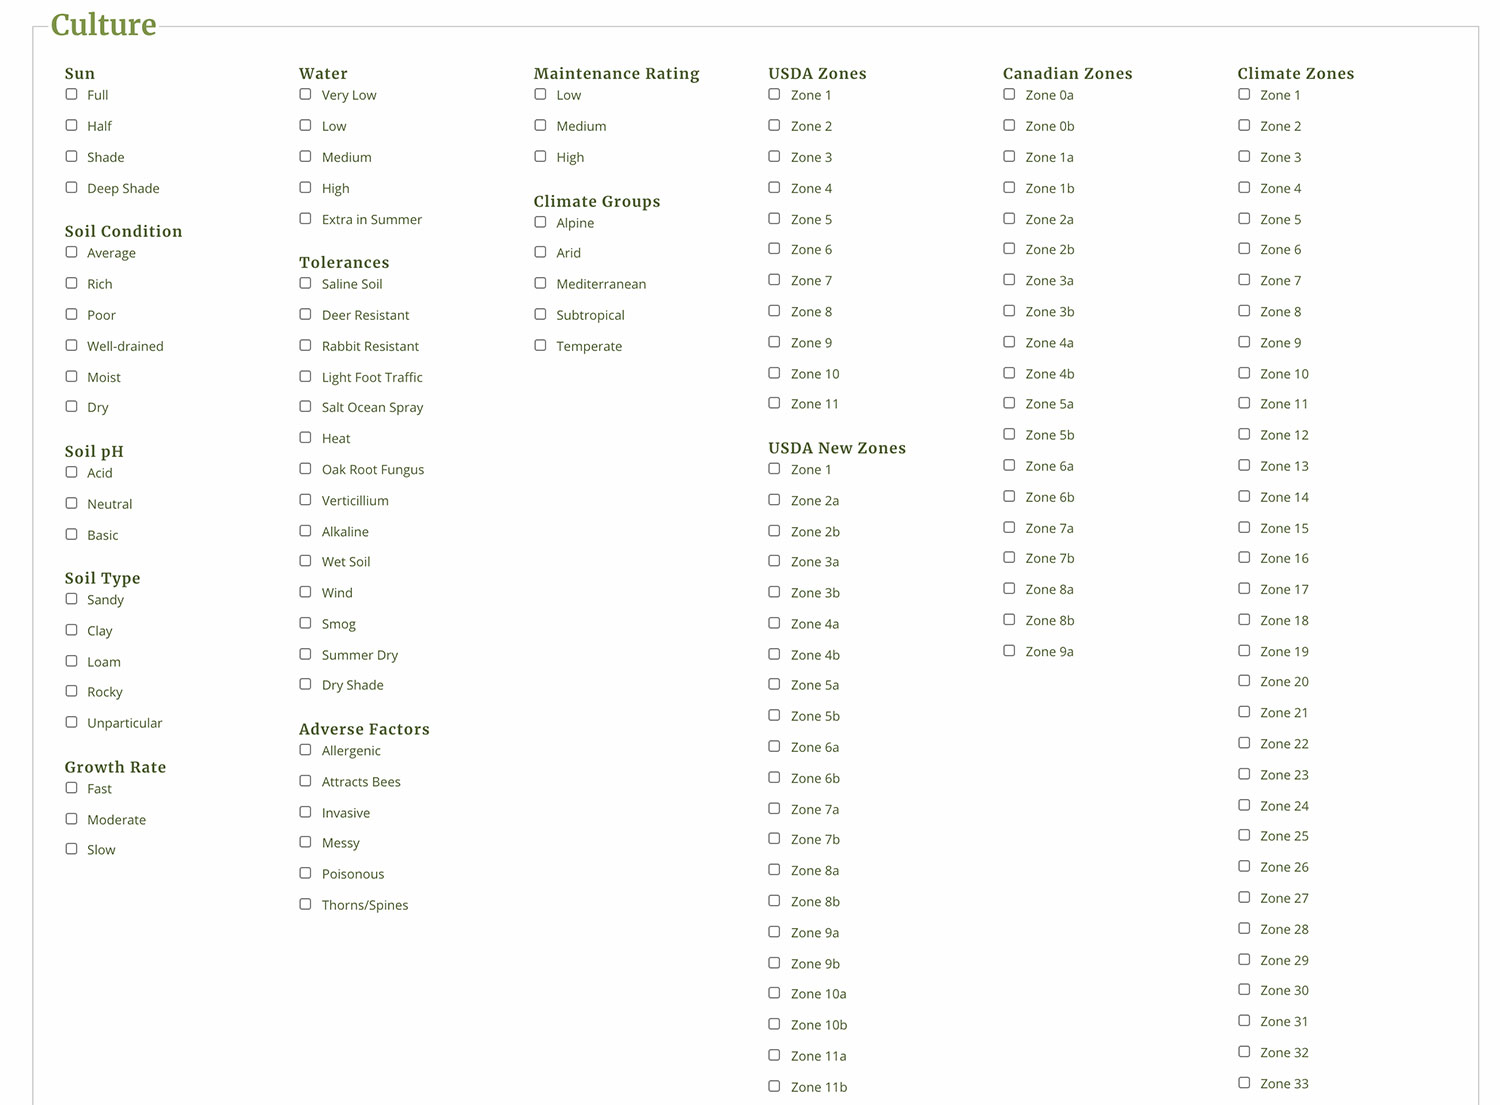
Culture
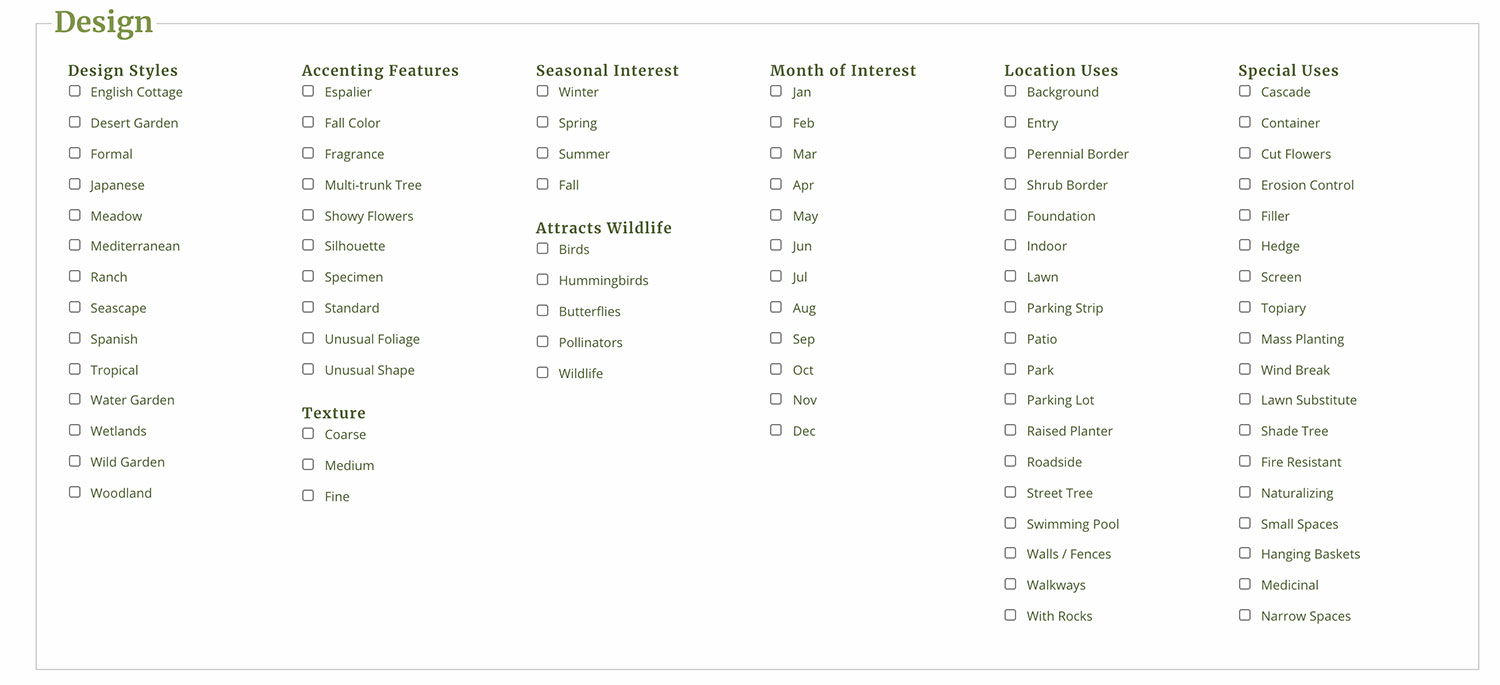
Design
Once you are done filling out the plant details, scroll to the bottom of the page and click “Create New ePlant”.
Congratulations, you’ve made a new ePlant!

Next, it’s time to add pictures.
There are two ways you can add images to your new plant.
Upload Images
You can upload your own images to the database. You can upload .JPG or .JPEG file types only. In normal web instances, you want to upload smaller images at lower resolution – not in PlantMaster! Upload the largest images you can find (up to 4k resolution). The images you upload can be viewed as smaller thumbnails OR at full screen size, so upload the best images at the largest size you can find. You don’t need to stick to tiny images.
Copy Images from Another Plant
If you are adding your own variety or don’t have any images of the new plant, you can select another plant that already exists in the PlantMaster library and copy those images to the new ePlant you just created. Just click on “Copy Images from Another Plant” and follow the prompts. For complete training, read the article titled “Add Images from Another Plant“.

Change the order of the images
Once you’ve uploaded the images, you can determine their order. You can use the arrows to move the images forward or backward in order. You can delete any image you don’t want. And you can type in or change the number of any image. The minute you navigate away from this page, your changes will be automatically saved.

You have successfully completed the process to create a brand new ePlant!
To see this plant, select “Plants” in the main menu and then select “My Plants” from the drop down. The My Plants page includes any plants you’ve added to PlantMaster or plants that you’ve edited.