
24 Dec Creating and Sending Simple Presentations
There are two distinctively different types of presentations in PlantMaster, Interactive Presentations and Simple Presentations. In this article we’ll discuss everything you need to know about creating Simple Presentations and sending them to your clients.
To see all the wonderful features of the Simple Presentation and take a tour, read this article titled “Explore Simple Presentations”.
Simple Presentation: A quick overview
Simple Presentations work best for more particular customers. Though they are simple in design, you can hand pick what you send to your customer. For example, you can send a single report or combination of several presentations in one link. Maybe your client is little more finicky and tends to question every decision. For them it makes sense to send a presentation with limited information and a single image. Take a quick look at the elements that you can include your presentation.
Potential Elements of a Simple Presentation:
SELECT HOW YOU WANT TO SHARE YOUR PLANTS:
Design Showcase – This presentation layout features 3 different images of each plant with general plant information on a single plant per page layout. This is a design layout created specifically to make the plants shine!
Plant Details – Includes thumbnails of each plant with more in-depth plant information. This presentation is perfect if you want to give your customers a snapshot of the plants and some general information.
Storyboard – This presentation style includes larger images of each plant with botanical name listed below but no plant information. Use this presentation if you only want your customers to see pretty pictures.
SELECT ANY ADDITIONAL REPORTS YOU WANT TO SHARE:
Water Requirements – Spreadsheet view of the water ratings of all the plants in your project: Very Low, Low, Medium and High, in spreadsheet format.
Month of Bloom – Spreadsheet view of the months each plant will be in bloom and the color of the flowers. This presentation is great when you want to demonstrate that something will be in bloom most of the year!
For more details and examples of each element, read the article titled “Explore Simple Presentations”.
Organize Your Project
Let’s get started. Presentations are based on the projects you build. Every presentation includes the exact plants you’ve added to a specific project. So the first thing to do is select a project you want to share.
Click on “Projects” in the main menu.

In the left vertical menu, select the project you want to share from the drop-down list.

A FEW ITEMS TO DOUBLE CHECK OR REVISE
BEFORE YOU CREATE YOUR PRESENTATION:
Double Check Your Plants – Make sure you’ve included all the plants you want to share with your customer. Simple Presentations display images for each plant. If you have a specific image you want your customer to see, you’ll need to navigate to the specific ePlant and edit the order of images so your favorite comes first in the list.
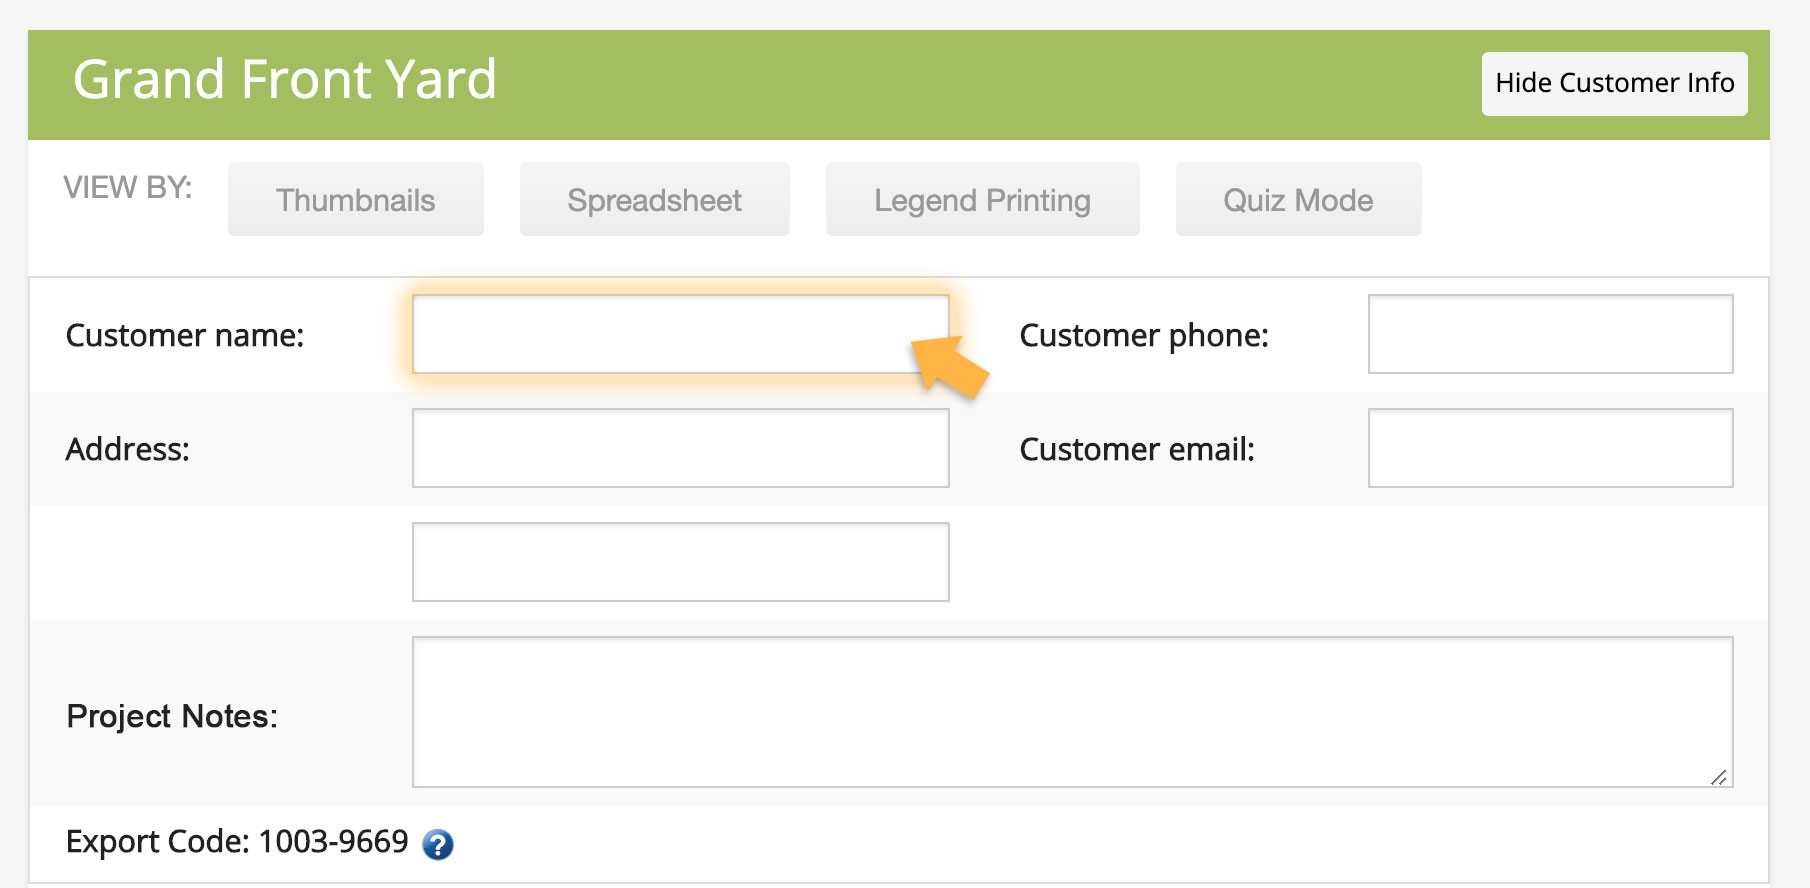
Update the Customer Name – Your customer’s name will be displayed on every page of your presentation. If you do not fill in the customer’s name (or whatever title you want your customer to see) it will display the project name by default.
To update the customer name, click “Show Customer Info” located in the top right hand corner of the green title bar, next to the project name. This will expand to reveal all customer information.

Add your customer’s name or whatever title you would like them to see in this space.
Check/Upload Your Logo – Your logo will be displayed on the first page (overview page) of your presentation, so make sure you have a high resolution graphic added to your account.
To update or add your logo, you will need to navigate away from the Project and go to your account page.

Click on your name (located on the drop down under your name in the main menu) and upload your logo. Make sure your logo does not exceed 1000px X 1000px.
Please Note: If you are replacing an existing logo image, you may not see the new image on the account page. However, the image has successfully been replaced throughout your PlantMaster account.
![]() Contact Information – While you are in the account page, make sure your contact information is accurate as it will also be included in your presentation. Don’t forget to hit “Save” when you are done.
Contact Information – While you are in the account page, make sure your contact information is accurate as it will also be included in your presentation. Don’t forget to hit “Save” when you are done.
Great! Now you are ready to create and send your presentation!
Creating and Sending Interactive Presentations:
Navigate back to the Projects page, and with your preferred project selected, choose “Manage Presentations” from the left vertical menu.

You will be prompted to this page:
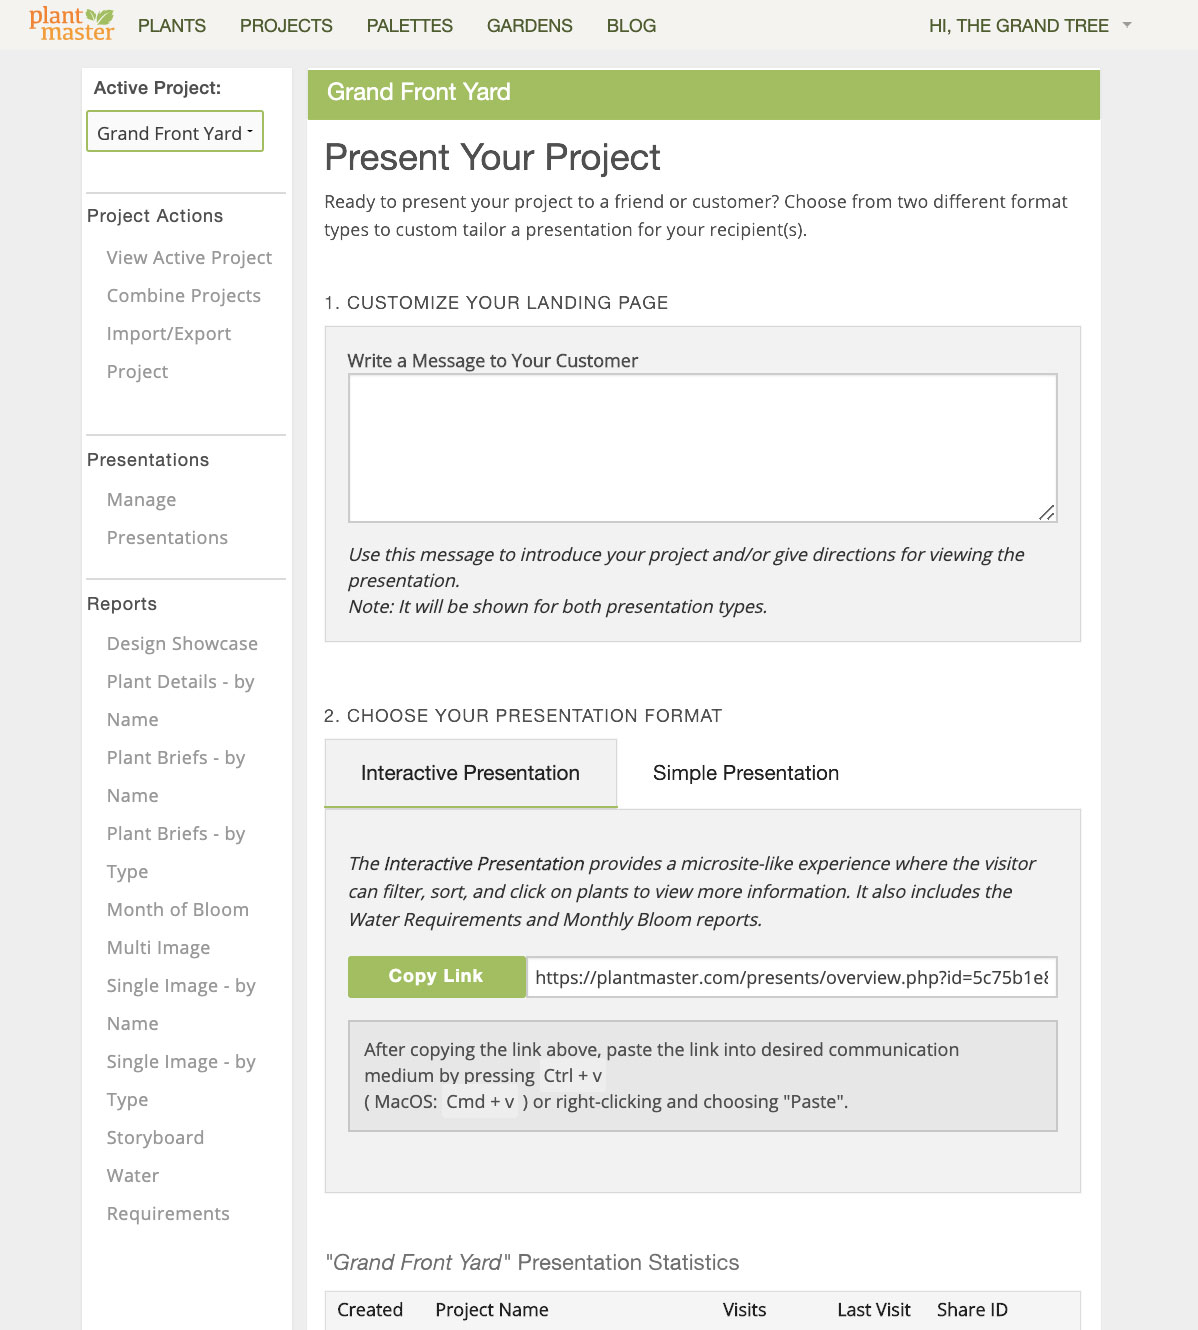
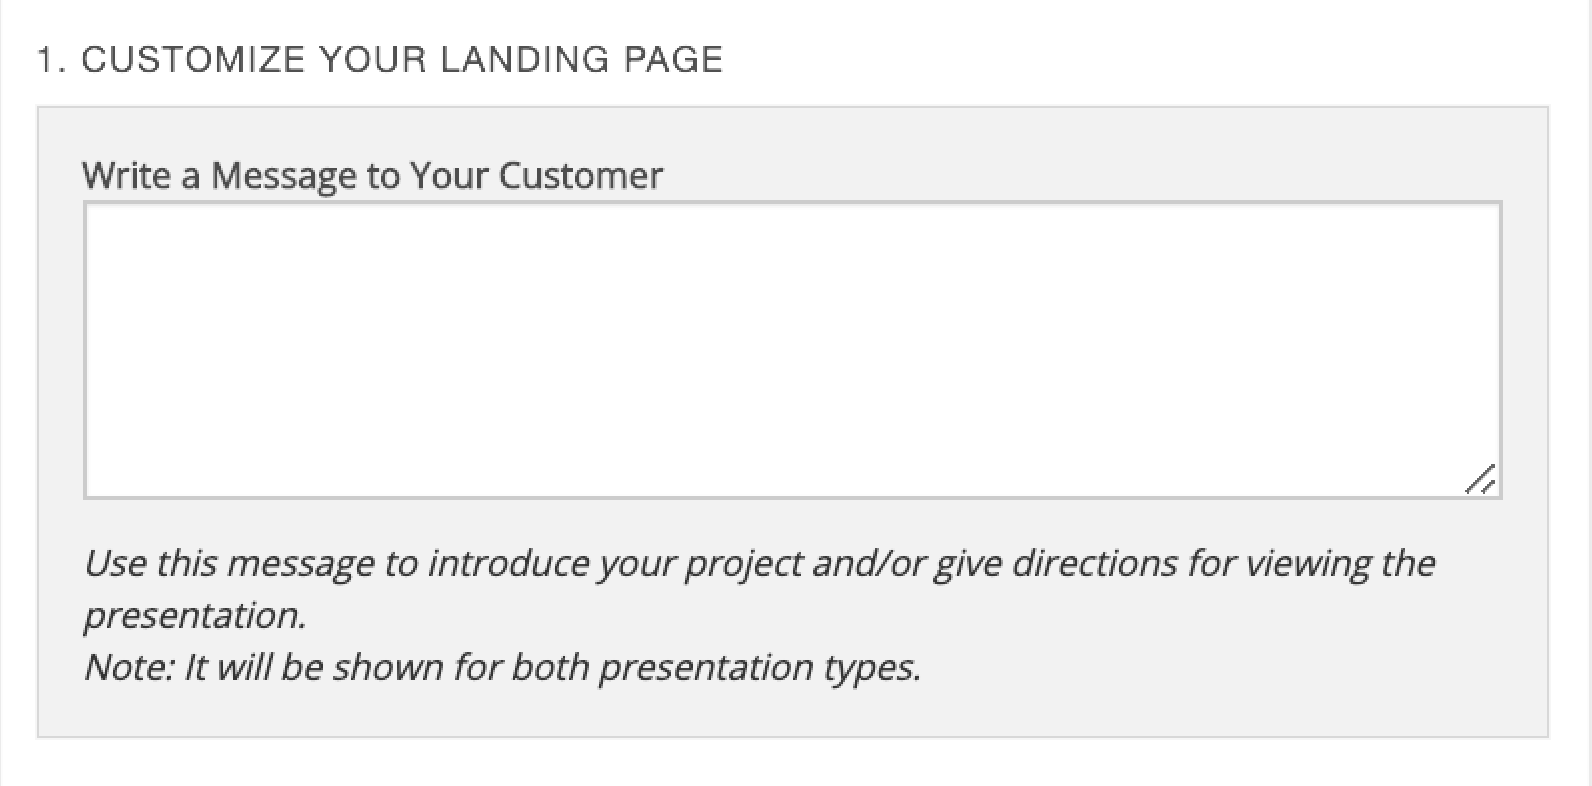
Write a Message to Your Customer
The Simple Presentation automatically includes an overview page with your logo and contact information on the left side. The right side will display your customer’s name plus any notes you’ve written for them about this project.
This is the space where you can write a note to your customer. You can introduce the project, highlight specific plants you want them to review, or share any changes you’ve made, etc. You can update this message any time and it will automatically update in the presentation (your customer will just need to refresh the page to see these changes – no need to resend the link). So use this space however you see fit and feel free to update often.
Type in your message.
Select Simple Presentation
With your message completed, move down the page to the “Select Your Presentation Format” section and make sure to click on the second tab titled “Simple Presentation”.
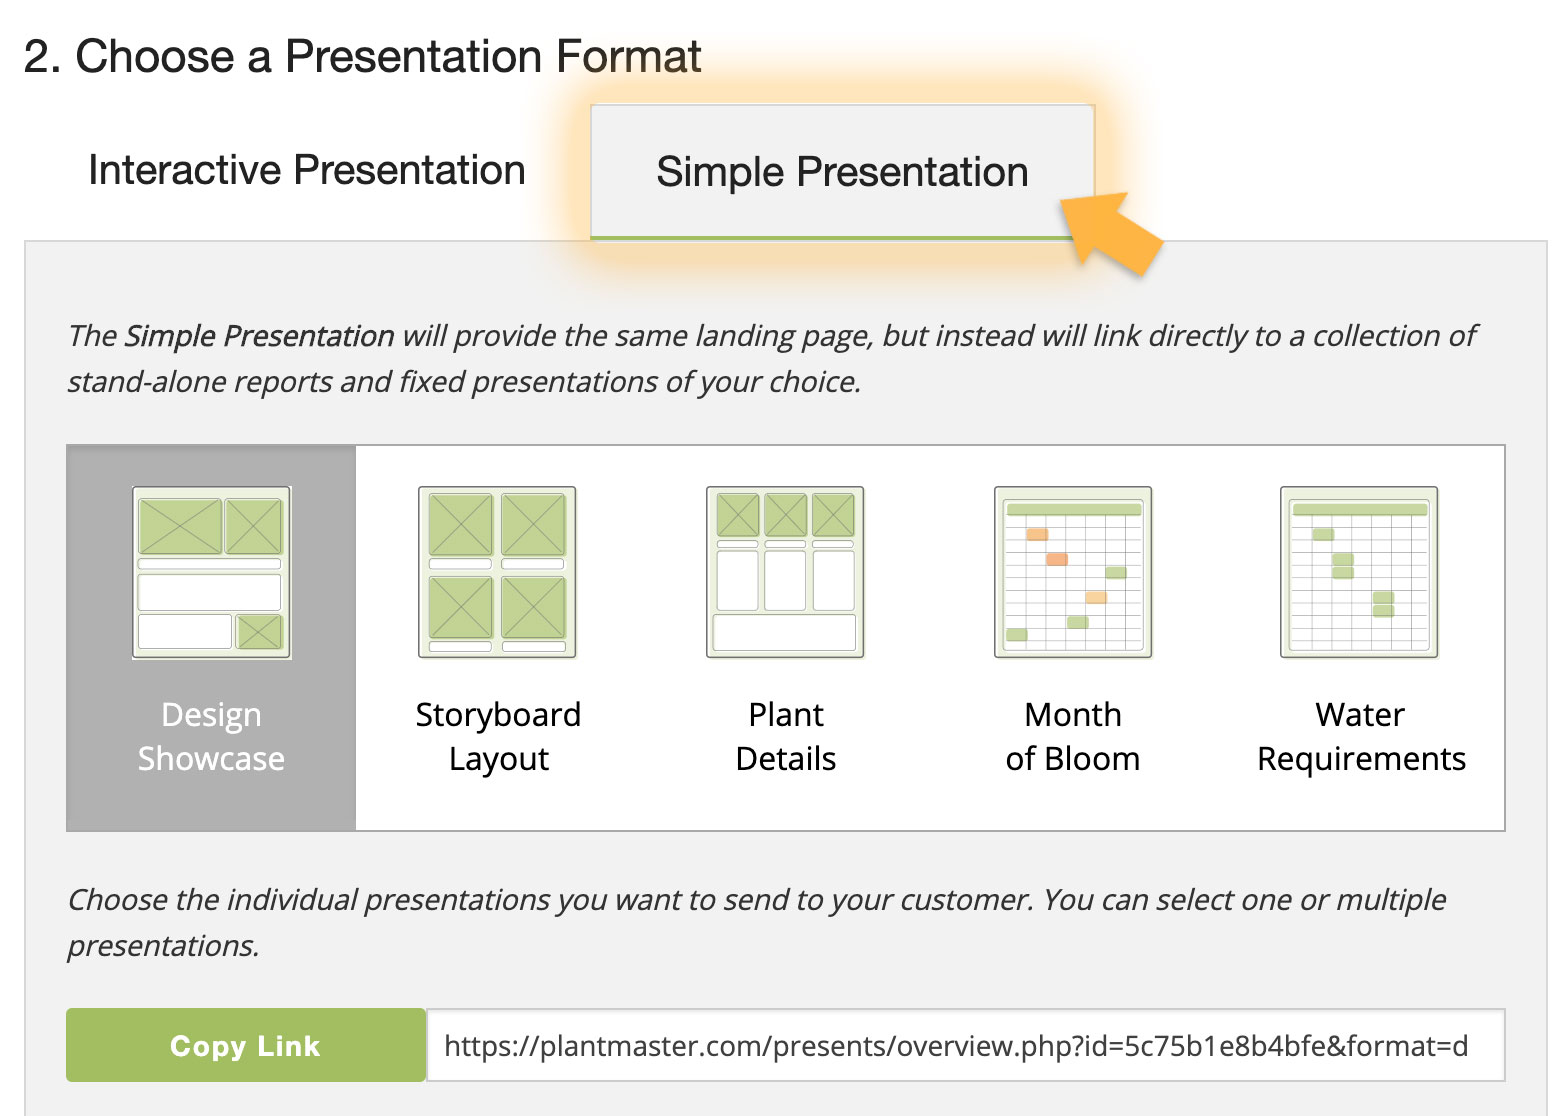
You’ll notice a brief description with a group of icons and presentation elements indicated below. Select the items you want to include in your presentation by clicking on the icons. Selected items are gray. To deselect, just click on the icon again until it is white.

Once you have your elements selected, now it’s time to create a link to send to your customer.
Notice the “Copy Link” button in green. This is the most important step – Click this button to create a link to your Simple Presentation!
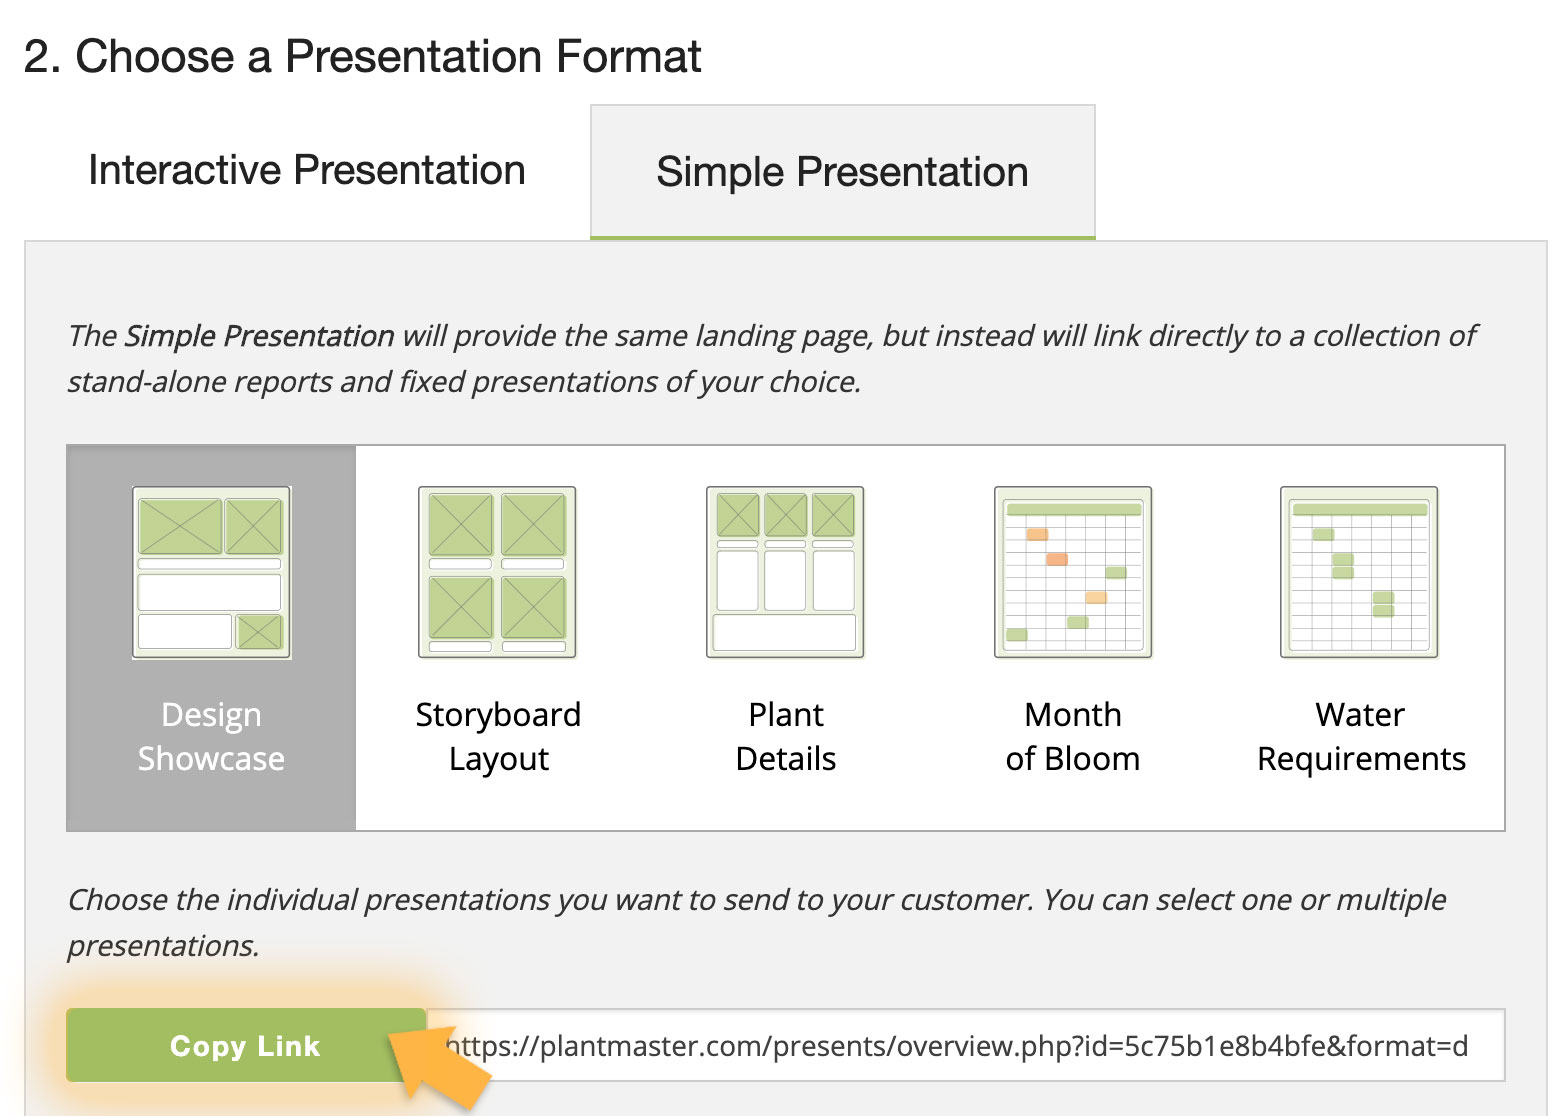
You’ll see a success message once you’ve officially saved the link. You’ve done it! Your presentation is complete and ready to send!
Send Your Simple Presentation
Now that you have a copy of the link saved, what do you do with it?
First, we strongly recommend that you take a look at the presentation before you send it to your customer. To do so, open a new tab in your web browser and right click in the URL field and select “Paste” or type the keyboard shortcut Command + V on a Mac or Control + V on a PC to paste the custom web address. Then you can review your presentation and make any edits to your plants, logo, or contact information prior to sending the final presentation.
Once you are happy with how everything looks, you’re ready to send! To do so, open your email and start a new message to your customer. Include a brief paragraph or two about what you are sending them and how they can use the presentation. Better yet, use the email to schedule a time to go through the presentation together on the phone or in person! Then make sure to share the link to the Simple Presentation. Right click and select “Paste” or type the keyboard shortcut Command + V on a Mac or Control + V on a PC to paste the custom web address into your email.
Hit “send” and you’re done! Your Simple Presentation is off!
Getting the Most Out of Your Presentations | FAQ
When should I use the Interactive Presentation versus the Simple Presentation?
The quick answer is that if you want to share more plant information and a great selection of images, send the Interactive Presentation. If you want to share more limited information or a single report, then you may prefer to send the Simple Presentation. Take a full tour of the Interactive Presentation or the Simple Presentation here to see which one best fits your current project.
On the overview page, why is the project name listed instead of my customer’s name?
PlantMaster will automatically display your customer’s name on the overview page and will read “This presentation is created for [Customer Name]”. However, if you have not added the customer name to your project, it will default to displaying the Project Name instead. To revise, simply go into the project, click “Show Customer Info”, and add your customer’s name in the customer name field.