

24 Jan Explore the Project section
This article covers the basic organization of the project section. With so many tools, its important to take a minute to understand where everything is located. By the end of this article, you’ll be ready to start a project and feel confident navigating to all the workspaces.
Start a new project or manage your projects:
Before you learn all the elements of a project, you’ll need to create one first. To start a new project, click on “My Projects” under “Projects” in the main menu.

This will take you to the “My Projects” page. This is where you will go to start a new project. “My Projects” is the management page for all of your projects. You can start a new project, import a project from another PlantMaster user, copy and combine projects, rename your projects, and archive projects you aren’t using. Here is what it looks like:

Click on “+ New Project” to start a new project. Click on any project name or the “Open” button to open an existing project.
For complete training on the My Projects page and how to manage your projects, please read the article titled “Manage your projects“.
Work on your current project:
In the main menu, select “Current Project” under the “Projects” option.
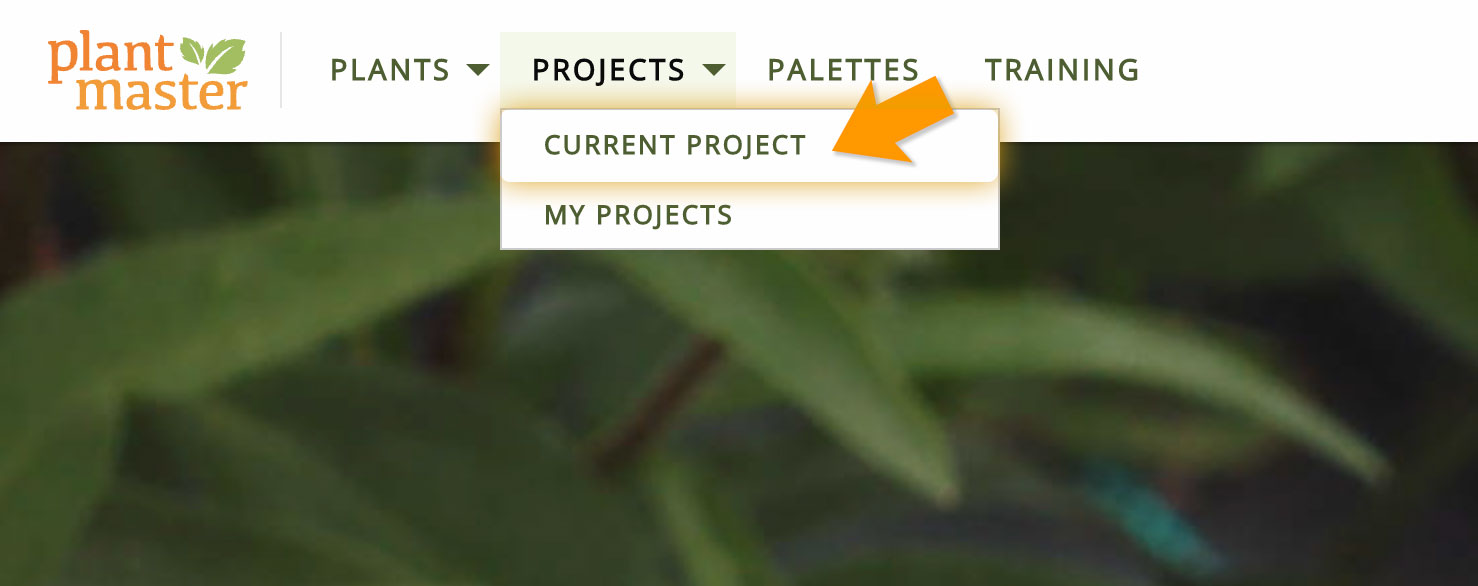
Once you are in the project, it’g going to look a lot different! First, lets talk about how you can navigate around the project…
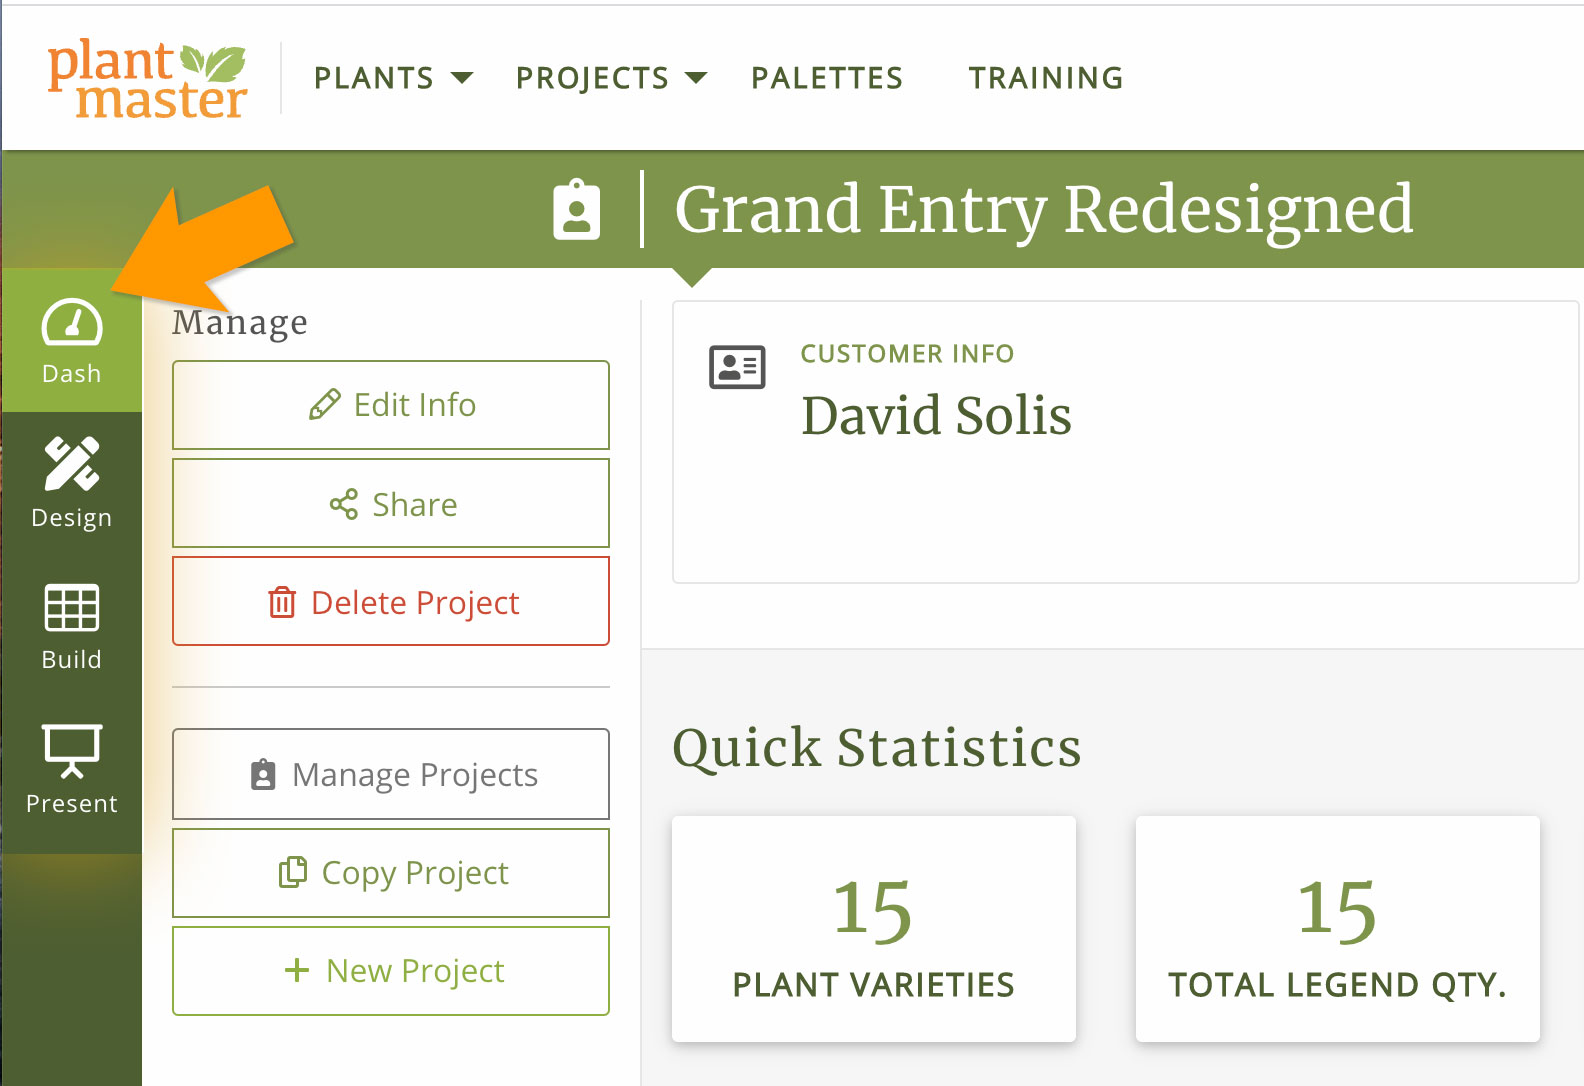
Project Navigation Bar –
On the far left of your screen, you will see a dark green bar that runs down the entire page. This is the project navigation bar. It is the best way to jump around your project. Projects are split into 4 sections – Dashboard, Design, Build, Present. Click on each of these items to open the corresponding section of the project.
Tabs/Pages within each section –
Most sections have additional pages within them, so there is also a series of tabs at the top of each section (just like the ePlant). Make sure to explore all these elements.
Explore the sections of the project:
Design –
Everything related to plants and designing with them. (Plants and Areas)
The Design section is the new home for all the plants you’ve added to your project. In this section you can review the plants (view as list, details, or images). You can remove them from the project. You can create Areas of your project and assign plants to those areas. The goal of this new section is to give you all the tools you need so you can have PlantMaster open as you are drafting or designing. Here is what it looks like:
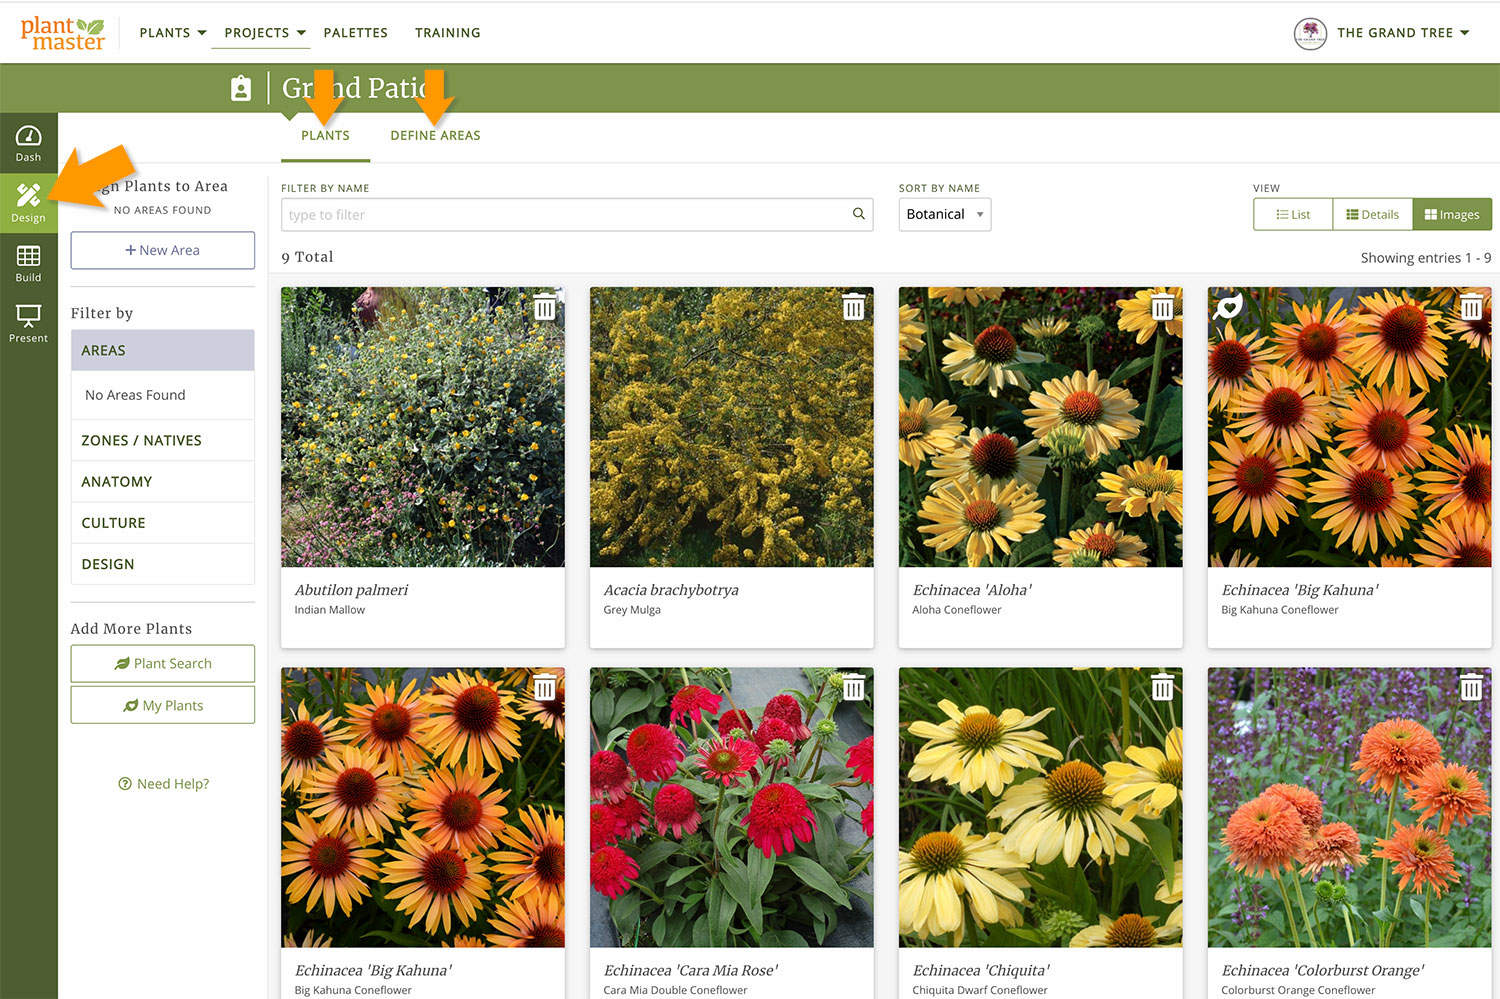
Here’s what you will find in this section:
- New location to view the plants in your project
- You can use filters inside the project
- Create Areas (define rooms/spaces in your project)
- Assign plants to each Area (which will display in Interactive Presentation)
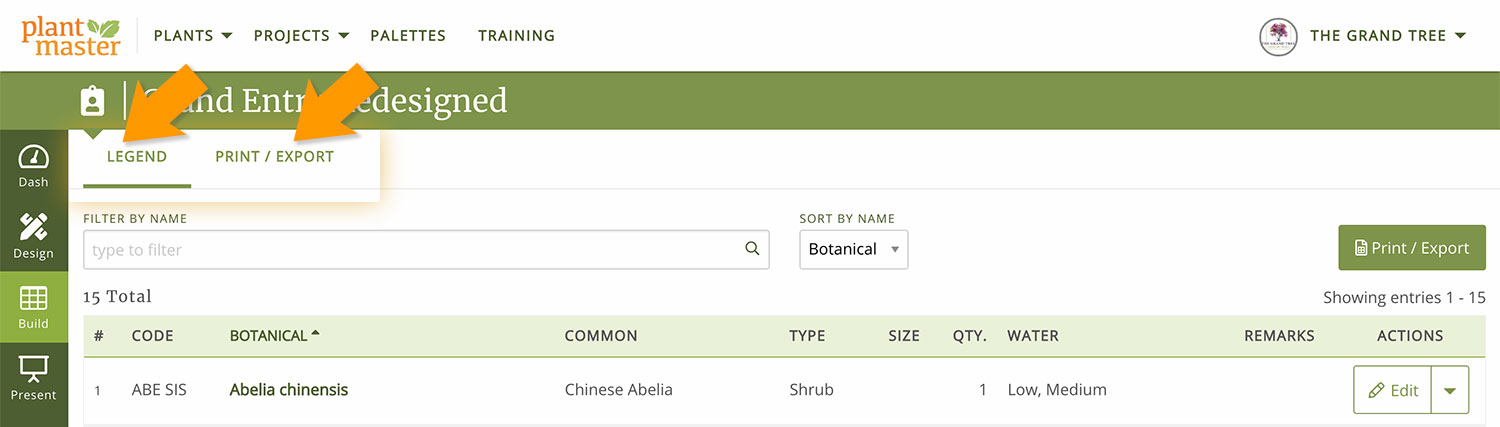
Build –
Everything related to legends and using them. (Legends and Print/Export)
The Build section is the new location for building your plant legends, plus all the tools to print/share them. And it will be the future home to more spreadsheets and worksheets. Here is what it looks like:

Here’s what you will find in this section:
- New location to build and manage your Legends
- Legend spreadsheet with ability to edit plant codes
- New legend print/export options
Present –
Anything you send to your customers (Presentations and Reports)
All tools to present your project to your customers are now grouped together in the Present section. You can send the two presentation types and view all reports. Here is what it looks like:
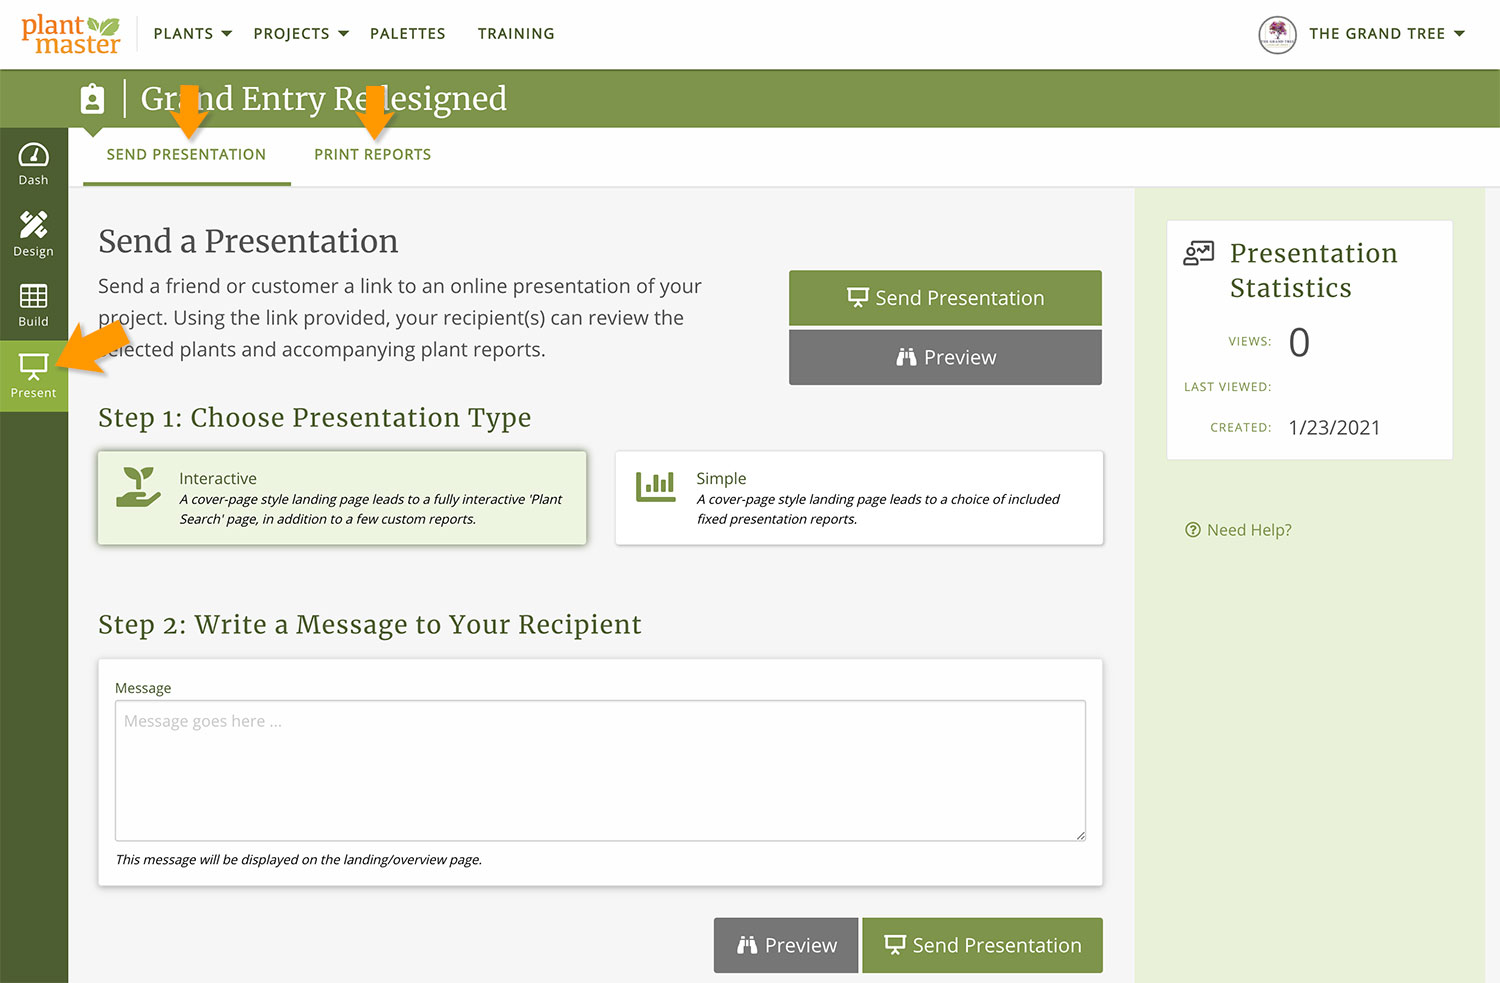
Here’s what you will find in this section:
- New home to prepare and send presentations
- New home for Reports
- New home for Customer Response Form and Nursery Order Form
Dashboard
Home base for your project (Project Information and Quick Links)
The Dashboard is intended to be a central portal to clearly navigate to the activity or function you wish to perform. From the Dashboard you can quickly jump to Printing Reports, Sending off a presentation link, Build a Plant Legend etc.. It includes your customer’s information, your notes, and the project statistics. If you ever get lost or can’t find a tool – go to your project dashboard. At the very bottom of this page, we’ve added a “Get Started” section. Click on any of these options to quickly jump around your project. Here is what it looks like:
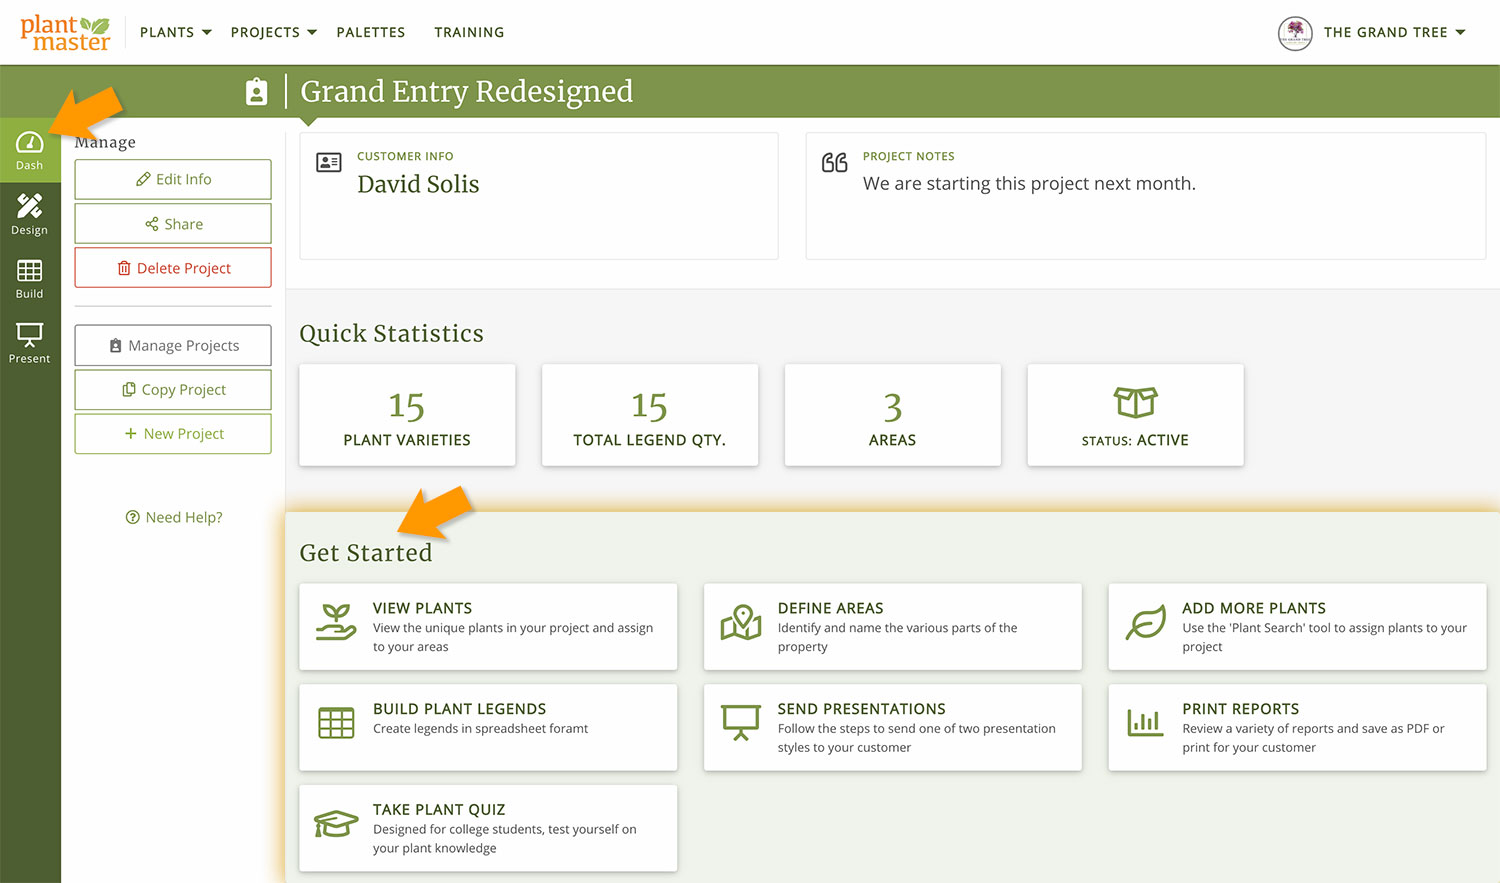
Here’s what you will find in this section:
- Project information
- Statistics about your project
- Quick start links to find things if you are lost – so use the dashboard to help you explore the new organization!
To change your current project:
In the main menu, select “My Projects” under “Projects”.
This will pull up the My Projects page with the complete list of your projects. You can see which project is current by looking for the clipboard icon next to the project name. To make a different project your current project, simply click on the project name or click on “Open”. This will both open the project and make it your current project. That’s it!

Understanding the workflow.
The Project menu system is organized around these steps:
- Start a Project
- Define the areas of the project
- Find candidate plants for the Project
- Assign plants to their respective areas
- Use the filters and other sorting tools to assist as you are drawing or drafting open to guide you in plant placement
- Assemble data for the plant legend
- Build the plant legend
- Create a presentation and send it to your client.