27 Sep How to use Planting Design tools
This article is intended to help you navigate the PlantMaster Planting Design tools located inside your project in the Design section.
What is the Planting Design section?
The Planting Design section is a spreadsheet-style layout that includes the most important plant information for every plant in your project.
Using this section you can quickly view and compare crucial plant information like height, width, flower color, water, etc. to help determine where to place your plants. You can use this section to easily determine color schemes or groupings. You can work Area by Area – which makes it easy to work with a smaller group of plants. Use this section as you work on your final planting plan.
The page includes Plant Type, Height, Width, Sun, Season, Leaf Color, Flower Season, Flower Color, Accenting Features and Habit for each plant in your project. Let’s take a look!
A few things to establish before you use this section…
The planting design tools work best when you’ve already established the different Areas (rooms, spaces) of the project and assigned plants to those Areas. That way you can work Area by Area instead of viewing ALL the plants for the entire project – which can be overwhelming. If you need any help setting up Areas for your project, please read the training article titled “Using Areas”.
Here’s a quick orientation of this section.
First, log in to your PlantMaster account and open the project you want to work on.
Inside your project, click on the “Design” section button in the project navigation bar located on the far left. Then, near to the top of your screen, click on the tab called “Planting Design” to open this section.
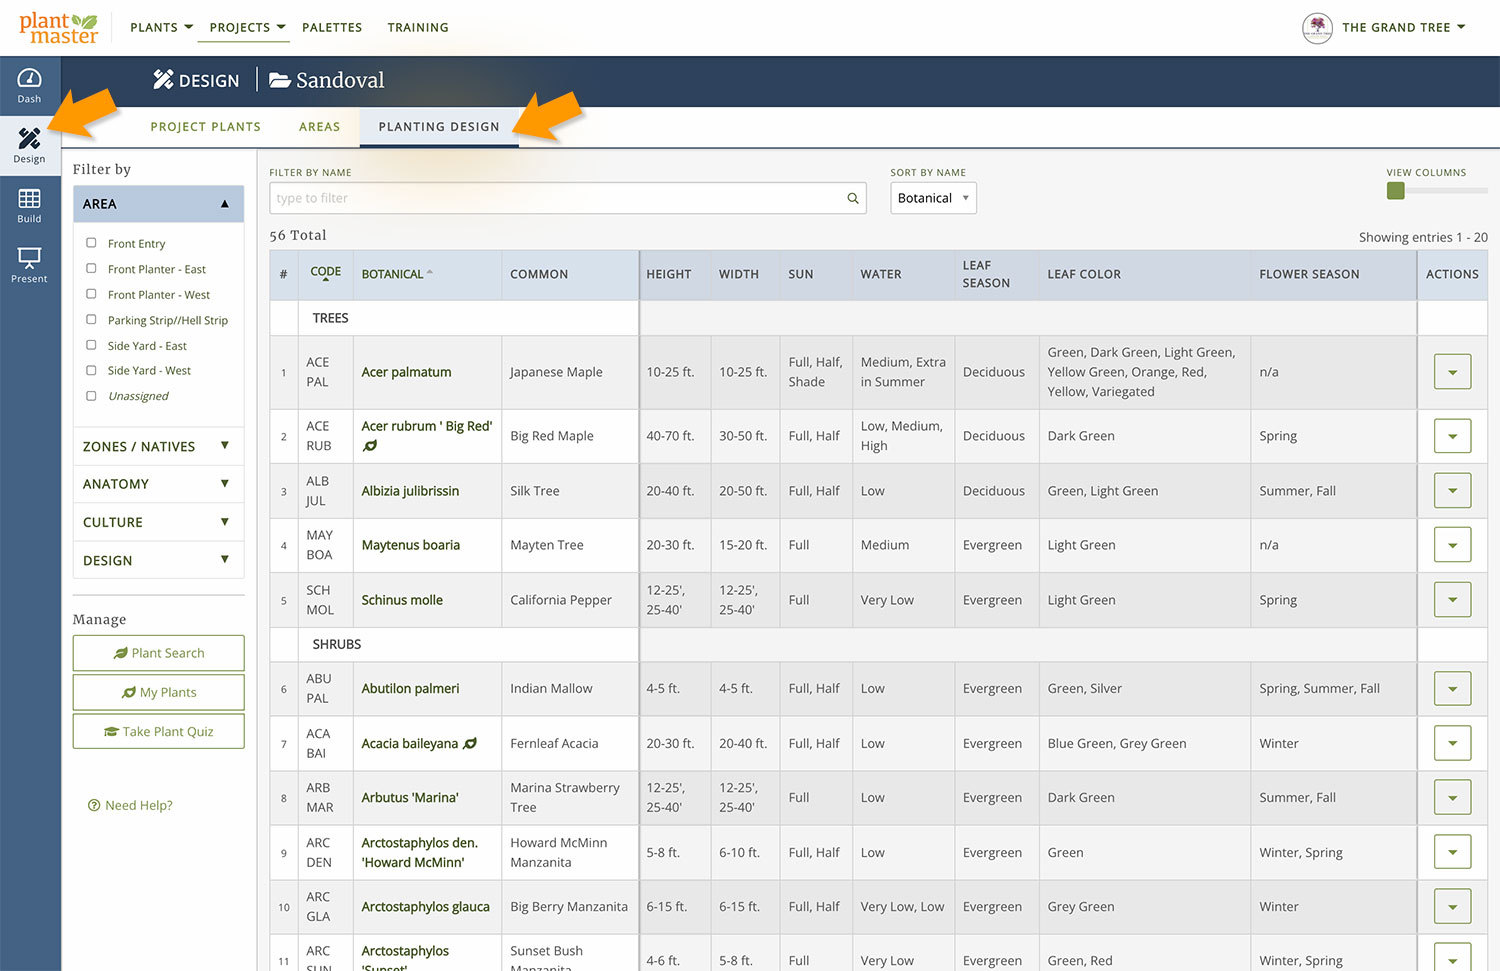
On the left side, you’ll see a list of your Areas for the project. You can use these Areas as filters to look at JUST the plants in each Area. Plus you’ll have access to all the normal plant filters that you utilize in your plant searches.
The rest of the page is dedicated to displaying the most vital plant information. This information includes Height, Width, Sun, Water, Leaf Season, Leaf Color, Flower Season, Flower Color, Accents, and Habit.
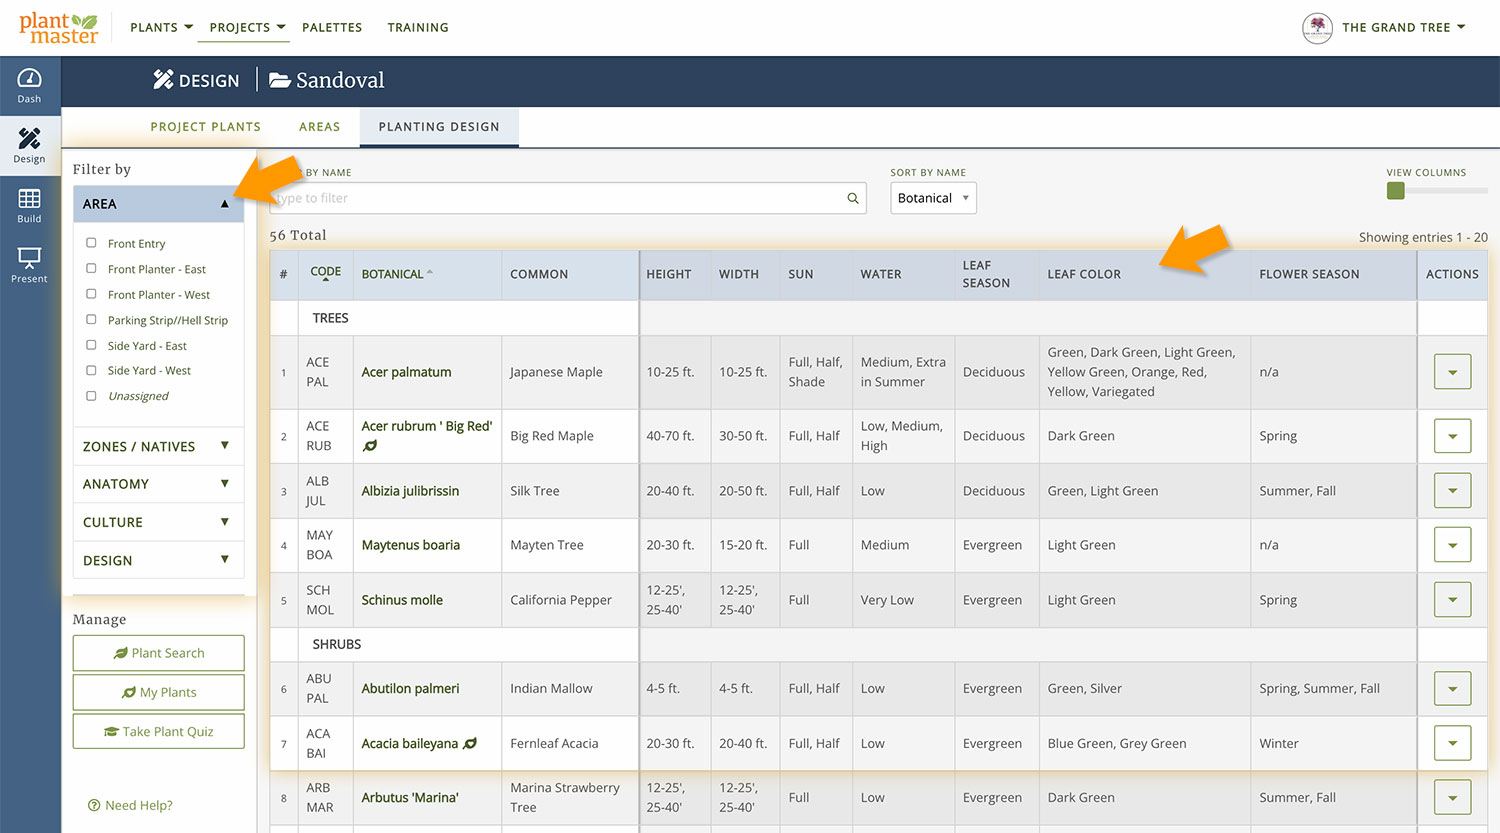
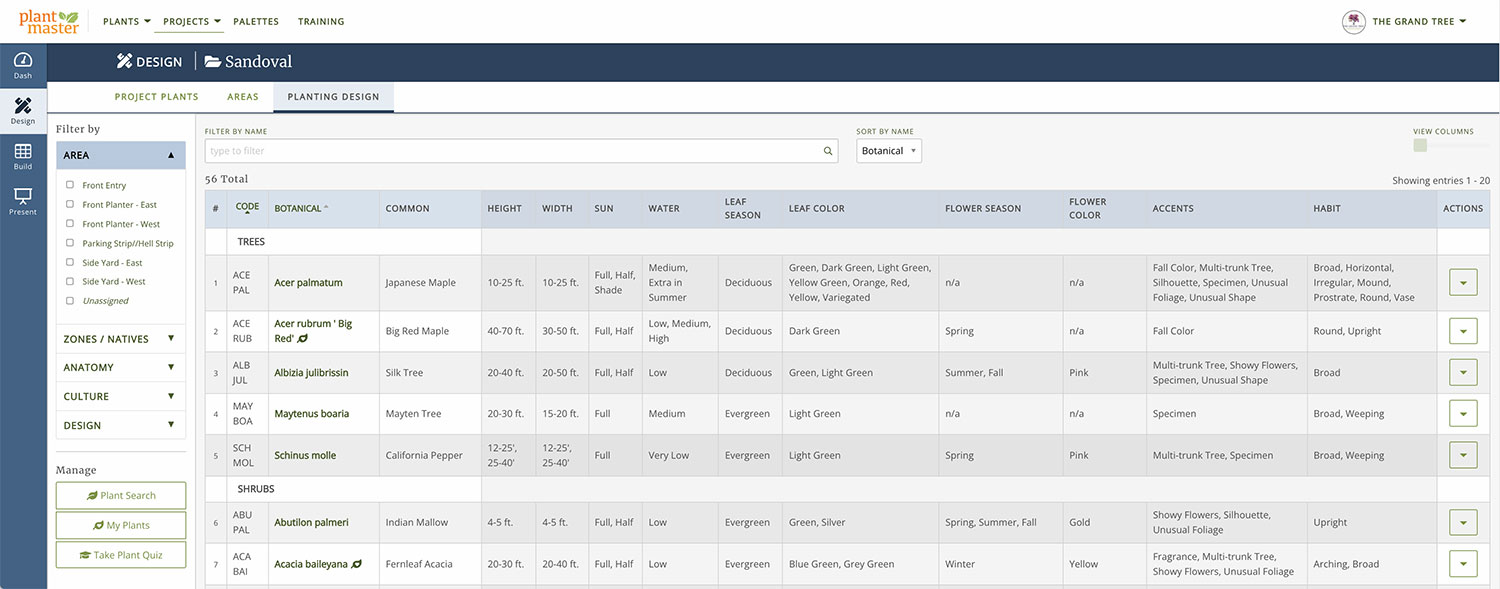
If you are using a computer with a large monitor, make sure to stretch the PlantMaster window as wide as you can to view the entire spreadsheet. It will look like this:
If you are working on a tablet or have a smaller screen, it may be too small to see all the plant information. There’s an easy way to see additional information – If you look at the top right of the page, you’ll see a slider called “View Columns”. Drag this slider to the right to shift through the different columns and view the information you want to see. Here is what it will look like:

How to best use this section.
The Planting Design tools work best if you have have them open alongside your drafting program or next to your drawing. That way you can compare and contrast the plants as you create your final planting plan.
As we’ve mentioned before the Planting Design section works best if you set up Areas for the project, first. We recommend that you work one Area at a time. By working this way you can quickly set up a color scheme, group shady plants with other shady plants, or determine which plants should be located in the back of the space.
When you’re done with one Area, click on the next Area and the list of plants you’ve selected for that Area will appear – ready to repeat the design process!
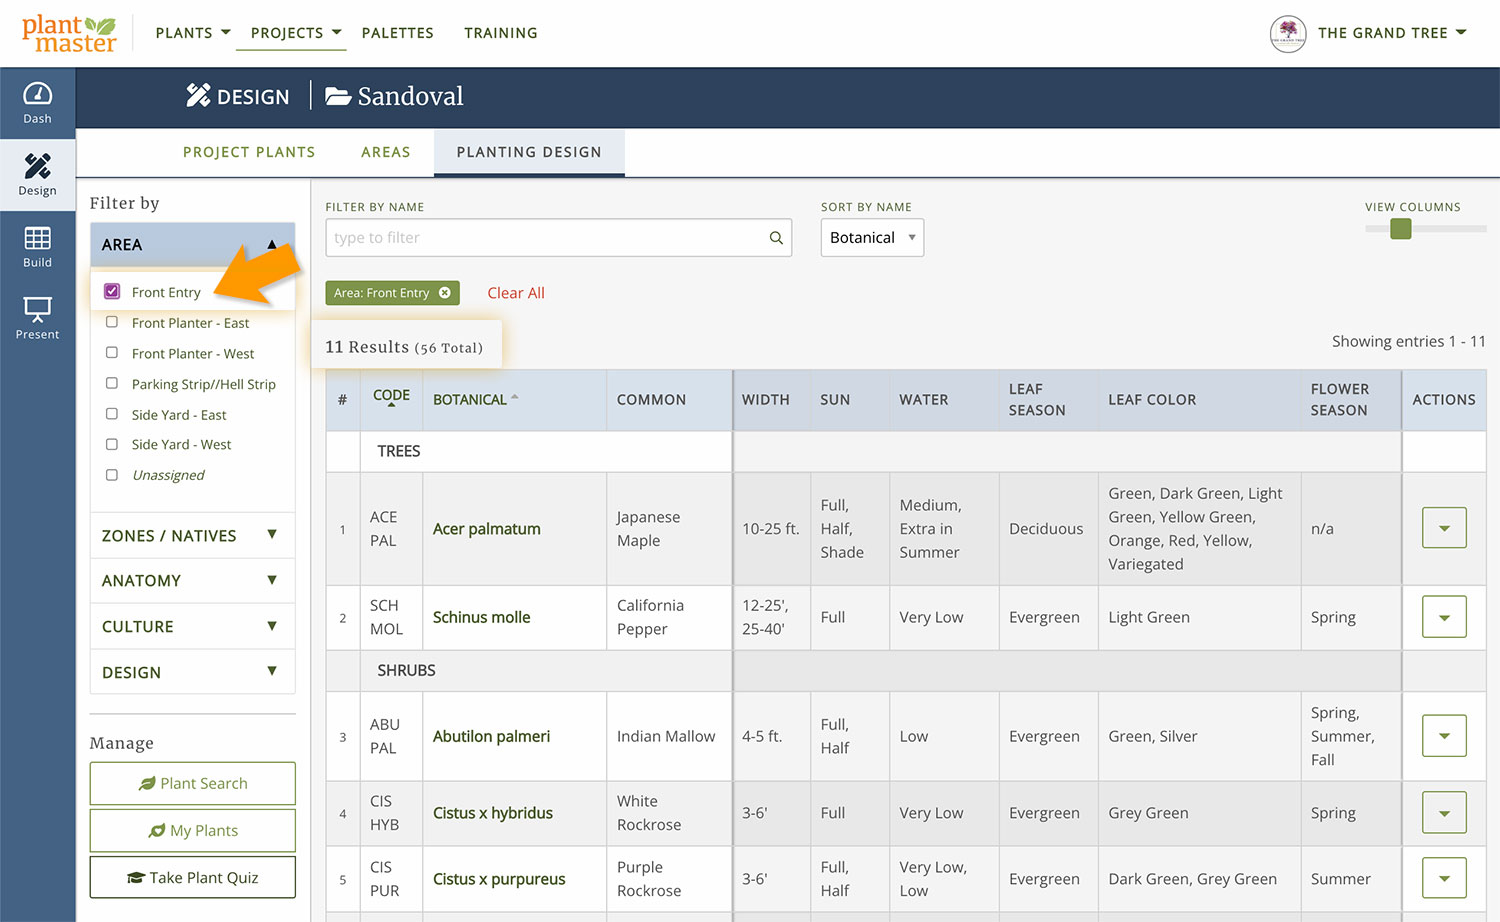
In our example, you’ll notice we have 56 plants for the entire project. However, if we work Area by Area, the number of plants is far smaller. For example, there are just 11 plants in the “Front Entry” – so it’s much easier to work with just 11 plants!
To do so, select the Area you want to work on from the Filters on the left sidebar. For example, if we select “Front Entry” we’ll see the 11 plants.
That’s it! Now you can work Area by Area on your final planting plan and have the most crucial information for each plant right in front of you!
A few extra tools.
As you work, you may want to make some changes, add plants to another Area, remove a plant from an Area, or remove a plant from the project altogether. The fastest way to make these changes is to go back to the Project Plants section – but you can make those updates right from this page!
Add a plant to another Area.
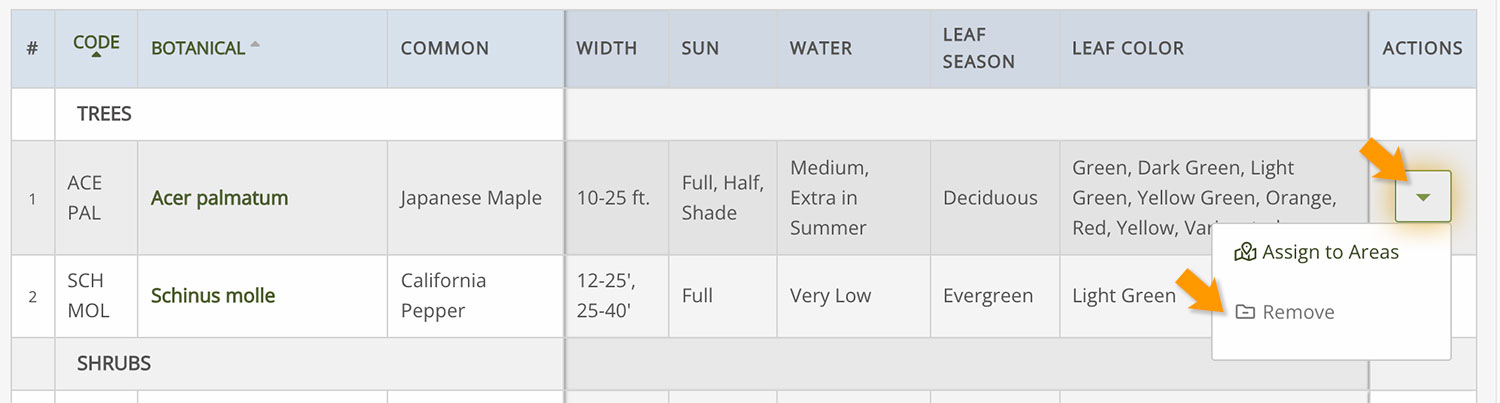
To add a plant to another Area or multiple Areas, click on the “Actions” button located in the far right column of the plant and click on “Assign to Areas”.
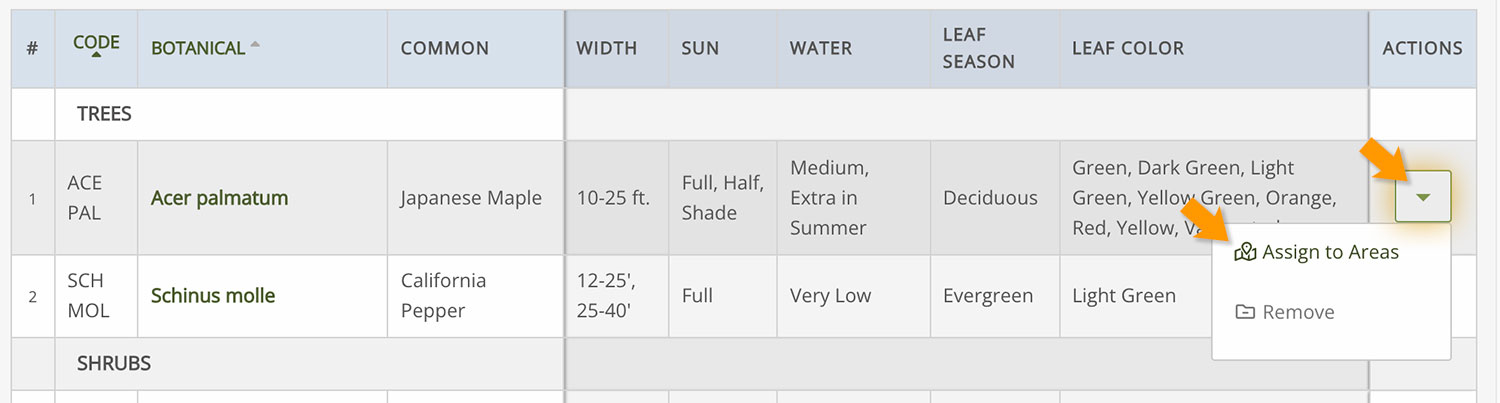
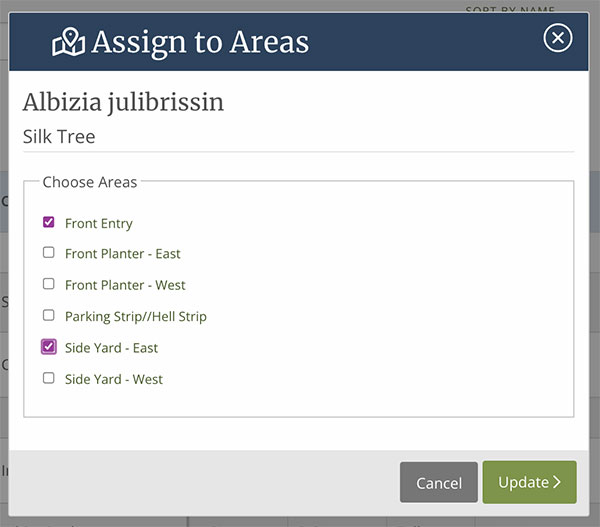
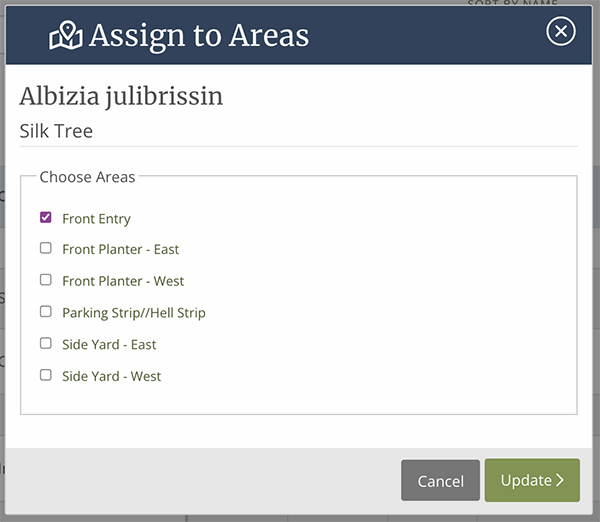
This will bring up a modal window with all the Areas for your current project. Click on any Area you want to add this plant to and click “Update”.
Remove a plant from the current Area.
If you change your mind about a plant in a particular Area, you can easily remove it from the Area by clicking on the same “Actions” button. Click on “Assign to Areas” like you did to add a plant to an Area. In our example, we are working in the Front Entry, so when you open the modal window it will look like this:
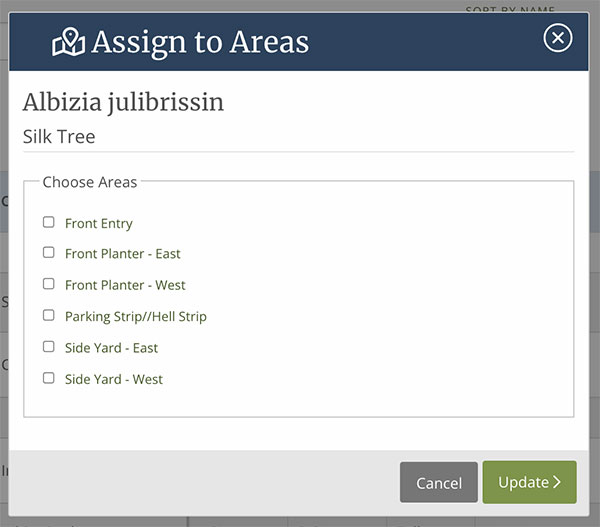
Instead of clicking on a second Area, deselect the Area by clicking on the selected Area again. This will remove the plant from the existing Area. Notice how the checkbox is unselected! Then click “Update” to save your changes. If the plant has been removed from the Area, your modal will look like this.
Remove a plant from the Project altogether.
If you want to remove a plant from the entire project, click on the “Actions” button again and select the option called “Remove”. You will permanently remove this plant from the entire project.