
05 Feb Using Areas
Using Areas
Areas are spaces, rooms, or sections of the entire project. So an entire front yard design may be broken down into its various spaces. In your project you can organize plants based on the Area you will use them. Below is are complete details on how to create Areas, add plants to those Areas, and how the Areas will be displayed in your presentations and reports.
Defining Areas
To define the Areas of your current project, open your project and click on “Design” in the project navigation bar. You will be taken to the page where you can view all the plants in your project. Please note, if you haven’t added plants yet, you will need to go to the plant search and add plants to this project. If you need any help adding plants, please read the article titled “Add or Remove a Plant from a Project. Near the top of the page you will see two tabs “Plants” and “Define Areas”. Click on the tab for “Define Areas” to go to this page or the button in the left sidebar called “+ New Area”. Both options will take you to the space where you can define the Areas of this project.
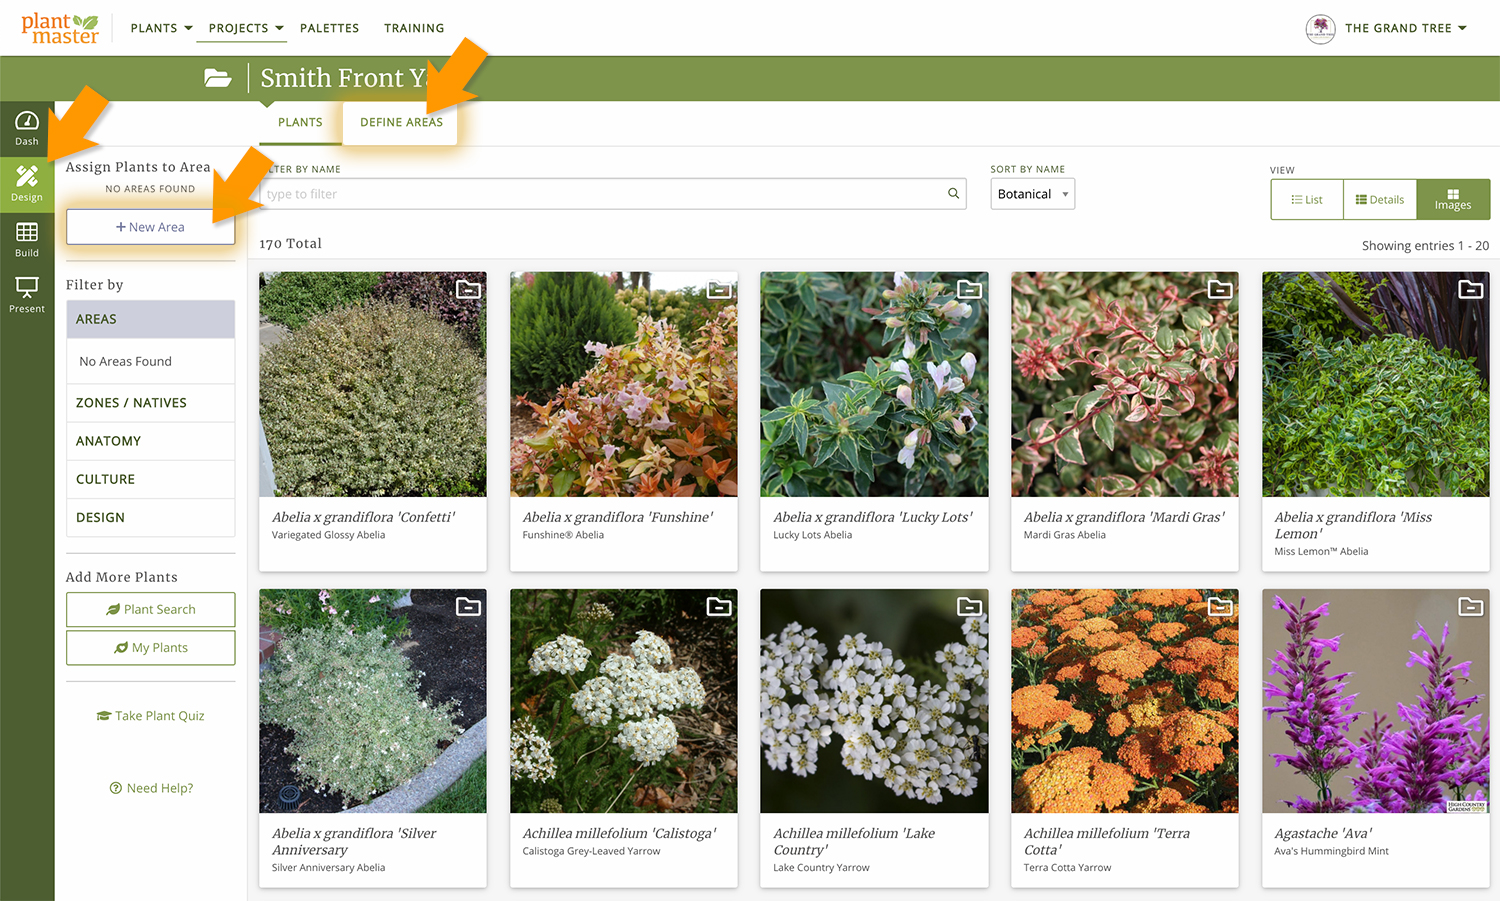
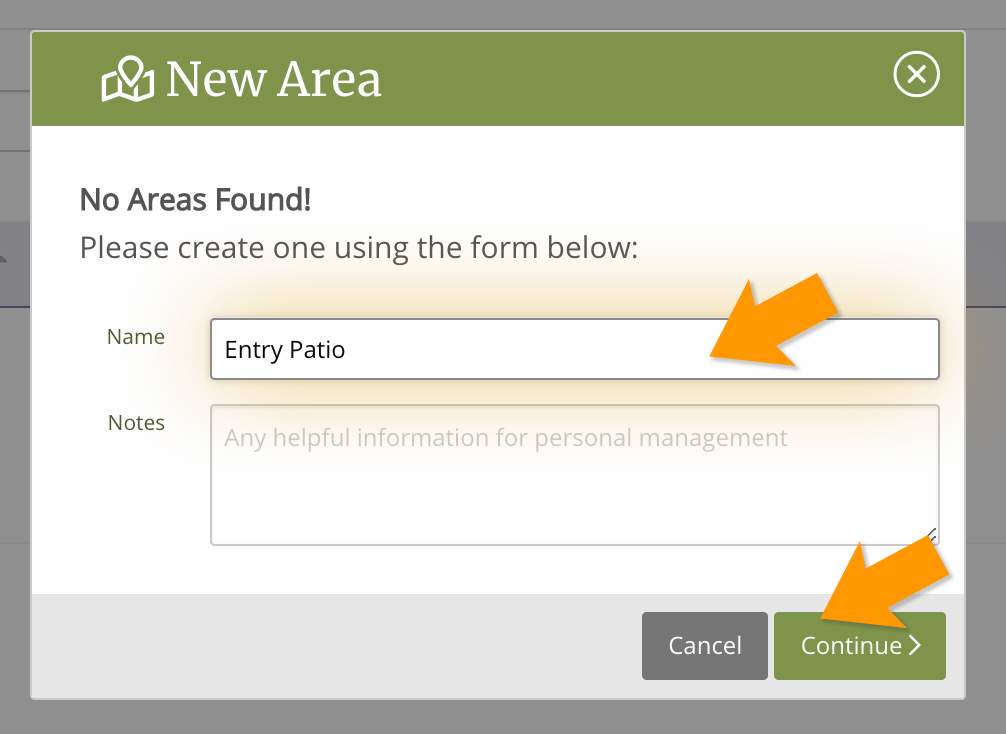
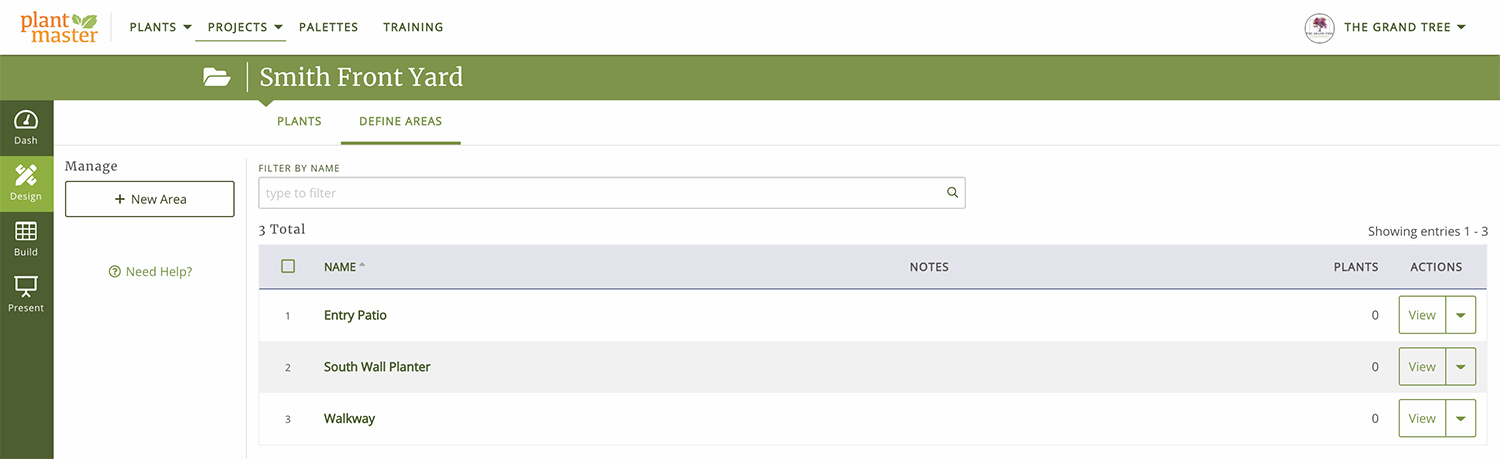
On the “Define Areas” page you will see the place where your list of Areas will live on the right and your tools are on the left. You’ll see a pop-up modal saying “No Areas found” and you can follow the prompts to start creating your Areas.
For this example, we’ll create an area called “Entry Patio”. Click “Continue” once you have filled out the form.
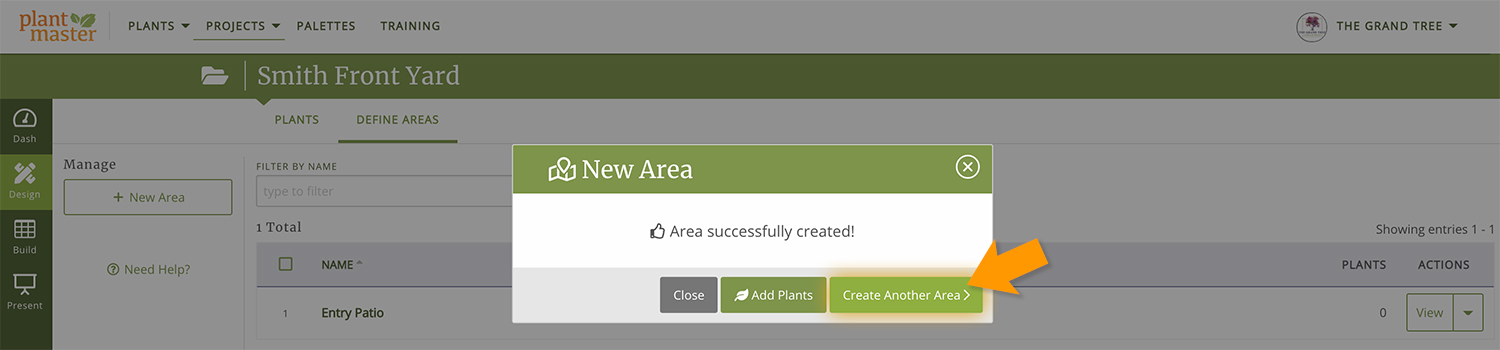
You have created your first area. Notice on the screen behind the modal – there is now an area called “Entry Patio”. From here you have several options. You can click “Close” to close the modal and edit your Areas. You can click “Add Plants” to go back to the plant search and add more plants to your project. Or you can click “Create Another Area”. We recommend that you define all the Areas of your project first, then work on assigning plants after.
For this example, click “Create Another Area” and complete the steps for as many Areas as you need.
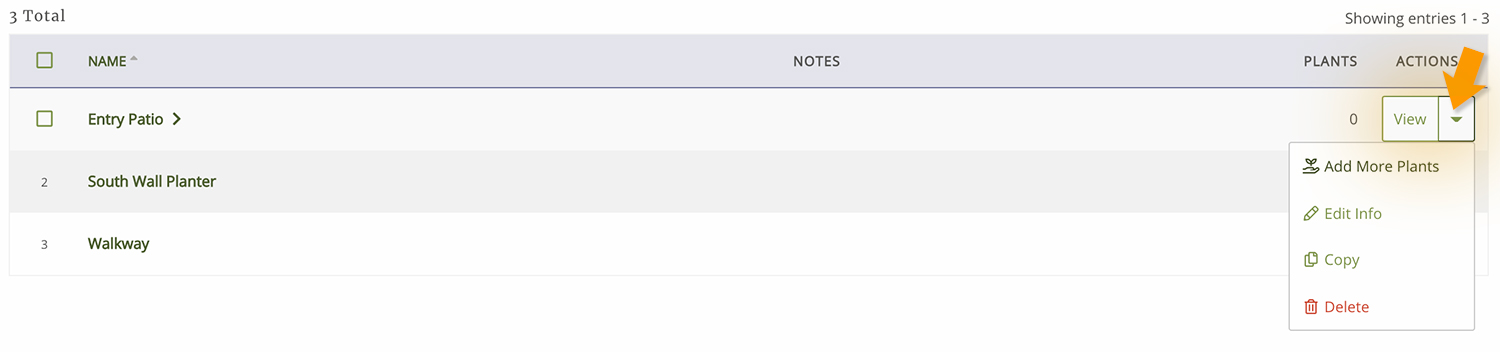
Here is what your page will look like once you have created multiple Areas. We’ve created two additional Areas for this project.
Once you have created your Areas, there is an action menu to the far right where you can do additional things like copy an area, edit the area name, and remove the area altogether.
Assigning plants to Areas
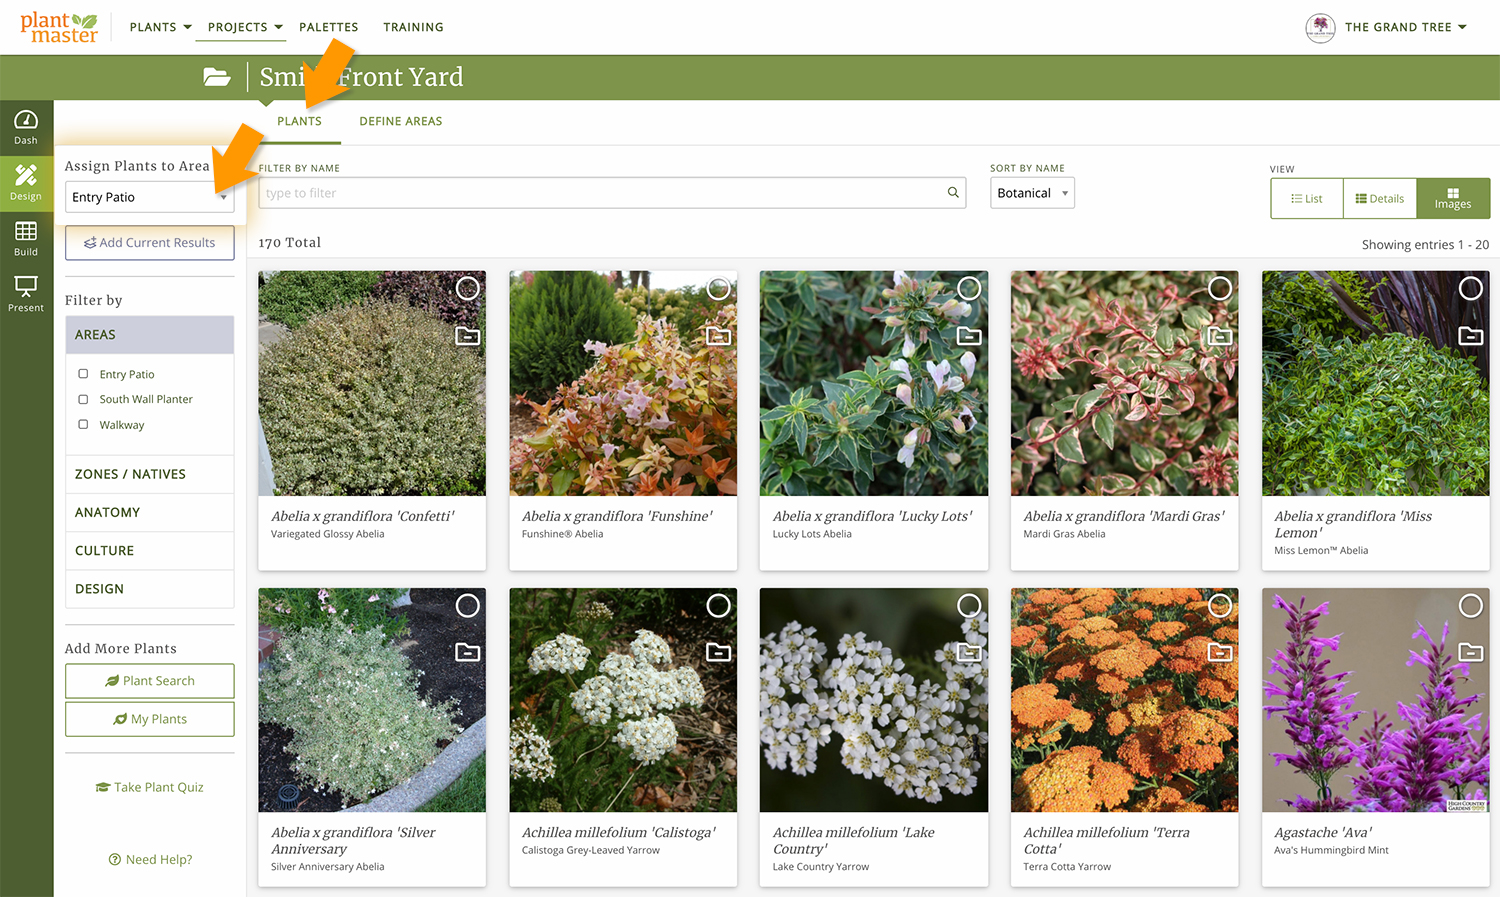
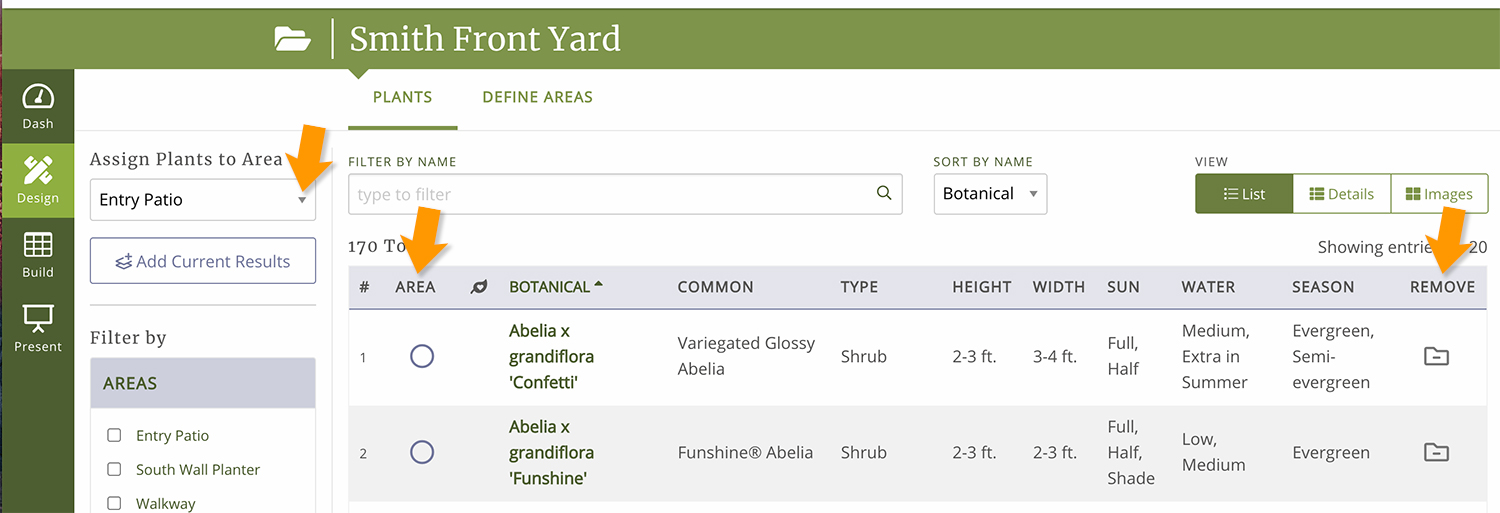
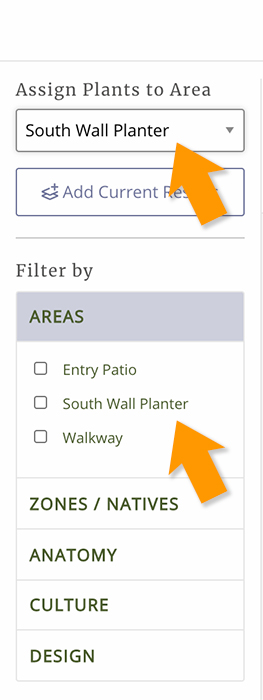
Once you have your Areas defined (and you can always jump back and forth), head back to the “Plants” tab. To assign plants to their Areas, the most important step is to pick an area to work on. On the left sidebar, just before the project navigation bar, you’ll see the heading “Assign Plants to Area”. This is where you can select the area you want to work on. Before you work on any area, double check this space to make sure you are working on the correct area.
So, for our example, we’ll select “Entry Patio” from the options.
Adding plants to Areas works just like adding plants to to a project or palette in the plant search.
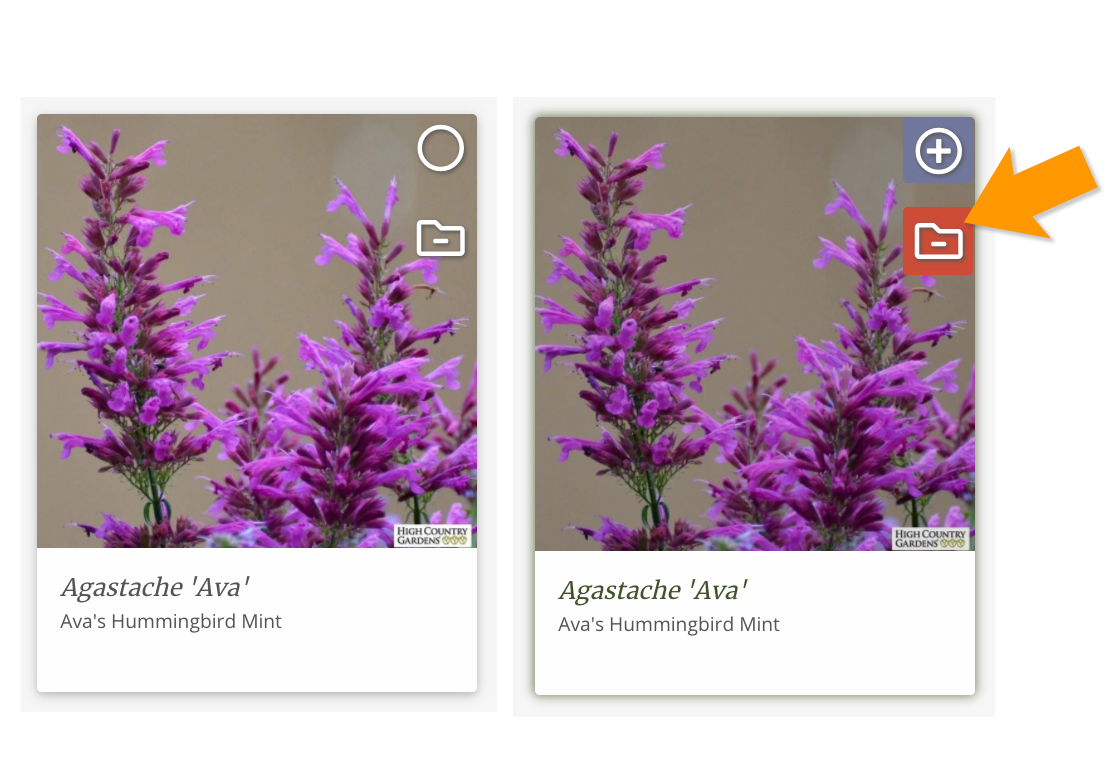
In the images view, notice there are two icons.
Anything with a purple color indicates Areas. In the top right corner of each images is the circle icon to add or remove a plant from an Area.
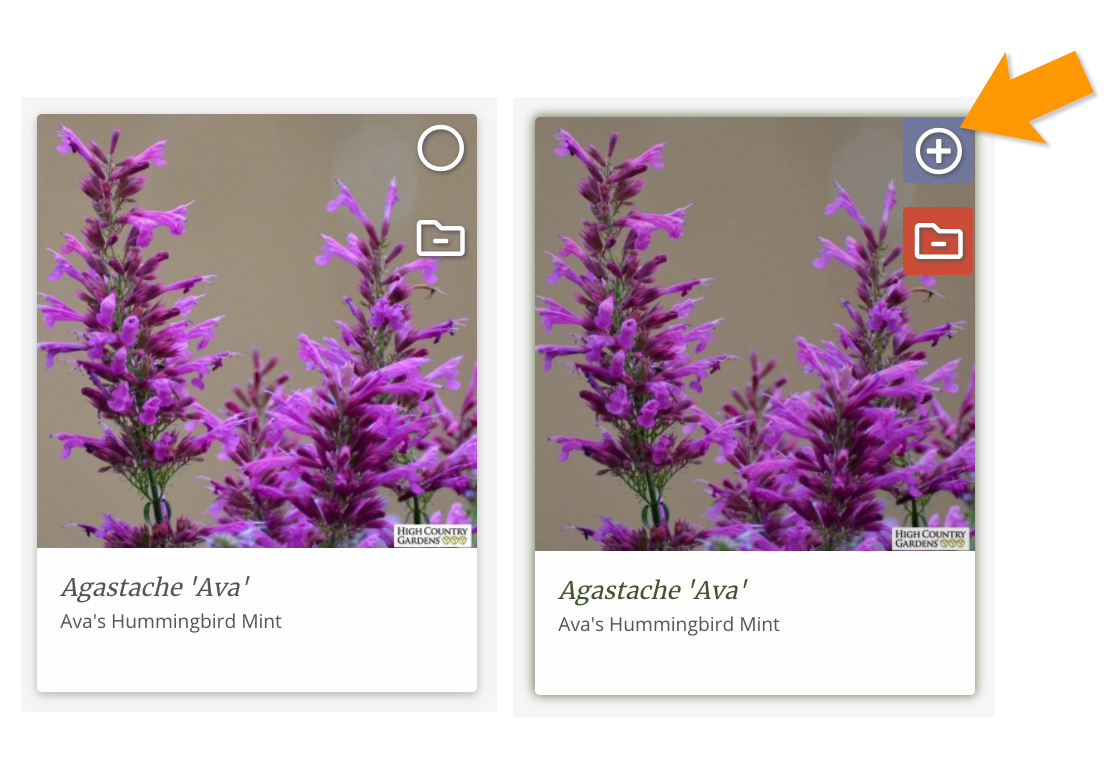
Just below is an icon with a folder and a minus symbol. Click this icon if you want to remove the plant from the entire project.
You can also add and remove plants to Areas or remove from the project in list view or details view using the same icons.
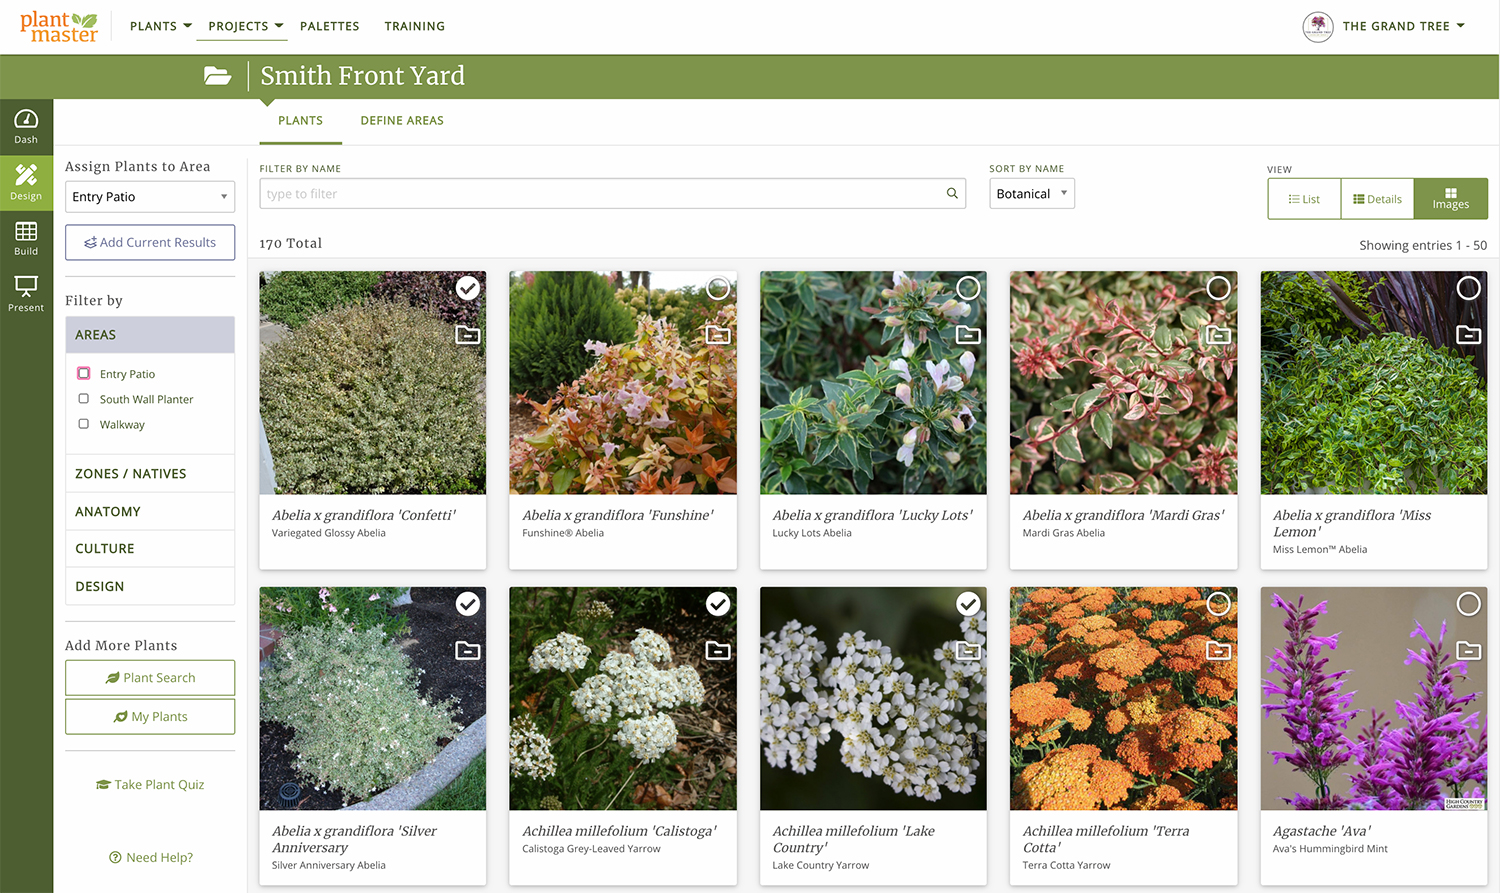
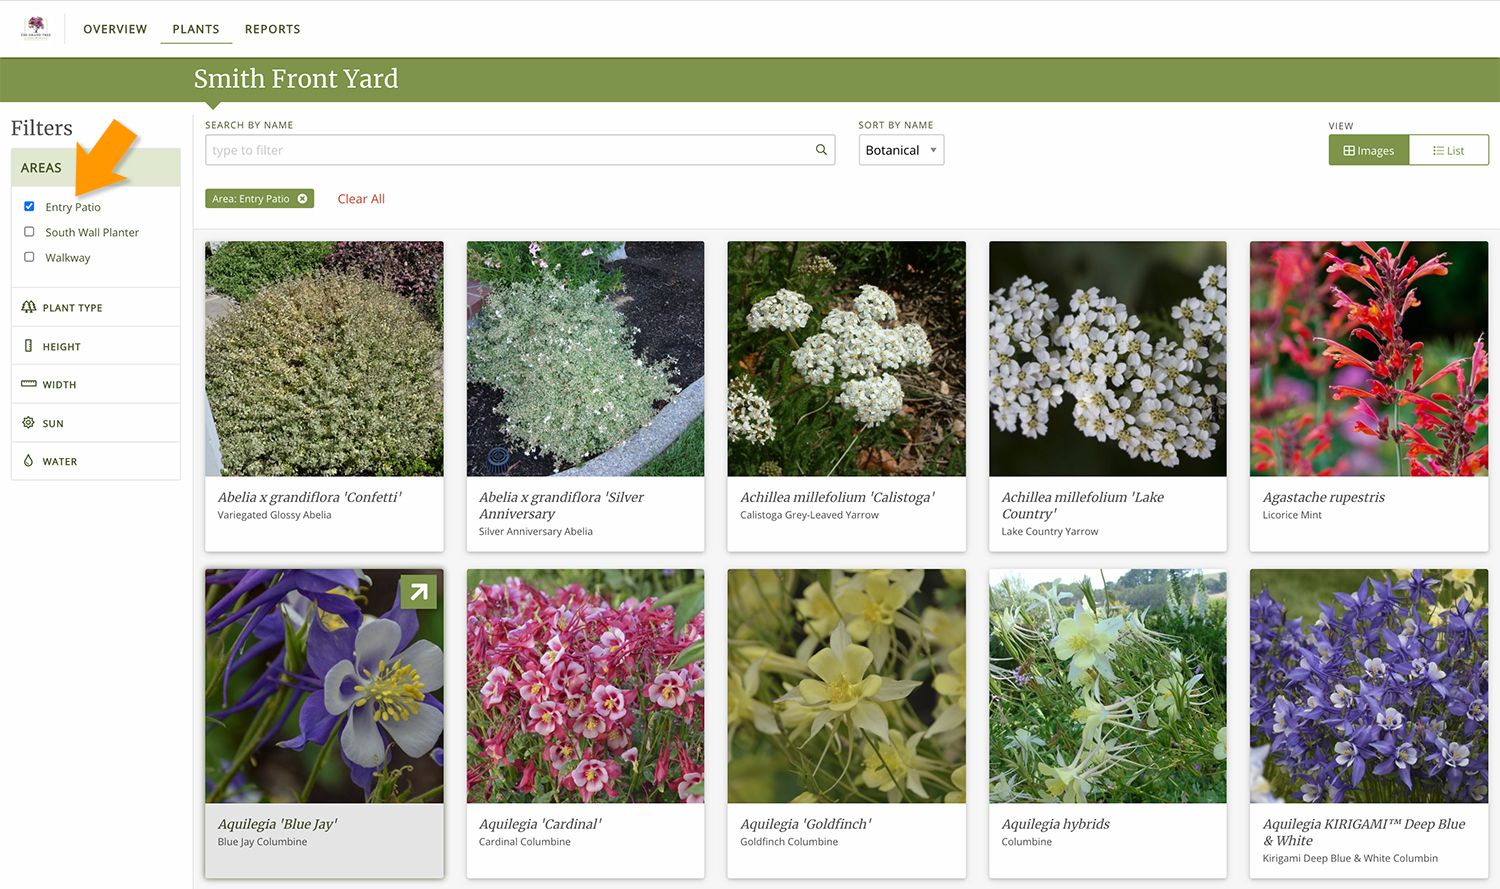
Go through all the plants you’ve added to your project and add the ones you want to your Entry Patio. Your page will start to look like this with a series of check marks on the plants you’ve assigned to the Entry Patio Area.
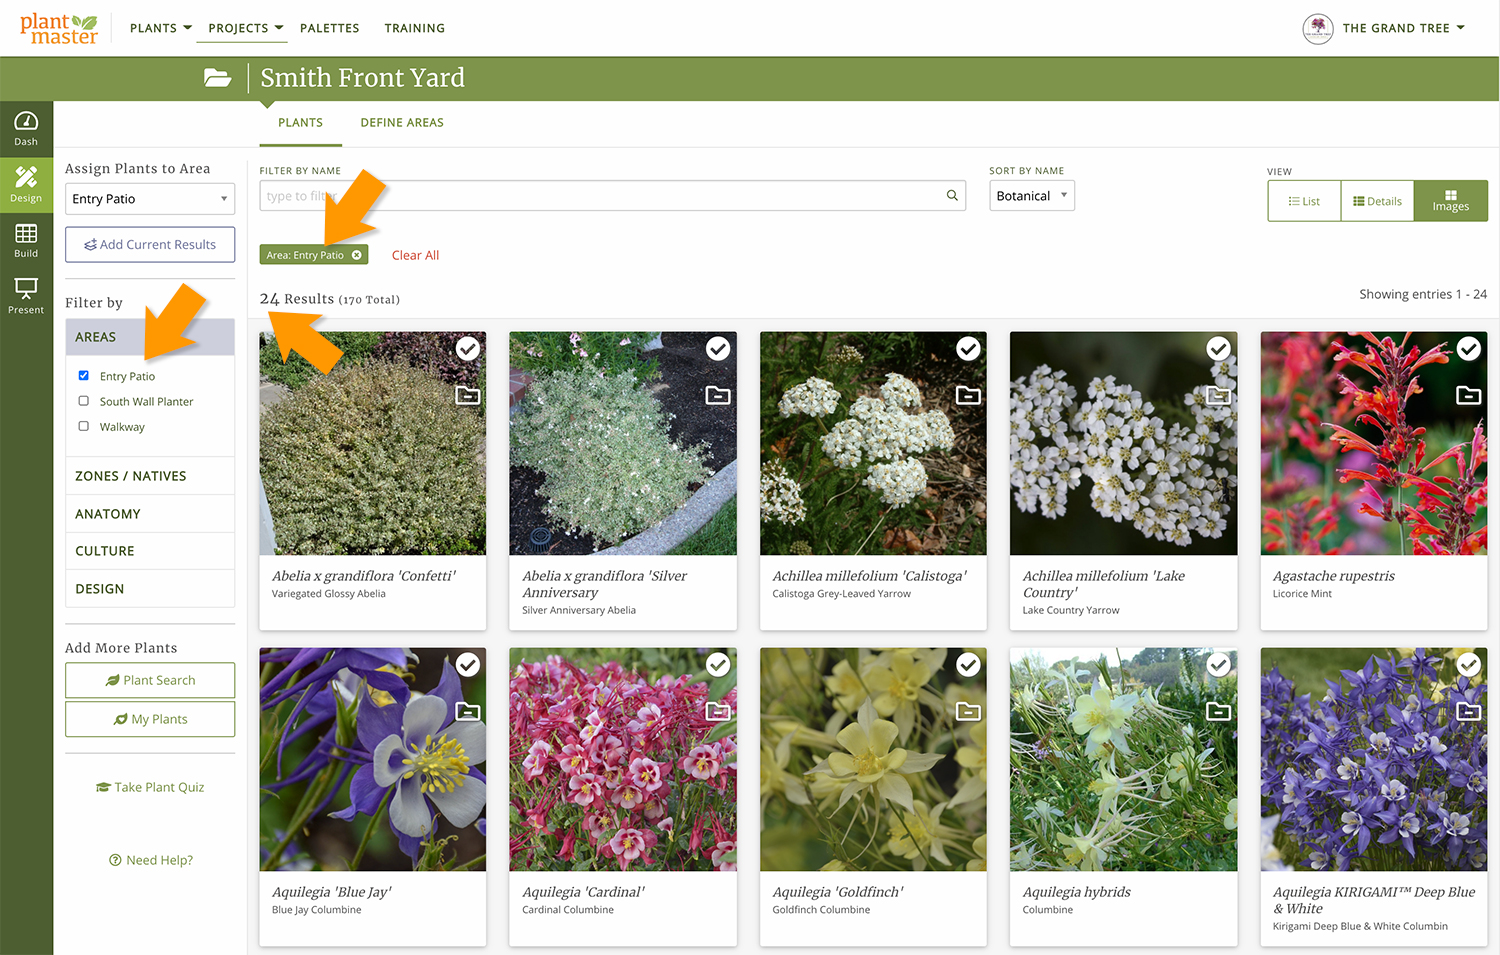
Once you have added all the plants to the Entry Patio Area, you will probably want to review your selections! In the left sidebar, you will see your filtering tools. The very first option is “Areas”. Now that you have assigned plants to this area, you can view them. Select “Entry Patio” from the list of filters, you will ONLY see the plants you’ve assigned to that Area. You will also notice that the total number of plants has changed from 170 to 24.
You can refine your Area further by removing any plants from the Area. Once you are happy, you can move on to assigning plants to other Areas.
Please Note: Whenever you want add more plants to an Area, make sure to check your filters first. If you want to view all the plants in the project, turn off all filters – otherwise you will only view plants in specific Areas. So if you don’t see all your plants, double check your filters. You can close the filters in a couple ways.
![]()
That’s it! Follow the same steps to assign plants to the rest of your Areas!
Remember to select your Area in the top section of the left sidebar and clear any filters you don’t want to use.
Now that you’ve completed your Areas, you can utilize them in the follow ways:
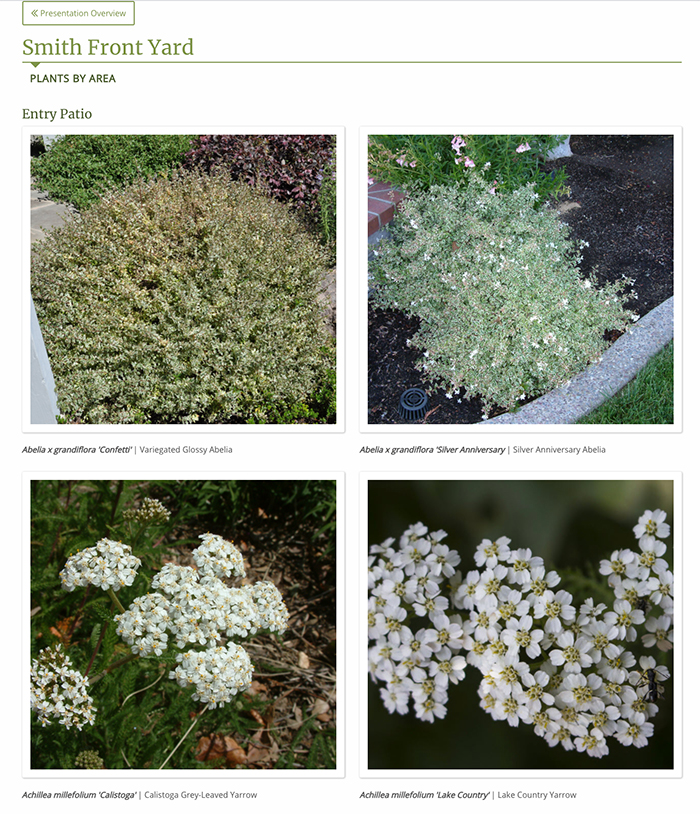
Interactive Presentation
Your customers will be able to filter all the plants by their specific Areas. So if they want to view all the plants you’ve selected for the Entry Patio area – they can see those plants grouped together. Here’s a peak at the Interactive Presentation:
Simple Presentation
A simple presentation is essentially a presentation you create by grouping various reports together. So if you want to include Areas, make sure to select “Plant Storyboard by Area” from the options. This is how it will look:
Reports
Here are the reports that can be organized by Area:
- Plant Storyboard
- Single Image (Thumbs)
- Stay tuned for more report options!
If you need any help deciding which presentation to send or how to send a presentation, please visit our Presentation Training page for complete instructions.