13 Dec Land FX Training – Everything you need to know
This article is intended to walk you through all the different ways you can share plants between PlantMaster and Land F/X.
Set up Land F/X to use PlantMaster plants.
From Land F/X, there are two different ways to bring PlantMaster plants into your planting design:
1. Browse through the plant search and add plants one-by-one.
2. Select an entire PlantMaster project or palette and send the entire plant list.
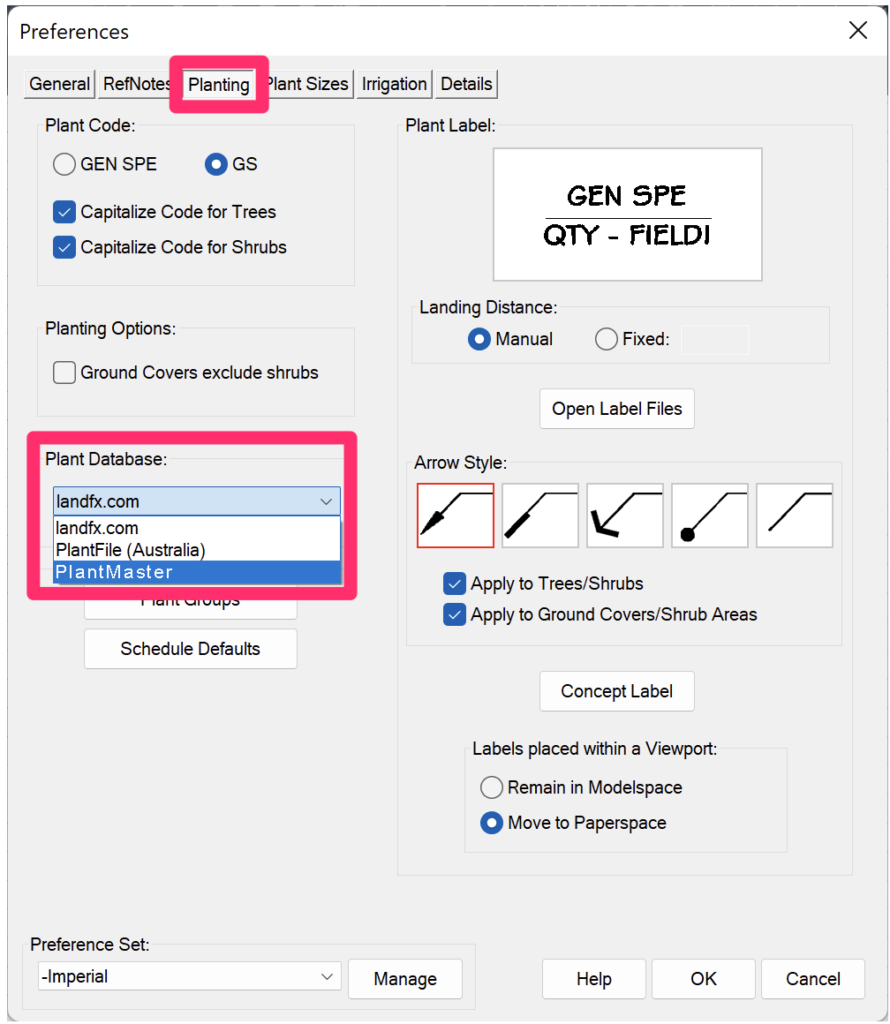
The first step for either of these options is to update your plant database settings to use PlantMaster:
Open the Planting Preferences and select the PlantMaster option from the Plant Database menu.
Now that you are set up to use PlantMaster and Land F/X together, you can start adding plants.
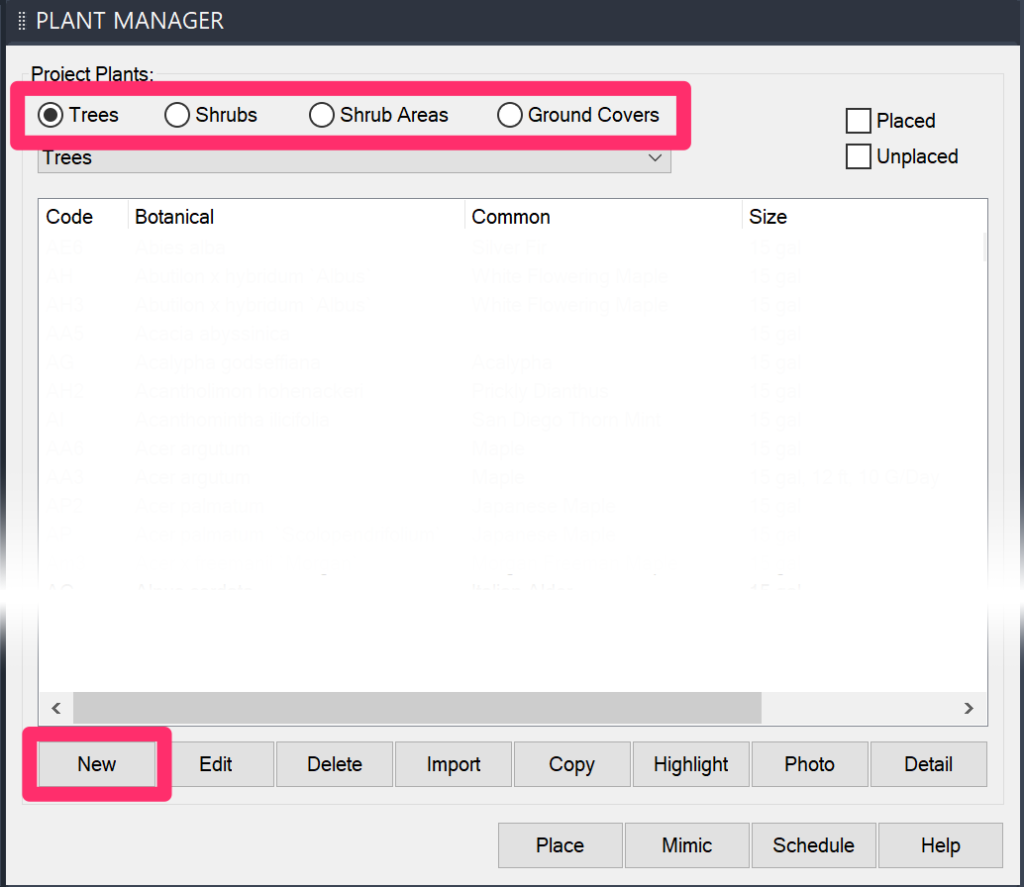
Add individual plants.
Once PlantMaster is selected as your ‘Plant Database’ within Land F/X, you have the ability to access all of your plants in PlantMaster. Open your Plant Manager menu and select “New”.
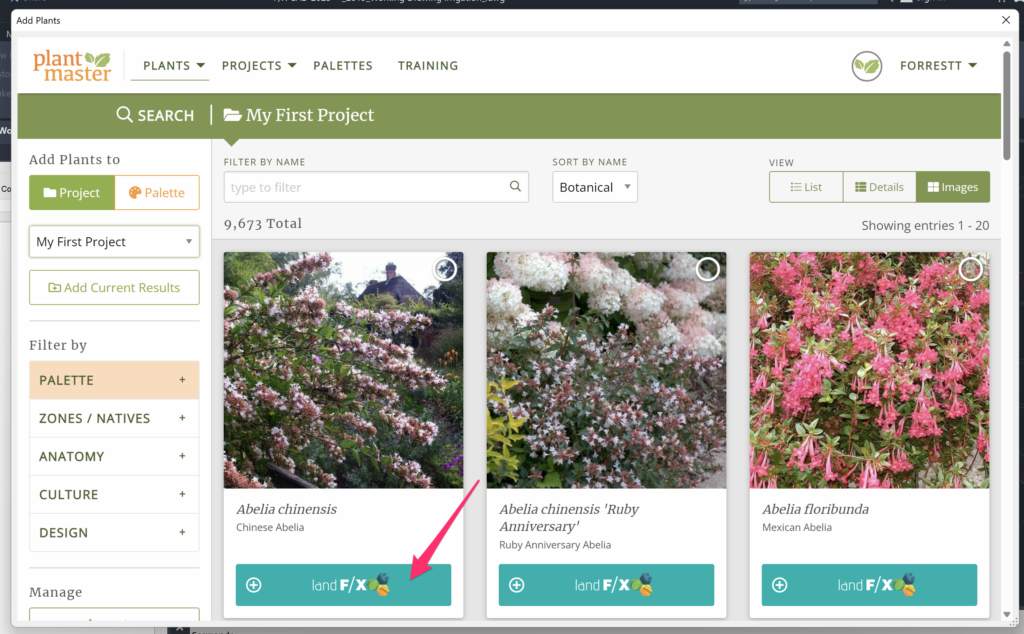
This will open a mini-browser to plantmaster.com. Here you will need to sign into your PlantMaster account.
PLEASE NOTE: When you log into PlantMaster, we recommend that you select the “Remember Me” option so that you are not required to login every time you go to pick a new plant.
From you’ll be taken to the PlantMaster plant search. You can use the normal plant search tools find and select any plant you want to use in your design.
To add a plant, simply click the button titled “+ Land F/X and the plant will be brought into Land F/X.
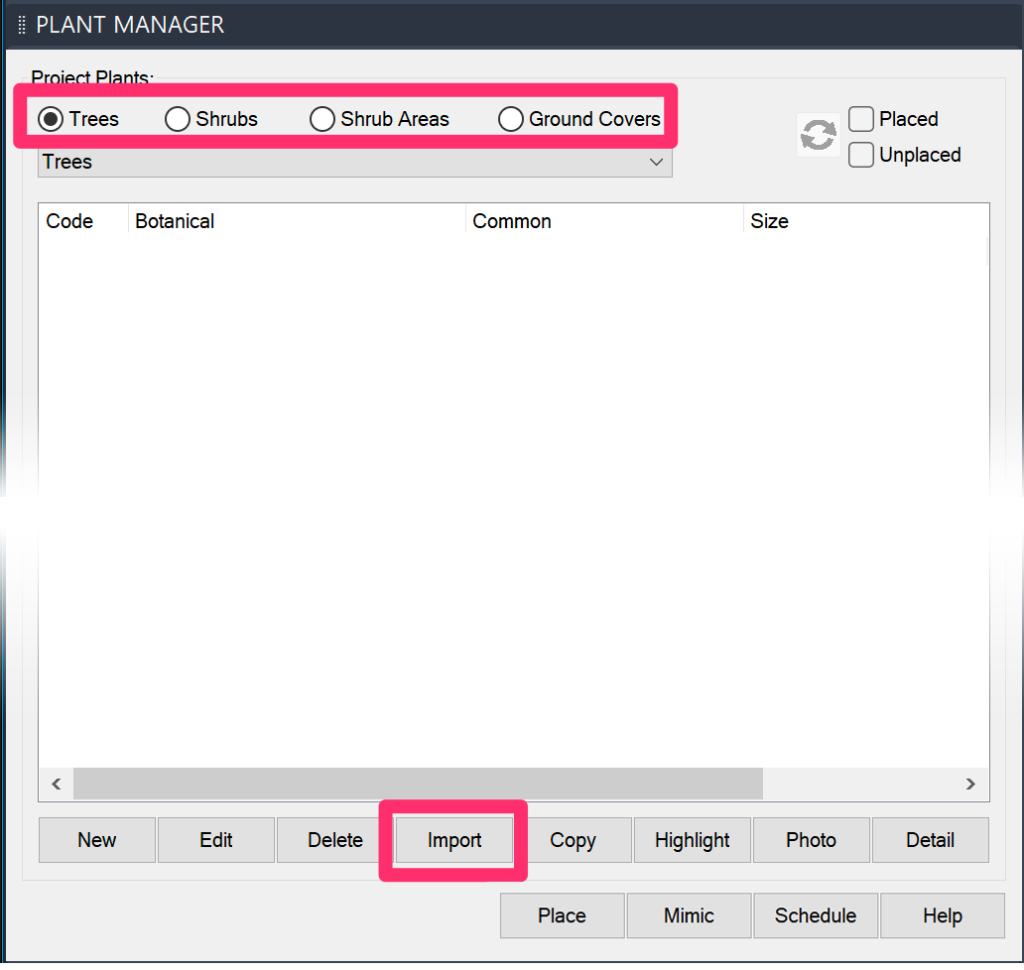
Add an entire project or palette of plants.
If you already have a plant list, project, or palette you want to bring into Land F/X, you can import an entire project or palette in one go.
In your Plant Manager menu, choose “Import”:
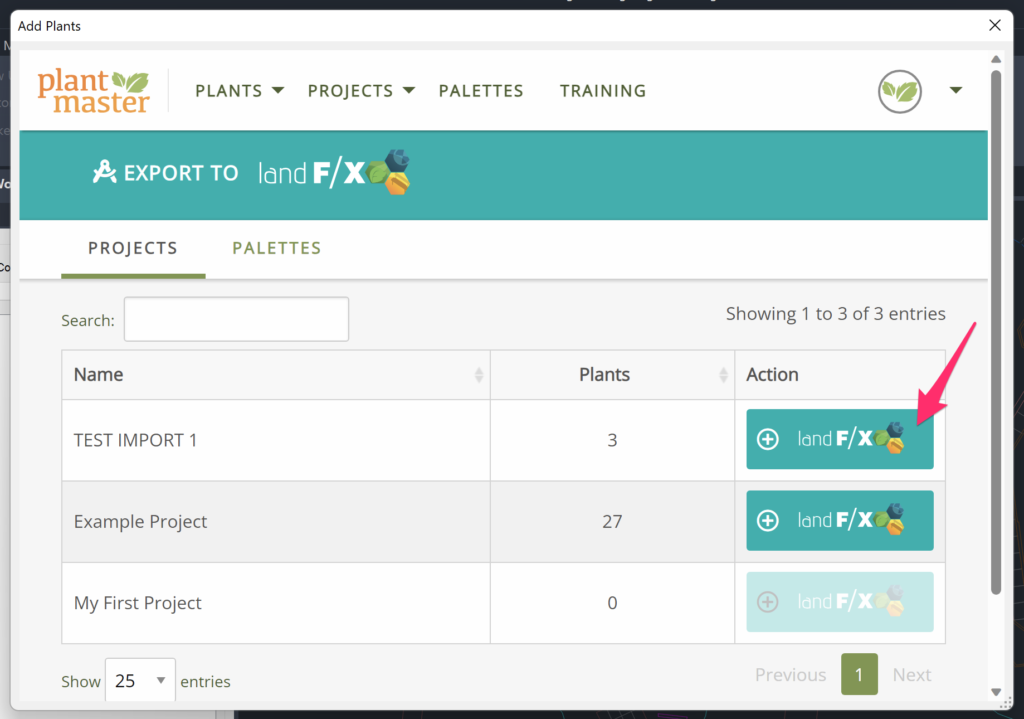
This will open up a new window to PlantMaster (you may need to login first). Here you can choose from any of your existing projects or palettes in PlantMaster.
To add a project or palette, simply click on the button to the far right of the project/palette name and titled “+Land F/X”. This will add the entire list of plants to your plant manager!
Send Plant Schedule to PlantMaster
When you want to send your plant schedule to PlantMaster for presentations, reports, or legends, there are two options:
- Export to CSV: Use this option when you are working with a project that includes plants that you found outside of PlantMaster. By using the export option, when you bring the plants into PlantMaster, you’ll be able to match the plant records in PlantMaster. (PlantMaster won’t automatically create new plant records for plants that aren’t in the database, so it will be helpful to match up as many of these plants as you can. Any plants that don’t have a match can be easily added to the system.)
- Utilize Land F/X’s “Schedule Integration” feature: Use this option if you build your plant lists in PlantMaster. Its a much quicker way to keep your plant lists updated in Land F/X and PlantMaster. (We highly recommend this option. However, if you have a lot of plants already in Land F/X and want to bring them into PlantMaster, the integration happens behind the scenes, so when you transfer plants to PlantMaster any plants that don’t exactly match plant records in PlantMaster will be skipped.)
Send Plant Schedule: Export to CSV
If you have a plant schedule you want to bring into PlantMaster and you want to make sure all your plants are accurate in PlantMaster, use the Export to CSV function inside of Land F/X.
Then, follow the steps to import the plant list into PlantMaster. See the full step by step instructions here – You can learn more about our “Import Plant List” tool here!
Send Plant Schedule: Use Land F/X Schedule Integration
Set up the connection. (You only have to do this once)
If you have projects that utilize plants that originated from PlantMaster (or that you know match exactly by latin/botanical name to PlantMaster’s library), then you can utilize Land F/X’s Schedule Integration feature to have your plant schedule data sent to PlantMaster directly. PlantMaster will receive the data transmission from Land F/X and based on the Project ID (set in Land F/X), it will either create a new project or update an existing project (it will only ever match a project that was first created using this method).
Here are the steps to get this set up
Create a custom ‘Schedule Integration’ URL
To set up the connection between Land F/X and PlantMaster. Open up your PlantMaster account and go to Manage My Projects page. Select a project and click on the button to the far right under “Actions” called “More”. It doesn’t matter which project you choose. You are simply getting a link that will connect the two systems. Then select “Import Plant List” from the options.
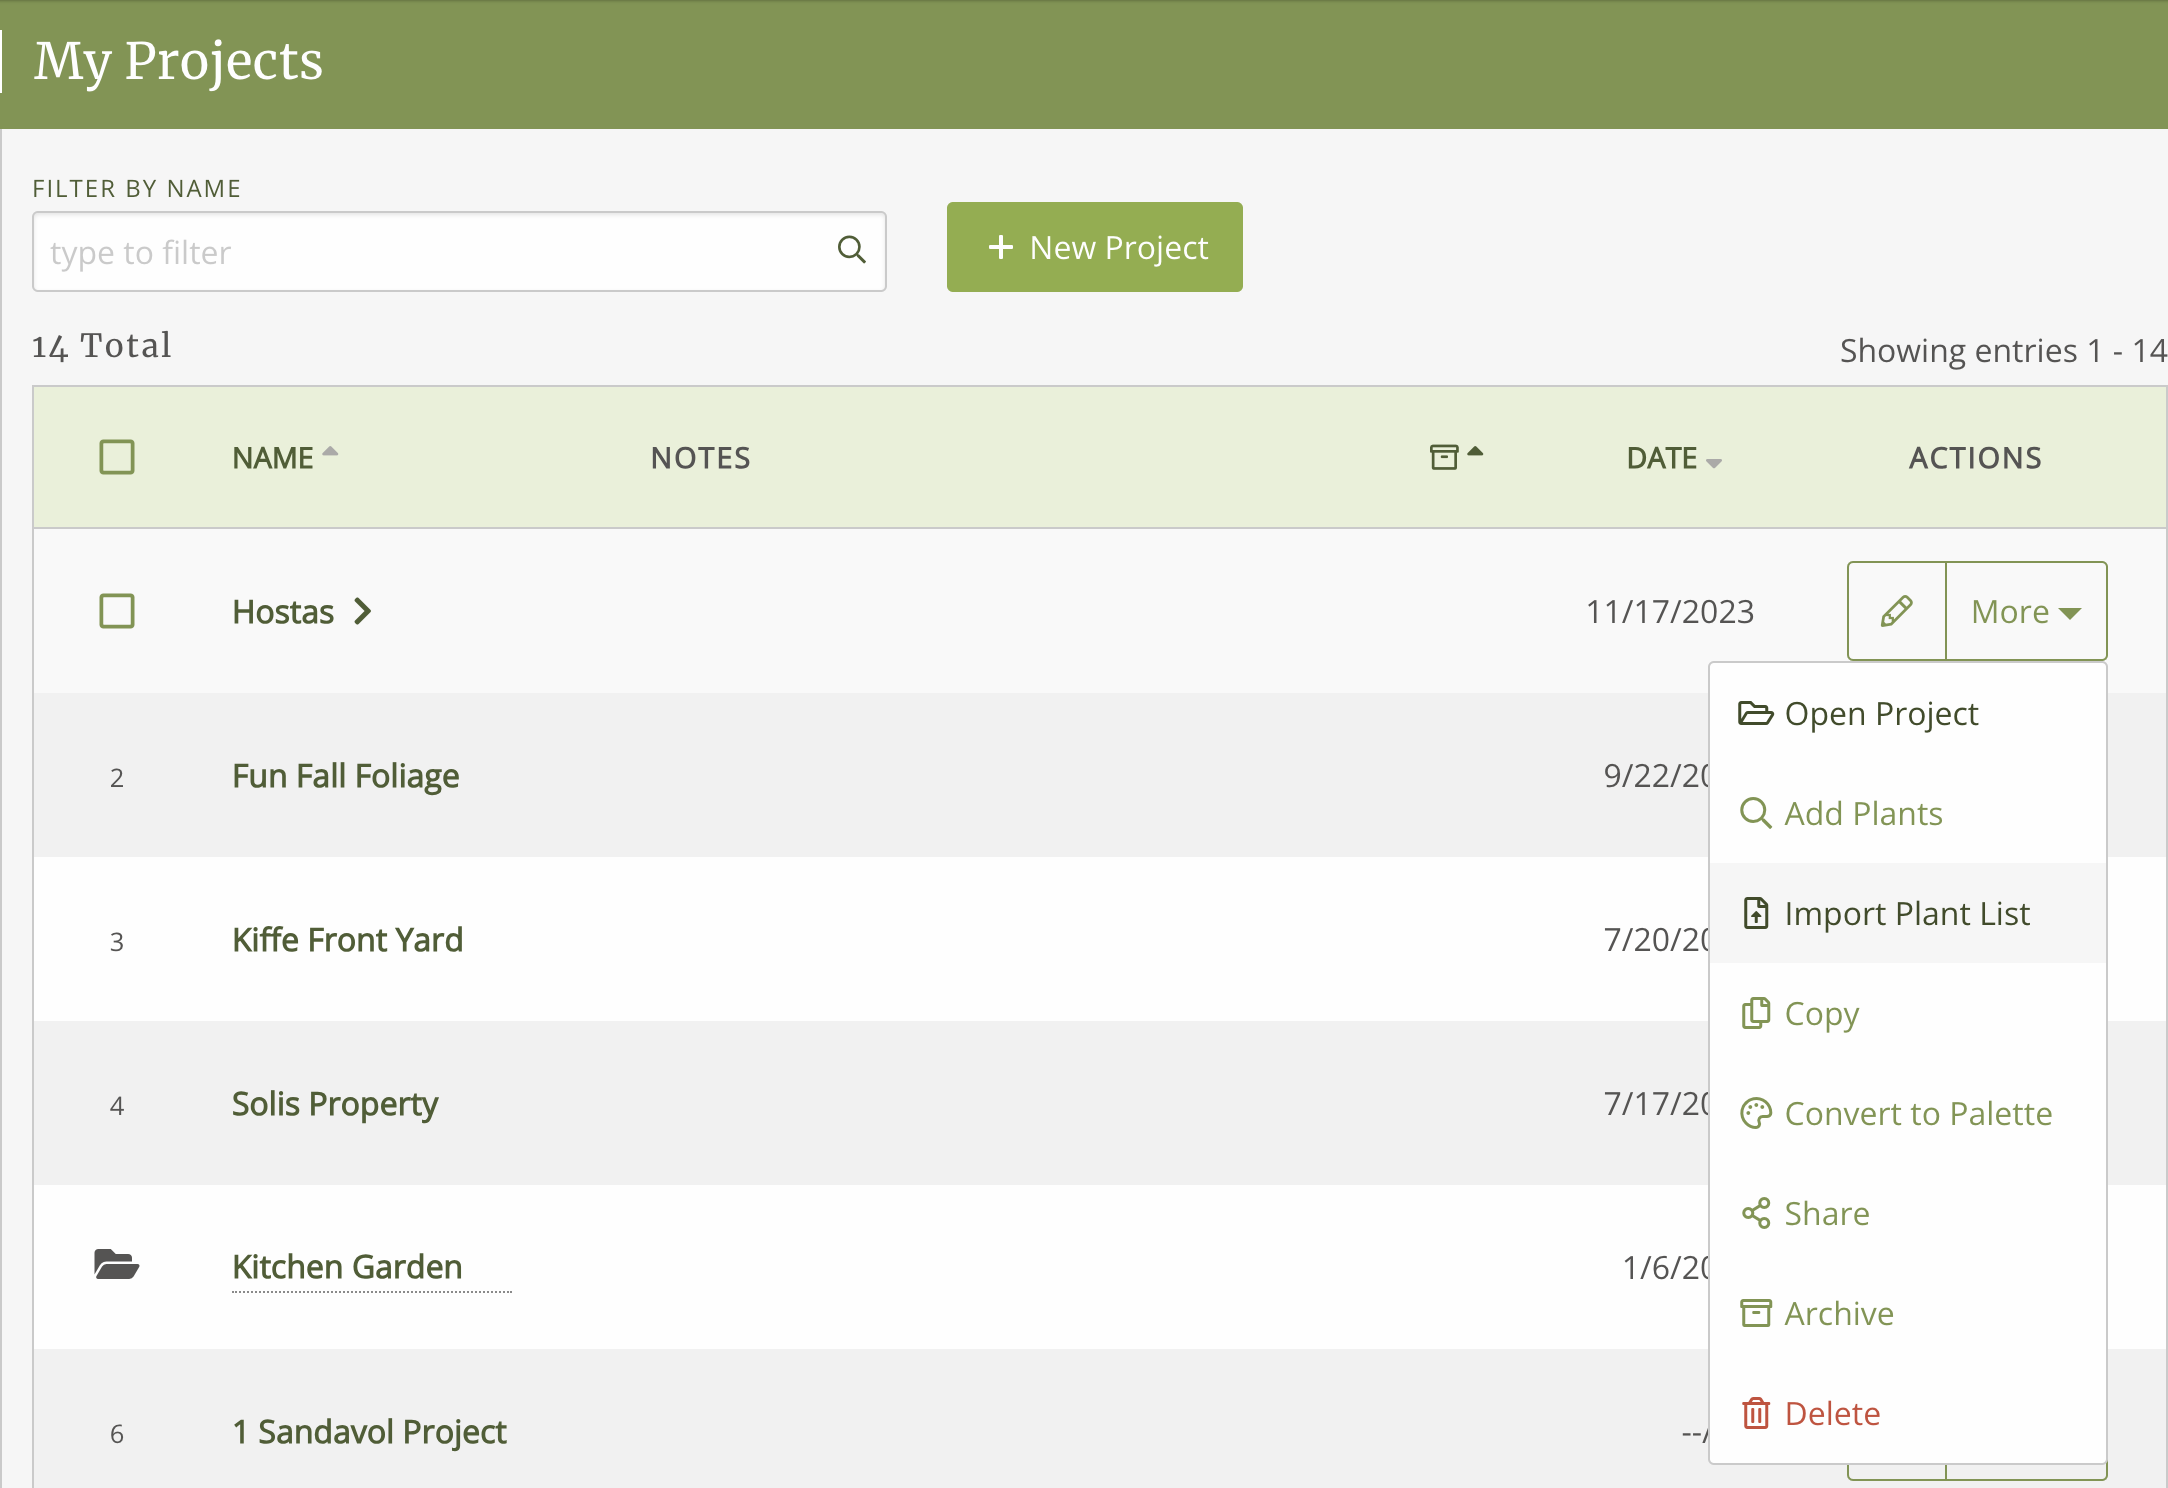
This will pull up the Import plant list modal.
Choose “Import From CAD” and then choose “Land F/X”. Find the input field titled “Schedule Integration URL” and click the “Copy URL” button

Create a Schedule Integration preference using copied URL
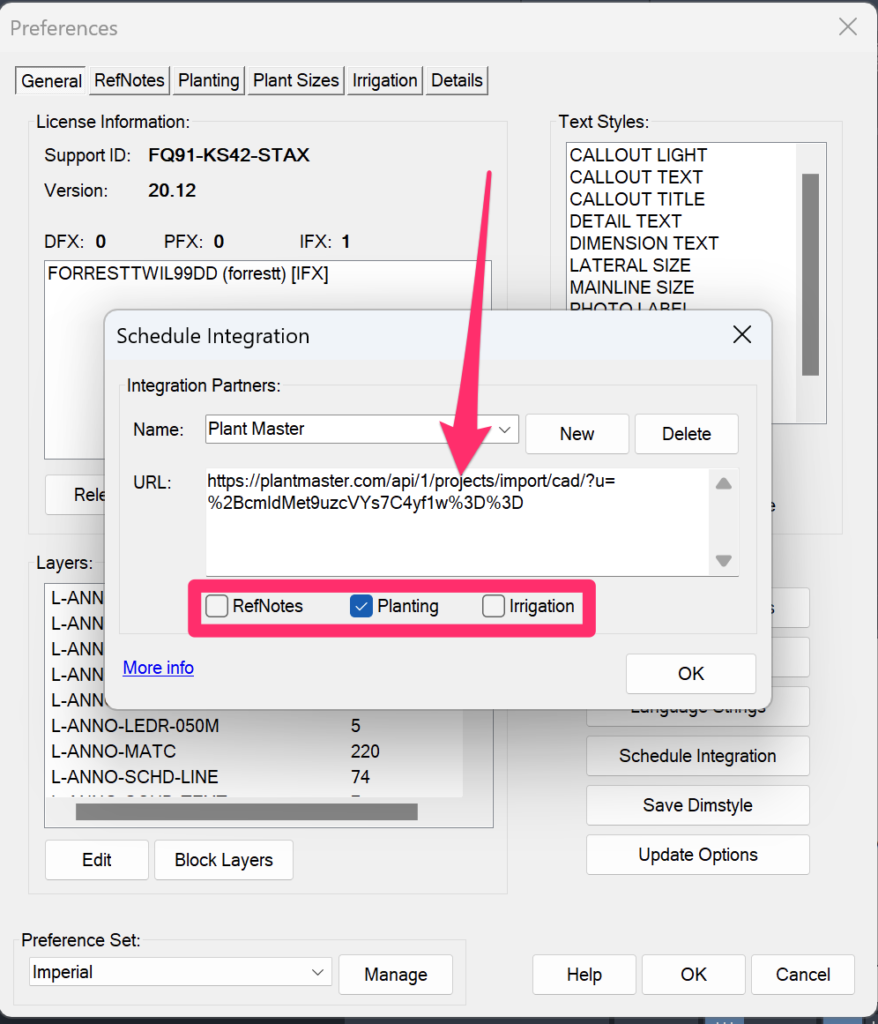
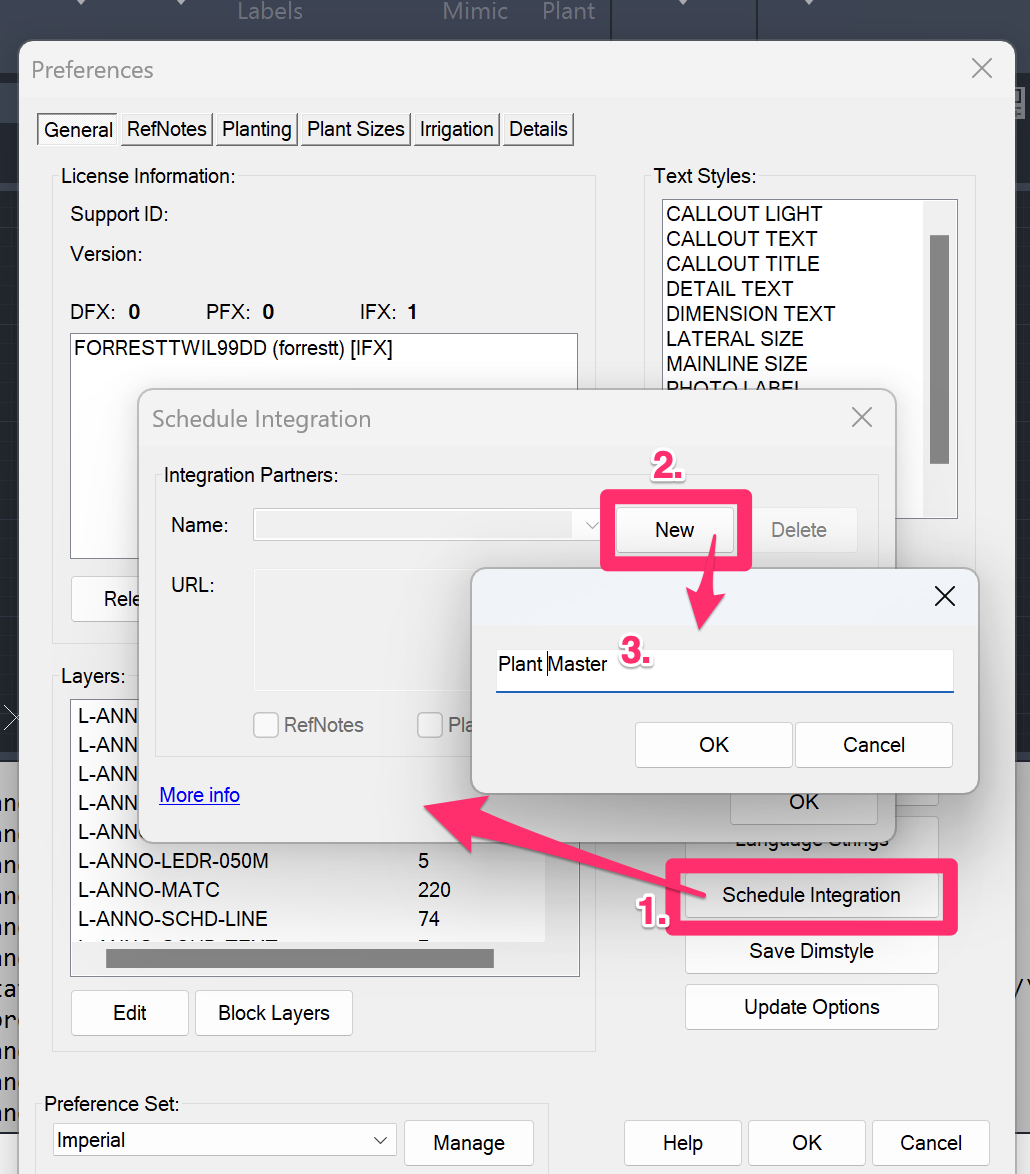
Back in Land F/X, navigate to your General Preferences screen in your main menu and click the “Schedule Integration” button
Inside the Schedule Integration dialog box, click “New”
Title the integration as “PlantMaster” or something similar. Then, click “OK”.
Once the new integration is created, Paste in your custom URL to the URL field and make sure only the “Planting” option is selected. Now your accounts are connected and you can send your planting schedule to PlantMaster. You do not need to repeat these steps every time.
Send your plant schedule to PlantMaster
Now that your integration preference is created, in Land F/X, select a project and navigate to your “Plant Schedule” tool option.
Select “Cloud” as the destination, and then select your new integration preference from the resulting drop-down.
Click “OK” and your plant list will be sent directly to PlantMaster. The first time performing this action for each project will generate a new project in PlantMaster with a corresponding name. However, each subsequent action will update the existing (matching) project.
Congrats! You’ve now added your plant schedule to PlantMaster. Now you can use these plants to create reports, presentations, and legend! And remember, every time you send your plant schedule for this project it will automatically update. You don’t have to do the setup again.