01 Oct PRODUCT UPDATE | September 2019
Editing ePlants
We’ve made an improvement!
Problem:
When I am in a project and I choose to edit a plant it forces me to delete the original plant from the project, then jump back over to the plant section to retrieve the updated plant that I just worked on. This seems tedious and unnecessary. Why not just switch them when I am in a project?
Solution:
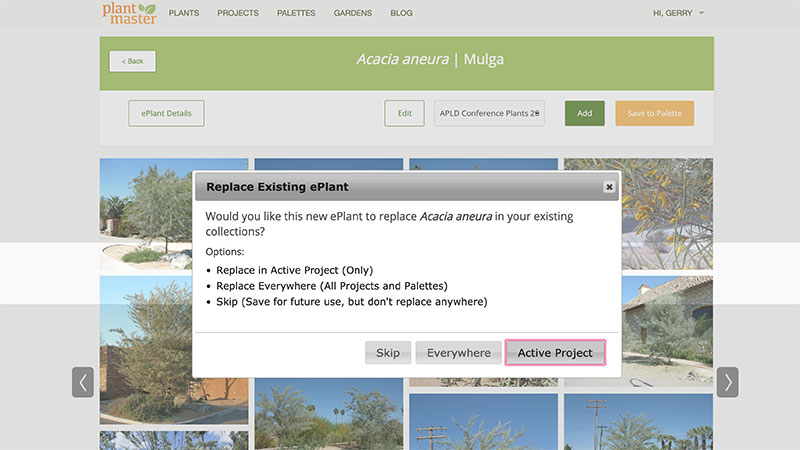
PlantMaster will ask you if you want to replace your new ePlant for the original currently in your project. It will also ask you if you want to change it in all the other location.
Here’s What Has Changed
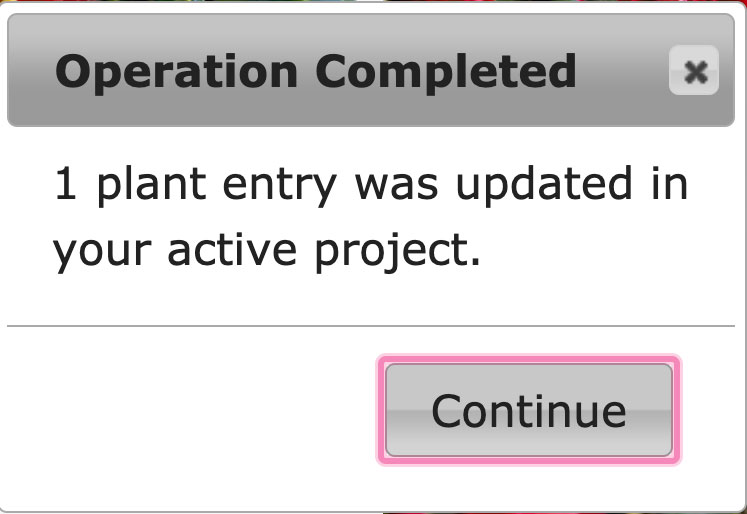
When you edit an ePlant, the updated ePlant (your ePlant) can be added to your Active Project instead of the original. (In the past the original stayed with the Active Project and you needed to manually add the replacement) This new plant will be added to your “My Plants” collection.

Once you’ve clicked to “Create” a new copy of the plant to edit, you’ll be given a few choices about where to store it.
- Replace in Active Project – Save your new ePlant in the Active Project (save it to your current project only and remove the original)
- Replace Everywhere – Replace the original ePlant throughout the ENTIRE database.
- Skip – Save the new ePlant for future use, but don’t replace it in any projects or palettes.
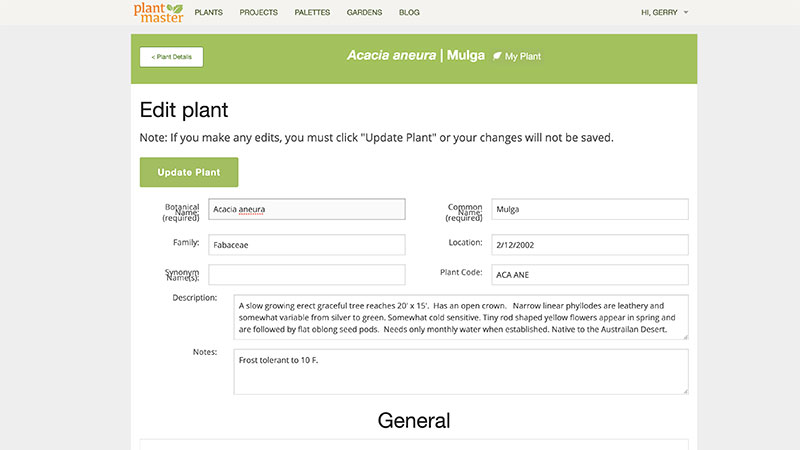
Once you’ve selected where you want to use the new ePlant you’ve created, you’ll have the opportunity to make any/all revisions to the plant data.
Make sure to click “Continue” to make edits.
Now you can edit any information about the plant to match your needs. This includes all images and data.
Please note the “My Plant” icon next to the name. When you run searches in the future, the search results will display the original ePlant and your revised version so you can always compare them side-by-side.