
14 Feb Rename Areas Terminology
In this article you’ll learn how you can rename the “Areas” terminology in your project to any name or reference you prefer. So, if you call the spaces of your designs “Rooms”, make the change so “Areas” become “Rooms” in all your presentations and reports.
Let’s get started!
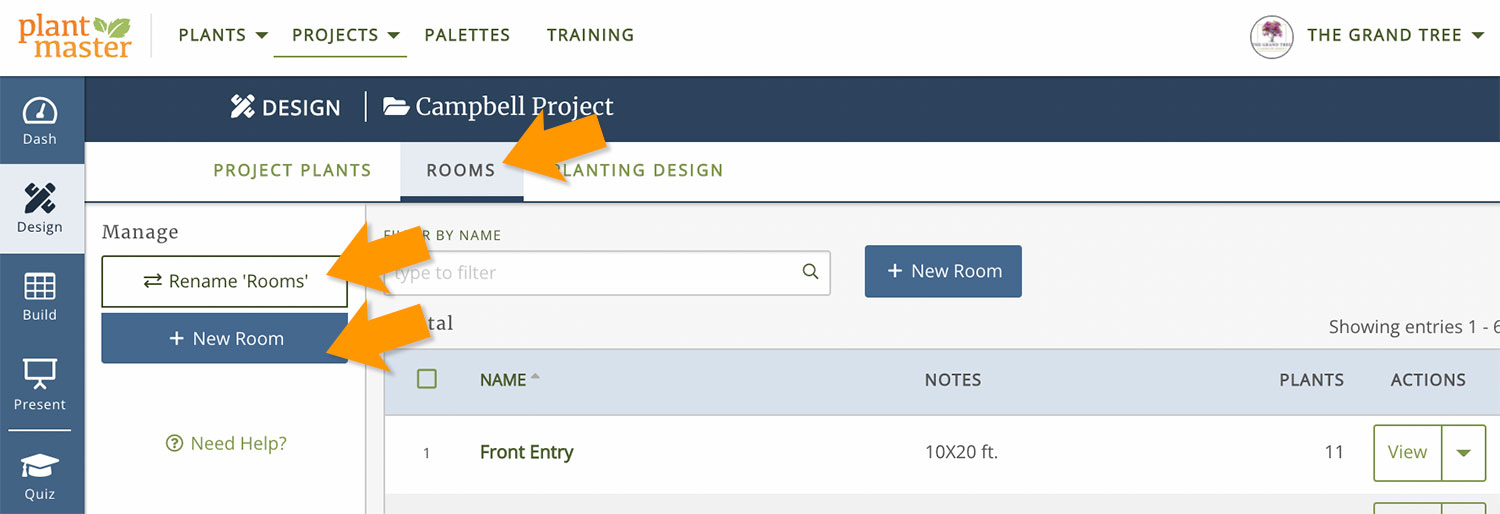
Open any project and make sure you are in the Design section. Just below the project name, you’ll see a series of tabs. Click on the tab called “Areas”. This will open the page where you can create new Areas and manage any Areas you already have.
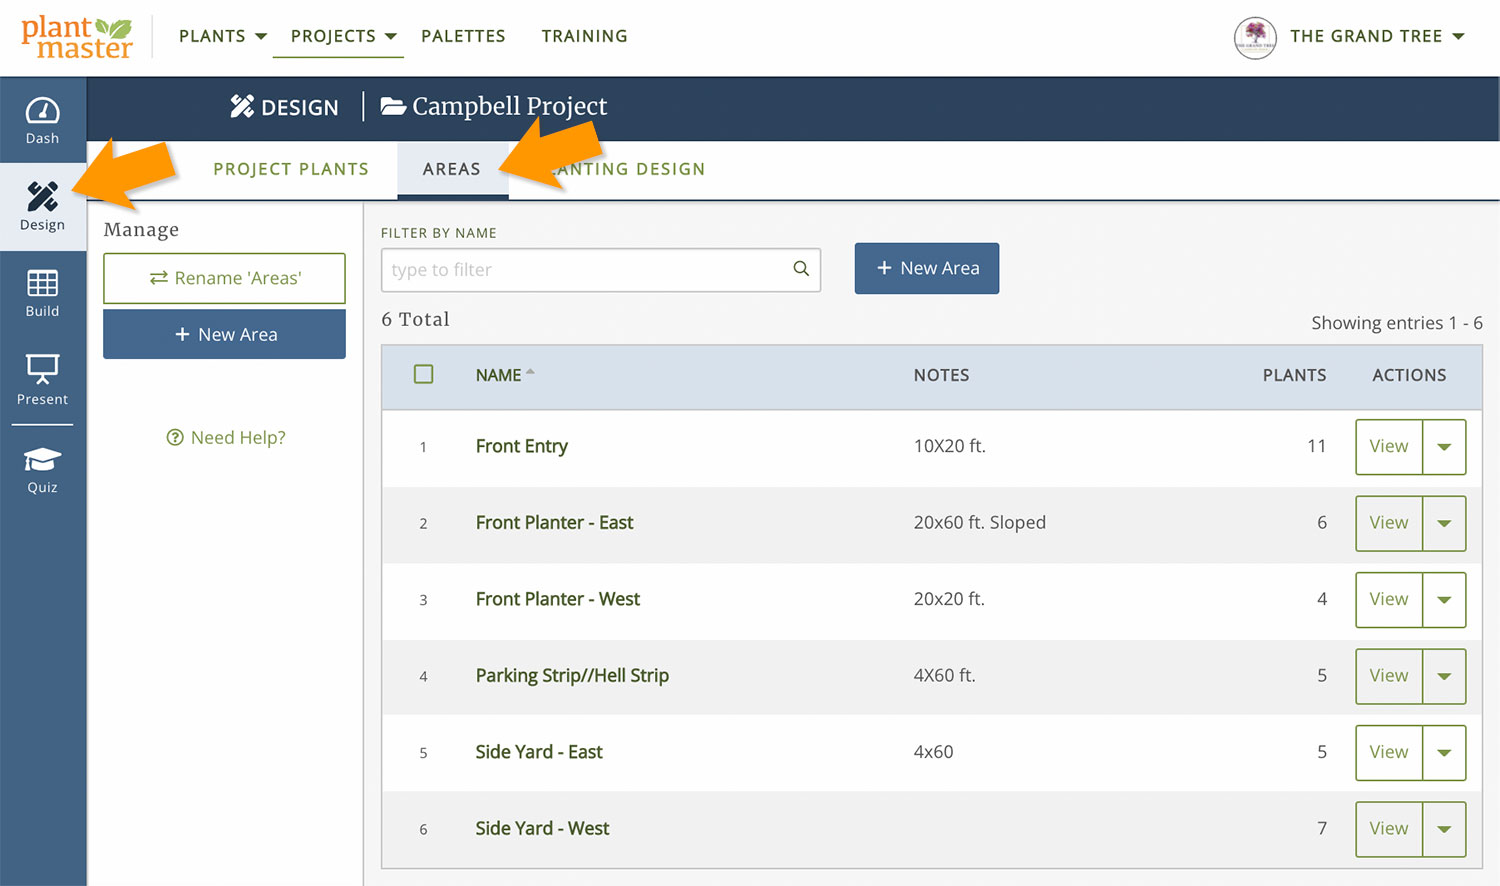
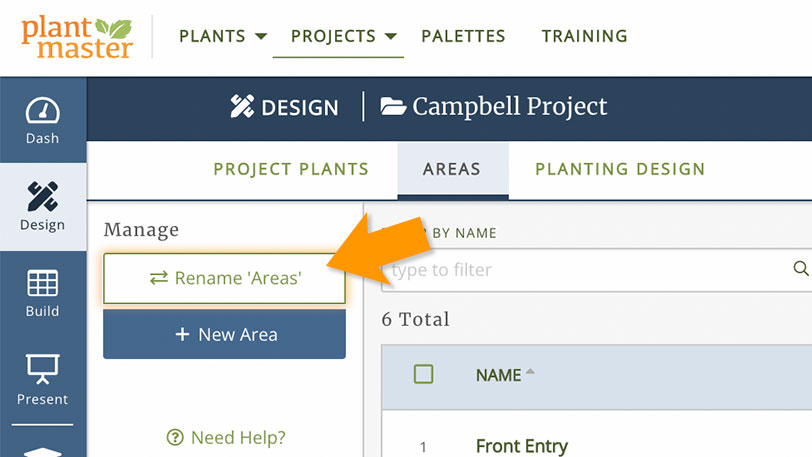
In the top left corner, click the button that says “Rename ‘Areas'”.
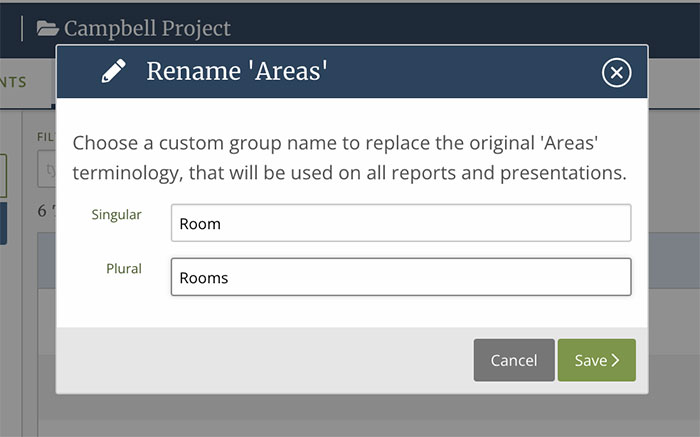
In the modal, type in the singular and plural name you would prefer to use. For our example, we want to reference our spaces as “Rooms” so we’ll type in “Room” and “Rooms”. Then click “Save” to save your new naming.
You’ll immediately see the tab name change to “Rooms”. The “Add New Area” button will now say “Add New Room” etc. Take a look!
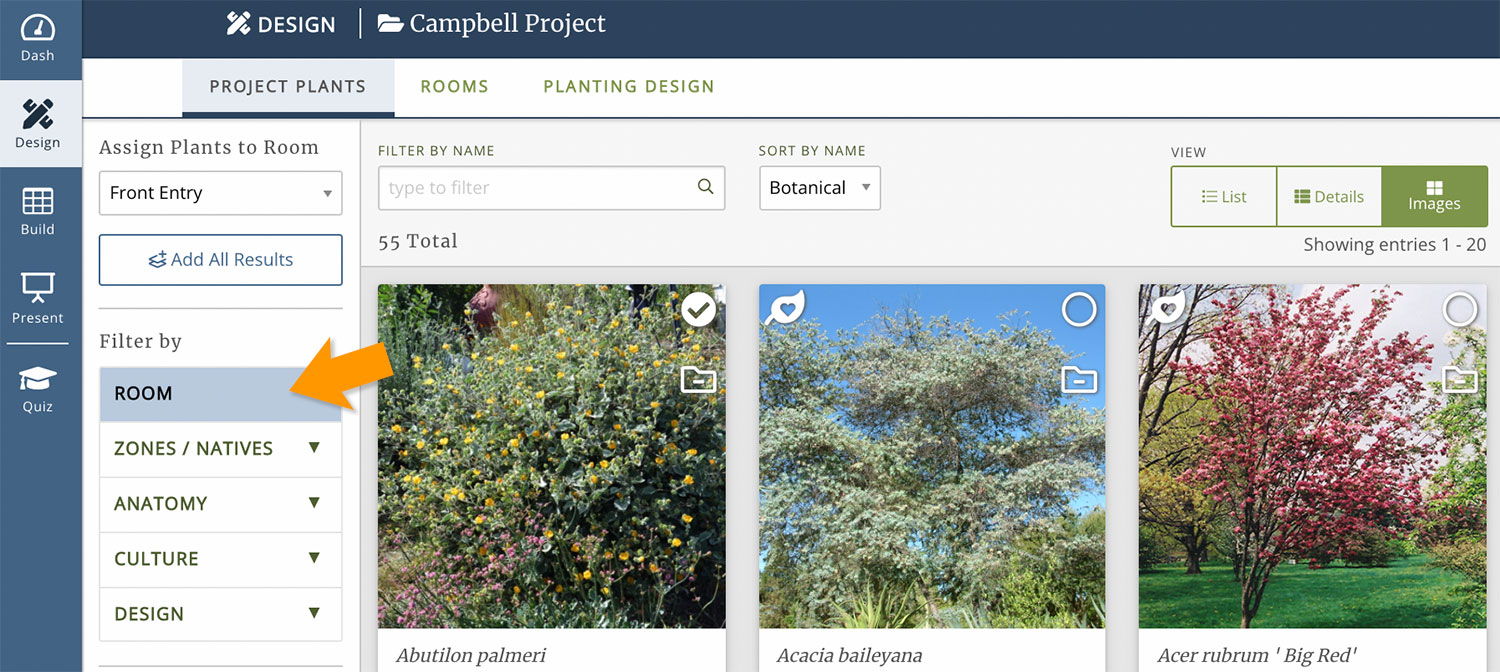
And, your plants for this project will be organized by Room. Check out the filters:
That’s it! You’ve updated “Areas” to “Rooms”.
Here’s all the places that will update the name to “Rooms” instead of “Areas”:
Presentations:
All tabs, filters, or references to Areas will be updated to “Rooms” in both presentation types.
Reports:
Any report that is organized by Area will now be organized by “Room”.
(Plant Storyboard, Plant Details, Multi Image, Care Instructions, Single Image, Design Showcase, Plant Briefs, Plant Listing)
Rename Areas Terminology – PRO TIPS:
Please Note:
This tool is unique to each project. So if you want to rename “Areas” everywhere, you’ll need to do so in each project. We’re planning to add a global option down the road, but for now you’ll need to make this change per project.
Use this tool to your advantage. Here are a few ideas to try:
Create a project template so you don’t have to update every new project.
If you want to use a specific term across ALL your projects, you’ll want to create a template! Create a blank project. Name the new project “AA – Project Template” (we added the “AA” so it will always be at the top of projects list, but you can use any name you want). Then, use the Areas renaming tool to rename “Areas” to your preferred reference. Here’s the trick – to use this as a template, whenever you are ready to start a new project, simply COPY this project instead of starting a brand new one from scratch. You can also add any other elements you want in every project (things like predefined Areas, specific plants you use in every project, etc.)
Create special presentations/reports to help your client.
Say you’re at the refining stage of your project and your customer is struggling to approve a specific tree for the focal point. Try this – create a new project, rename the “Areas” to “Focal Point” or “Tree Options”. Then create one group for all the yellow flowering trees, another group of red flowering trees, another for deciduous options, and a final for evergreen trees. Send your customer this specialized presentation or report. Each group of trees may only have 1-2 options, but your customer will be able to easily filter or visualize the difference between the options and quickly approve their favorite.
Create different collections of plants.
Use this same concept to create collections. Try it as part of your proposal process. Maybe your customer doesn’t know if they want a Mediterranean style garden or Japanese style garden. You can create a custom project, rename “Areas” to “Styles” and create a different collection of plants for each style. You don’t need to give them everything; just a few plants to visualize the style. Your customer will enjoy a presentation or report where they can easily compare the two different styles.
Define the different spaces of the property.
We know. We know – This is how you are using the Areas tools right now. We just want to remind you that you can call these spaces anything you like. We didn’t want to leave it off the list 😉