

12 Sep Create a New Project
In this article you’ll learn how to create a project so you can start building your plant list. Before you create a project, we recommend that you set up your company logo and contact information. This information will appear in all your reports and presentations. Learn how to Set up your PlantMaster Account.
First, what is a Project?
A PlantMaster project is your place to store plants in groups. You can name your projects whatever you like – create a project for every client project or make one specifically for your favorite yellow-flowered trees.
You can also use your PlantMaster project to communicate with your customers. For example, if you’re working on a front yard design and you’ve added all your plant choices to a project. When you’re ready to start plant selection with your client, you can email a link of the project and start narrowing down their choices together.
Create a new project in PlantMaster.
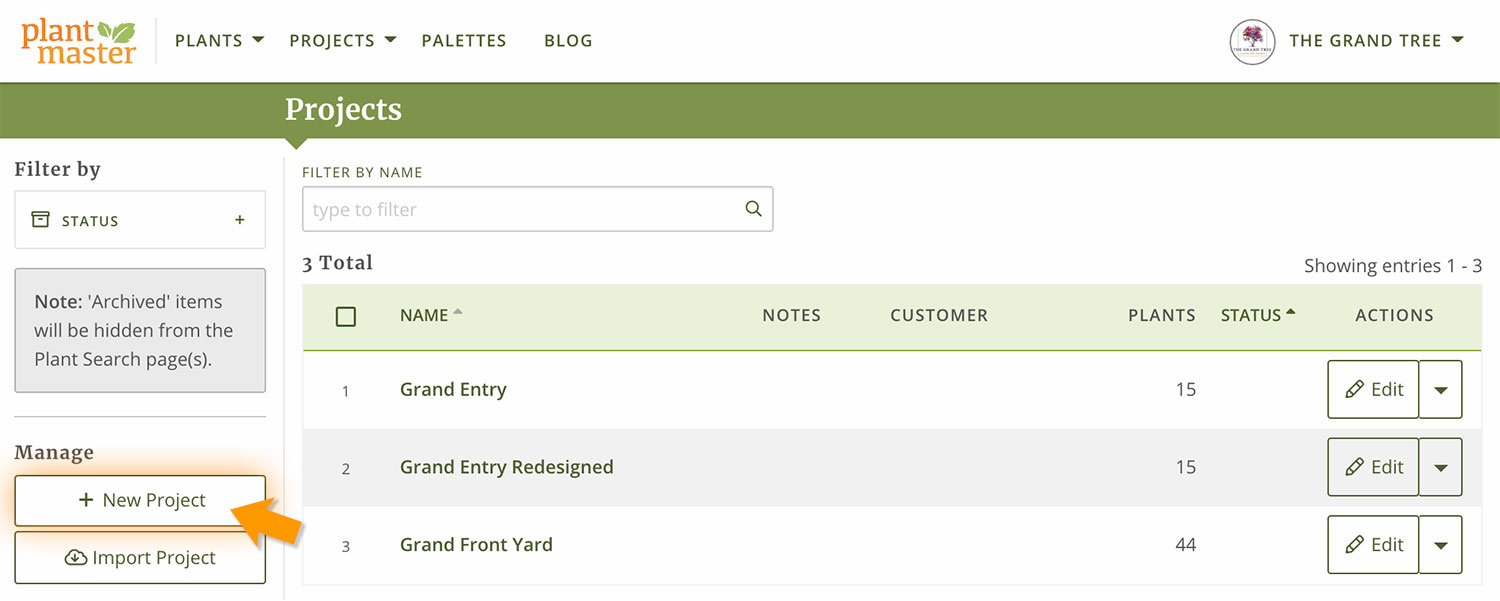
In the main menu, find “Projects” from your options, then select “My Projects. This will open the complete list of your projects.

Create a new Project
Now that you are in the project workspace (called “My Projects”) you will see the list of projects. To create a new project, click the “New Project” button in the left sidebar.
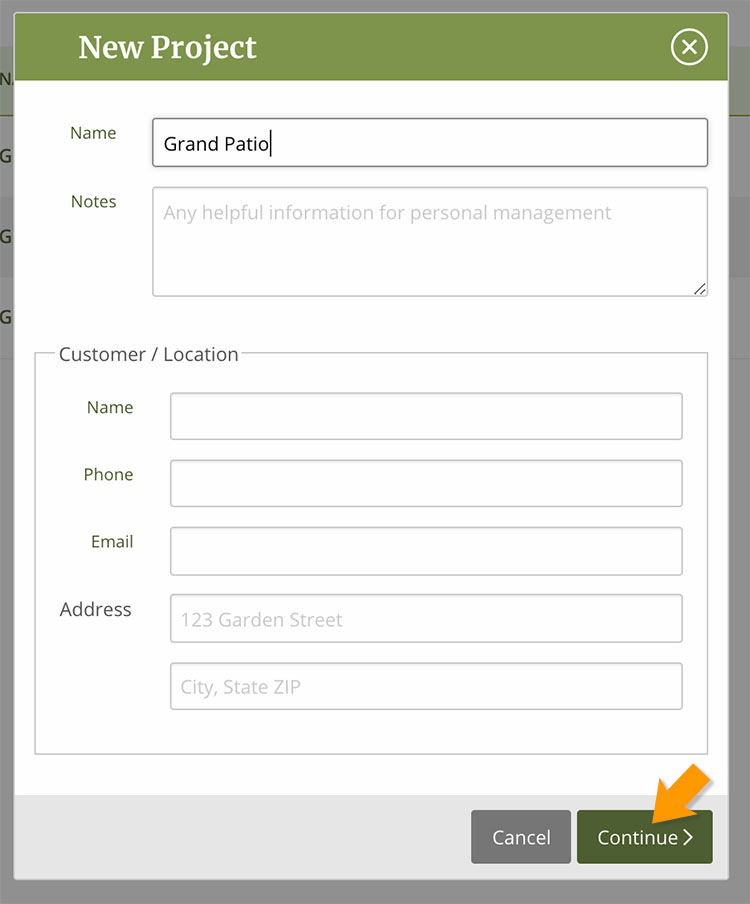
In the modal window, type in the name of your project and click “Continue”. You can always change the name of the project at a later date. You can also enter all your customer’s information at this stage.
Congratulations, you’ve successfully made a project.
That’s all there is to it! Create and name projects in whatever way works best for you. We’ve seen some users create projects for every customer and others create projects based on plant type or flower color – its up to you!
Once you’ve created a project, you have a few choices. Click “Add Plants” to immediately head to the plant search section and start adding plants to your new project. Or, click, “Open Project” to view your new project.
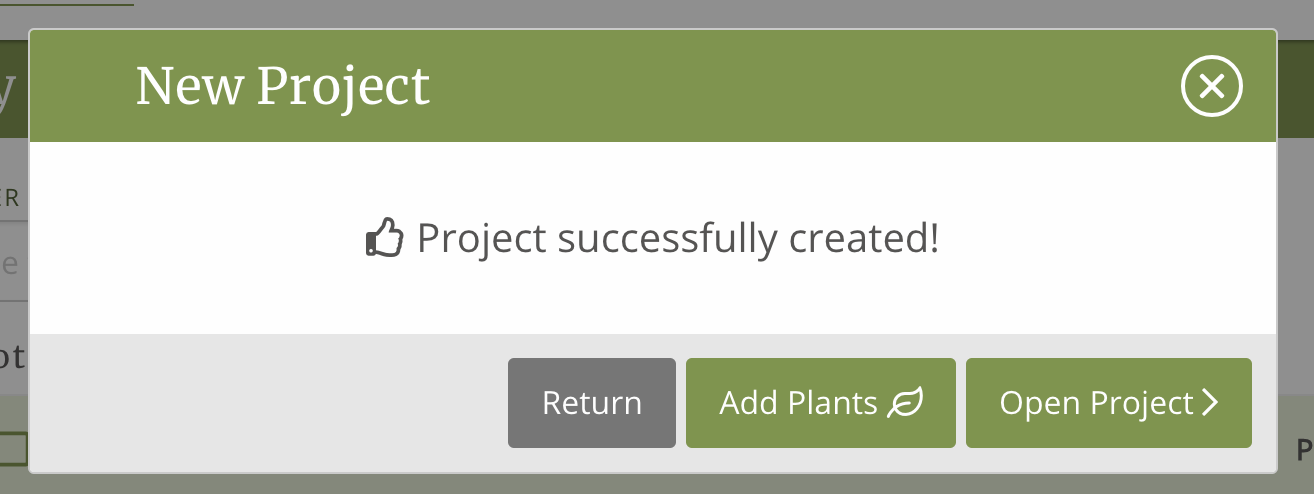
For the purposes of this training, please click “Add Plants” to go to the plant search. Now its time to add plants – head to our next training article.
If you prefer to open the project and look around, you’ll be taken to the Design section of the project where you will see this screen. Remember, you haven’t added any plants, so there won’t be too much to see, yet. If you view the project first, simply click on “Plants” in the main menu to go to the plant search section.

TIPS & TRICKS:
- Projects are listed in alphabetical order. Keep this in mind when you name your projects. One idea to consider – if you have 3 current projects running at the same time, add the letters “A-” (So “Grand Patio” becomes “A-Grand Patio) to the front of the name so the projects appear first in your list. Then when you are ready to share the project or a report with your customer, remove the “A-” so it doesn’t show.
- Any notes you add to the project will not be visible to your customer. This makes it a great place to place any reminders about specific plants they like or don’t like or anything unusual about the project that you don’t want to forget.
Next Steps:
Now that you’ve created a project, it’s time to add plants. Read the next article titled “Add or Remove Plants from a Project.”