

10 Apr Add or Remove plants from a Project
This article is intended to teach you how to add or remove plants from a project. Although it’s a simple procedure, take a few minutes to learn how to best use the tools.
Before you start adding plants, you’ll want to ensure you’re adding them to the right place. IF you haven’t already, create a new project first.
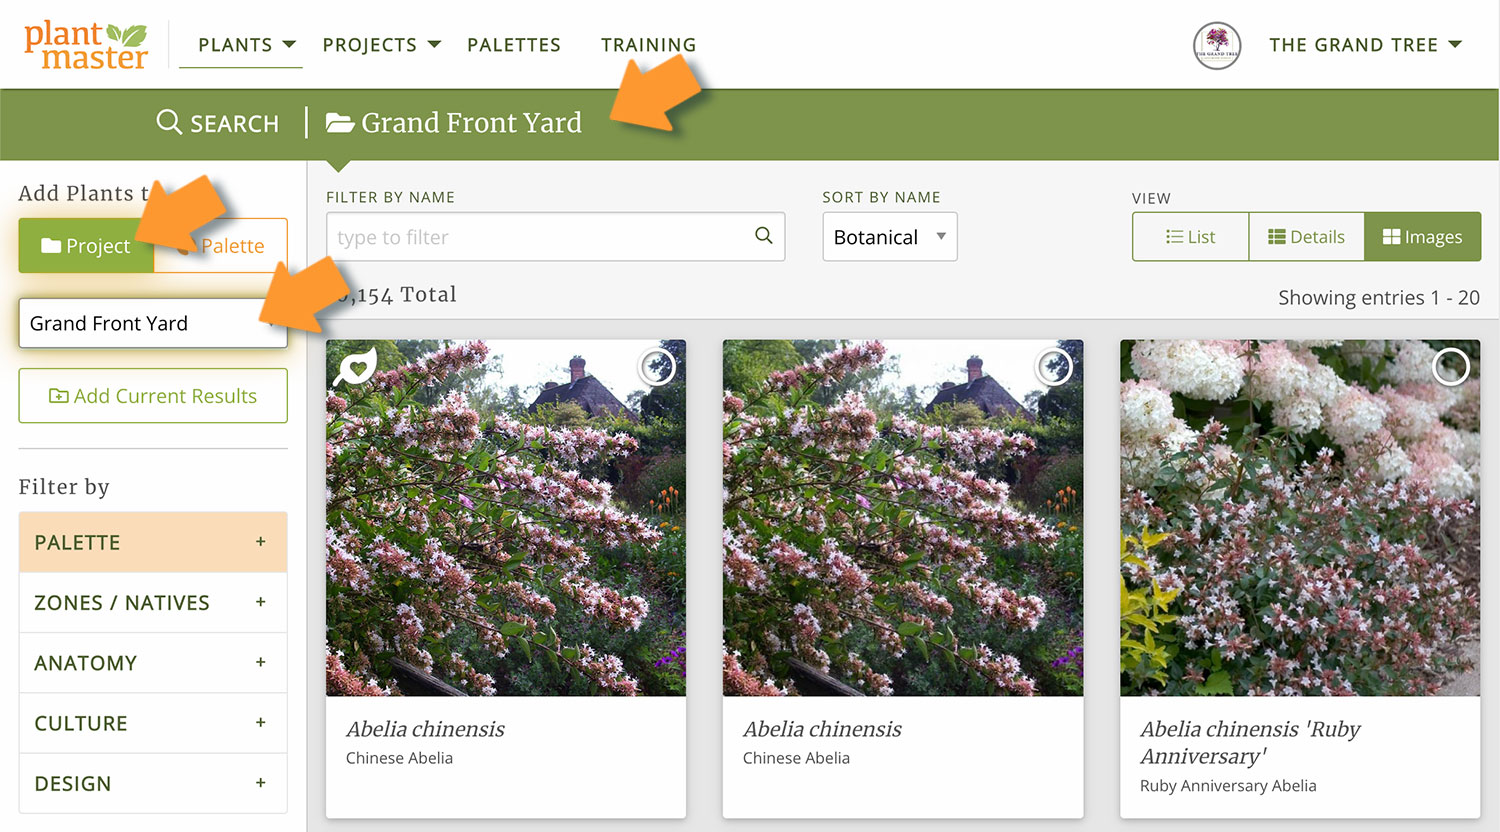
Select your current project.
First – the most important step is to make sure you are adding plants to the right place. On the left sidebar at the very top, you will see two options. Make sure “Project” is selected. (If the buttons are orange, make sure to switch the toggle to “Project”). Now, make sure the project you want to work on from the list of projects. In many cases, these options will already be preselected. The name of the project will be listed in the banner.
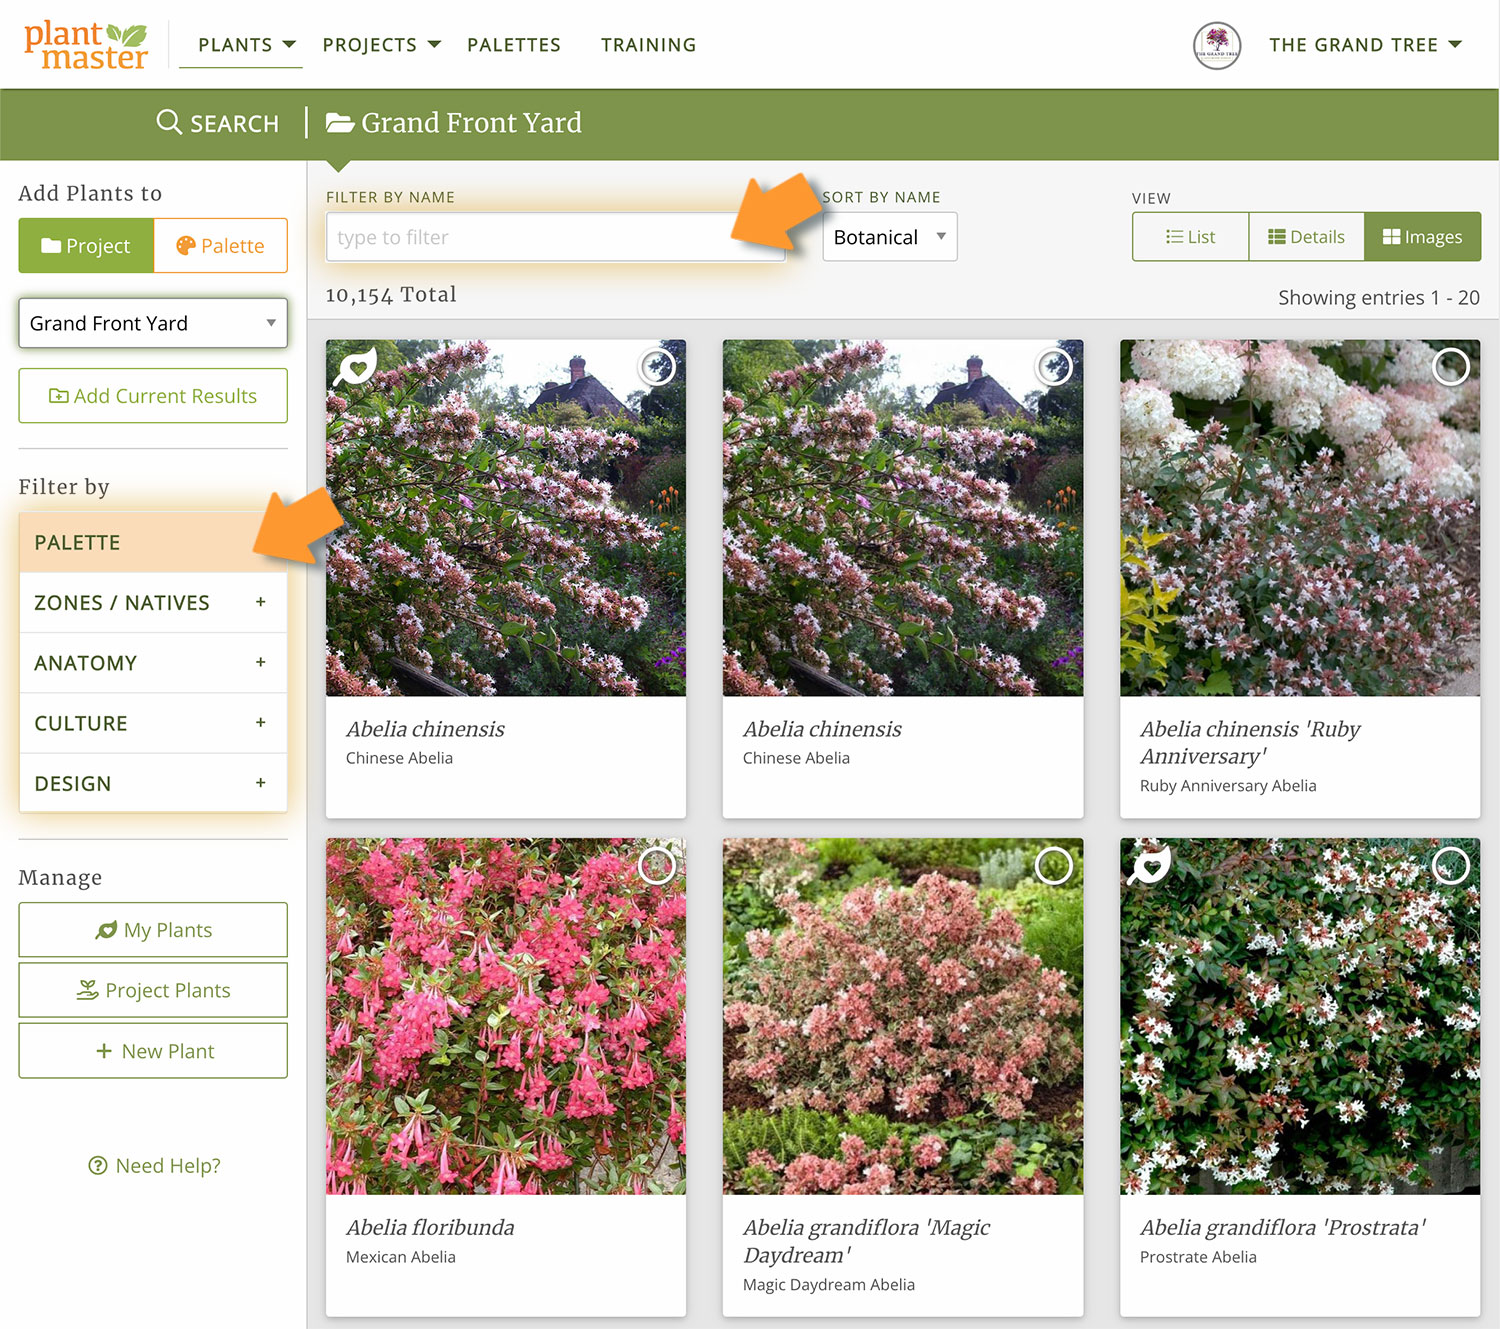
Now you can search for plants to add to your project. There are several ways to find plants. You can use the filter by name to look for specific plants. Type in just a few letters to get more results. Or you can use the filters on the left sidebar to find plants based on their characteristics. Better yet, use both tools together! If you want a more in-depth tour of the search tools, read this article.
Add or remove plants from a Project
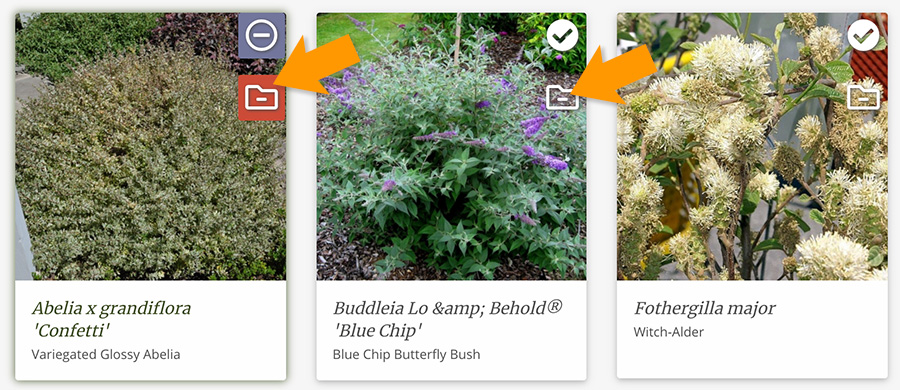
To add (or remove) plants, simply click on the plus icon (in green) in the top right corner of the plant image. A white circle with a check mark will appear once you’ve added it to the project. If you want to remove a plant from the project, click the check mark again.
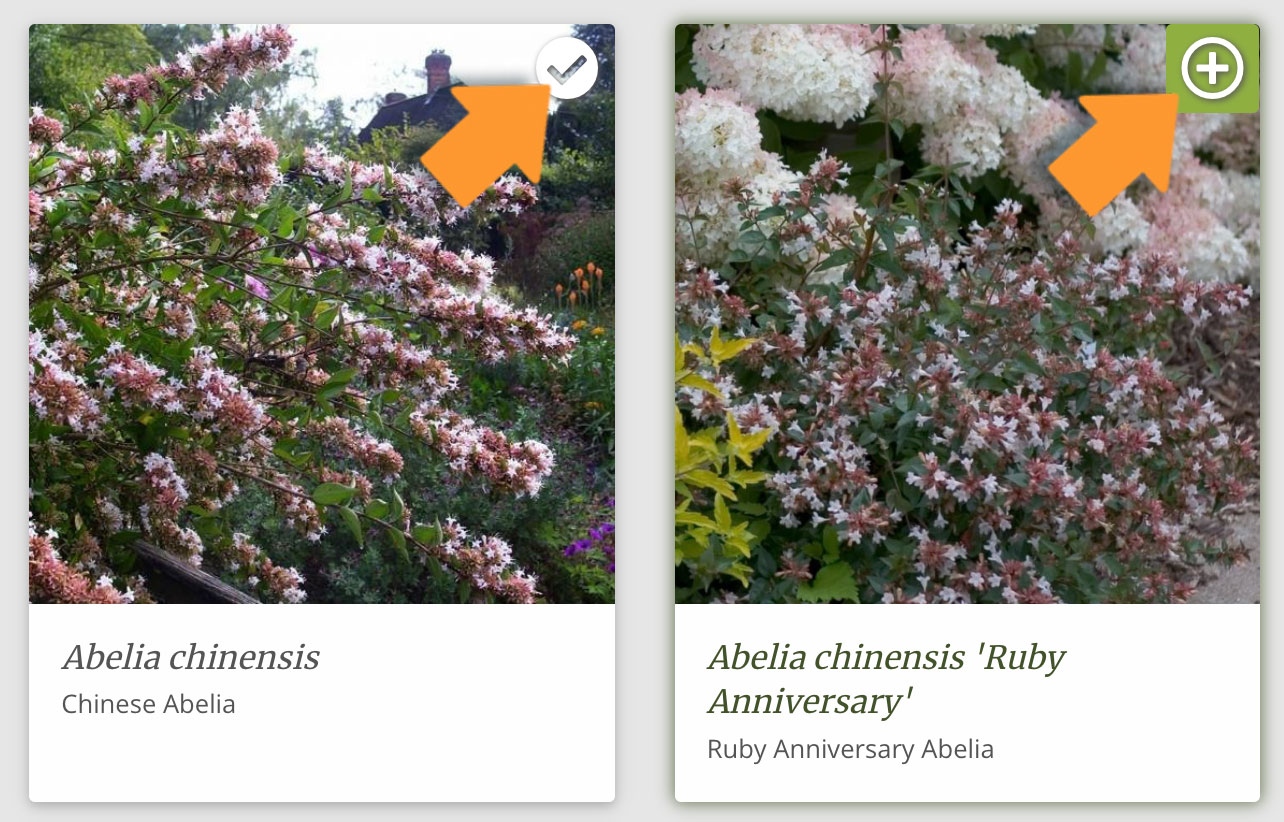
Please note, if you add a plant and change your mind, PlantMaster will ask if you really want to remove the plant from the project. This is because you will also be removing any additional information about the plant that you’ve stored in the project (information like container size or quantity – not plant data).
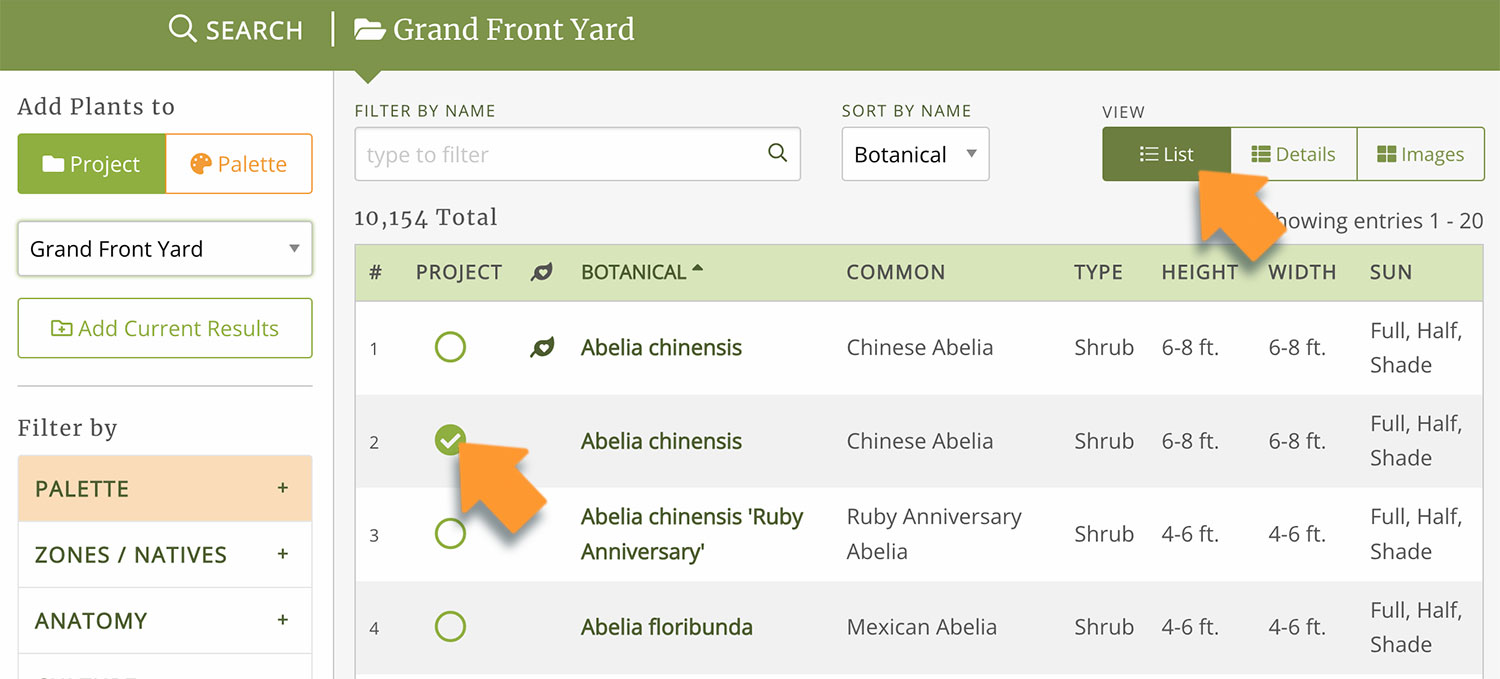
Don’t forget there are multiple ways to view the plants. If you want to see a list of the plants instead of viewing them as images, click on the “List” button in the views. Click on the circle next to the plant name to add or remove the plant from your project.
Review your selections
That’s it! Once you are done adding plants to your project, it’s time to review your selections. Click on “Projects” in the main menu and select “Active Project” – this will bring you back to the project itself. Here you can review all the plants you’ve added.

If you want to remove any plants while you’re in the project, just click the minus symbol inside a folder icon in the top right corner or just under the circle icon. (Please note: the purple circles will only appear if you have Areas in your project)
Next Steps:
You’re almost there! The next and final step in this series is to prepare and send a presentation to a client. Read the next article titled “Sending a Presentation.”
If you would like to take a detour and really learn how to organize your plant choices into specific Areas within the entire project, please read the article title “Using Areas”. But don’t forget to come back and read the final step to send your presentation!