Essential Training
Create a palette >
How to setup, name, and add plants to your palettes.
Use a palette >
How to utilize a palette once you have created one.
Add or remove plants from an existing palette >
How to add or remove plants from a palette that already exists.
Manage your palettes >
How to organize and archive palettes to save you time.
Advanced Training
Once you know how to use palettes, use them in clever ways to work smarter and faster.
Create presentations in minutes by building palettes >
Perfect for professionals who want to be able to quickly create projects and present them to their customers.
Create palettes based on your previous jobs >
Take plants you use all the time and combine them with plants from your work.
10 ideas for creating plant palettes >
A few ideas on different types of palettes you can create.
Plant Palettes – Frequently Asked Questions
What is a Plant Palette?
Plant palettes are high-level filters to narrow down the group of plants you are looking through. Why look through plants you can’t use?
You can create palettes based on Zones, design styles, or however you prefer to group plants. Then, when you are ready to select plants for your next project, activate a palette and your search results will only include the plants from that palette – saving you time!
For example:
Say you work primarily in USDA Zone 5 or Sunset Zone 14. You can run a search for all the plants in Zone 5 and save them to a palette. Done. Then, let’s say you are working on a project and want to search for a yellow flowering tree as a focal point in your design… activate that palette and your plant search will only display trees that grow in that zone!
Can I add a large group of plants to a palette at one time?
Yes! To add a large group of plants to a palette in one shot, follow these steps. First, go to the plant search page. In the top section of the left sidebar, select the palette you want to add plants to.
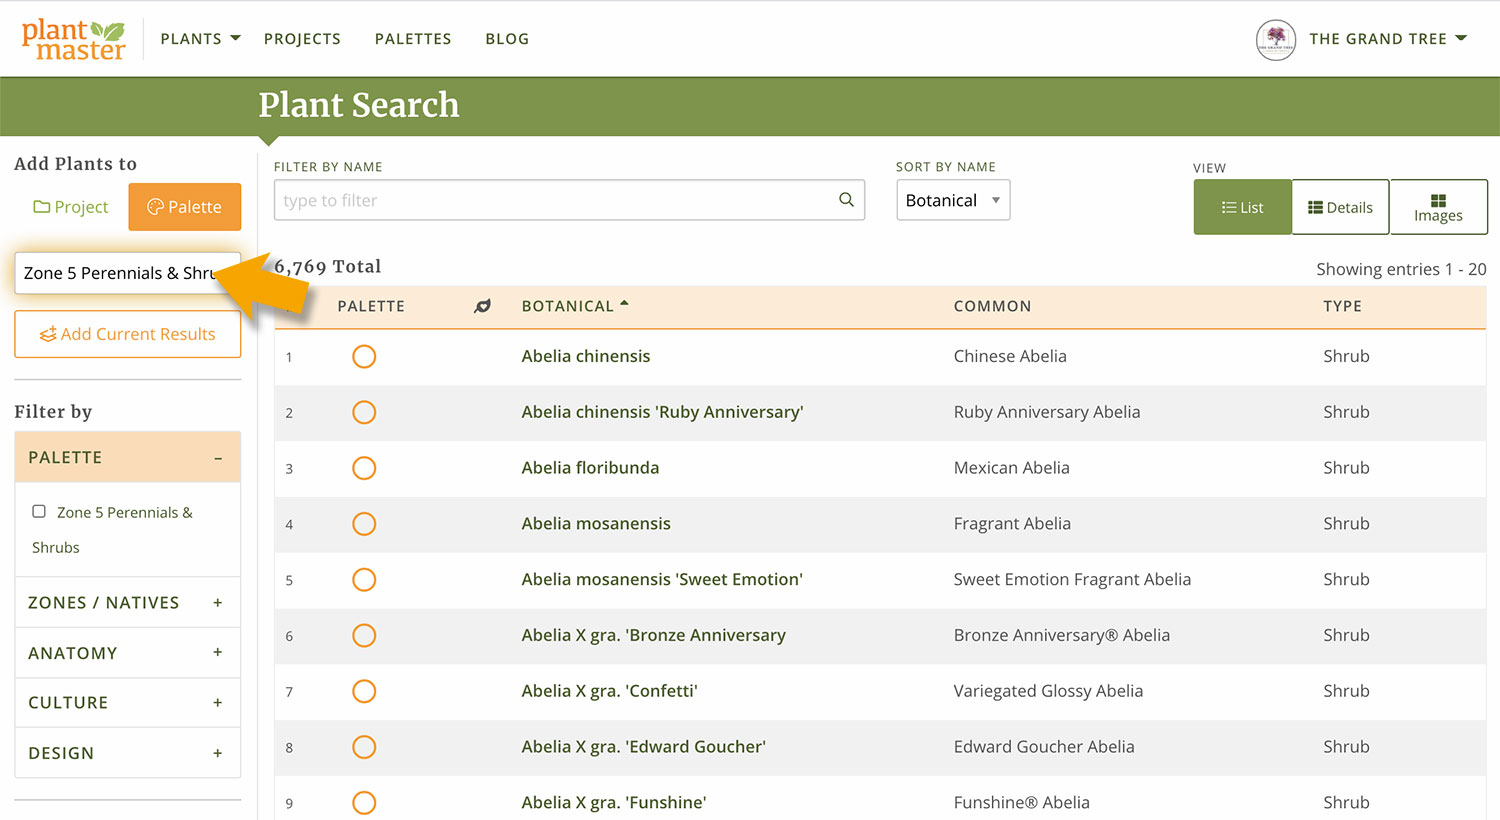
Now you can use the filters, type in plant names, and run searches find the perfect plants for your palette. Once you have a group of plants that you want to add, click the “Add Current Results” button in the left sidebar to add all the plants.

How do I combine palettes together?
Use the check boxes next to the palettes you want to combine, then select “Combine” from the modal that appears from the bottom of the page.
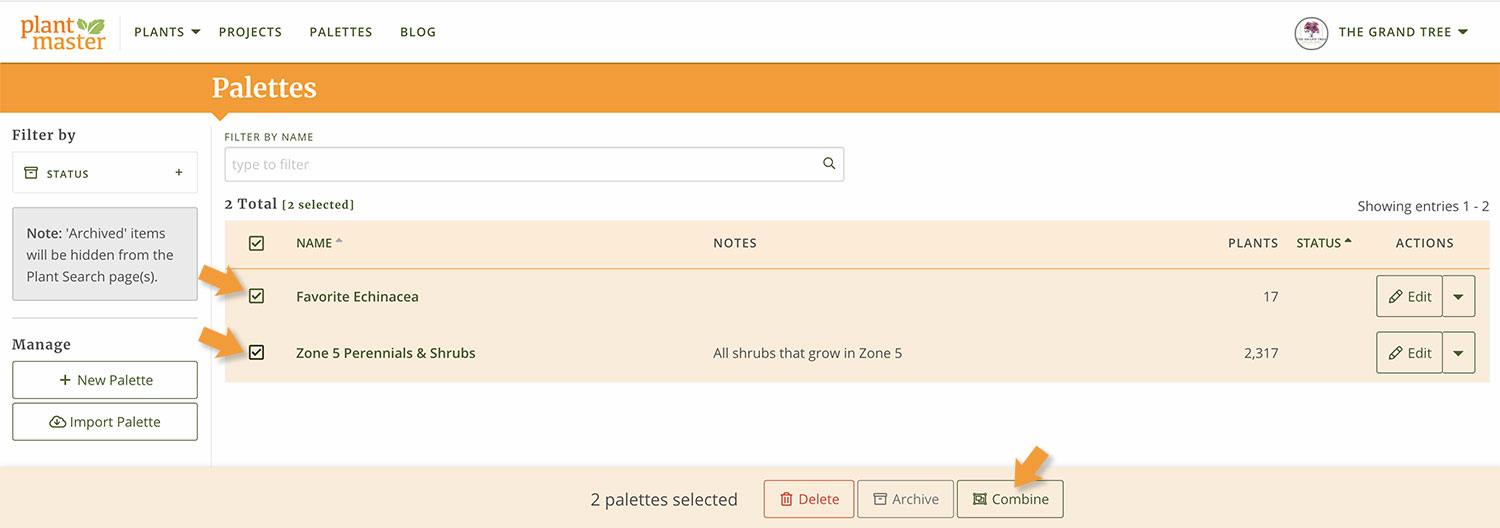
Name your new palette and you are done!
Can I take plants from a palette and add them to a project?
Yes! There are two ways you can add plants from your palettes to a project. You can make a new project from any palette or you can add plants from a palette to an existing project.
If you want to take all the plants from a palette and create a brand new project with these plants, navigate to the Palettes page. Click the drop down arrow to the right of a palette name, then select “Create Project”.

Name your new palette and you are done!
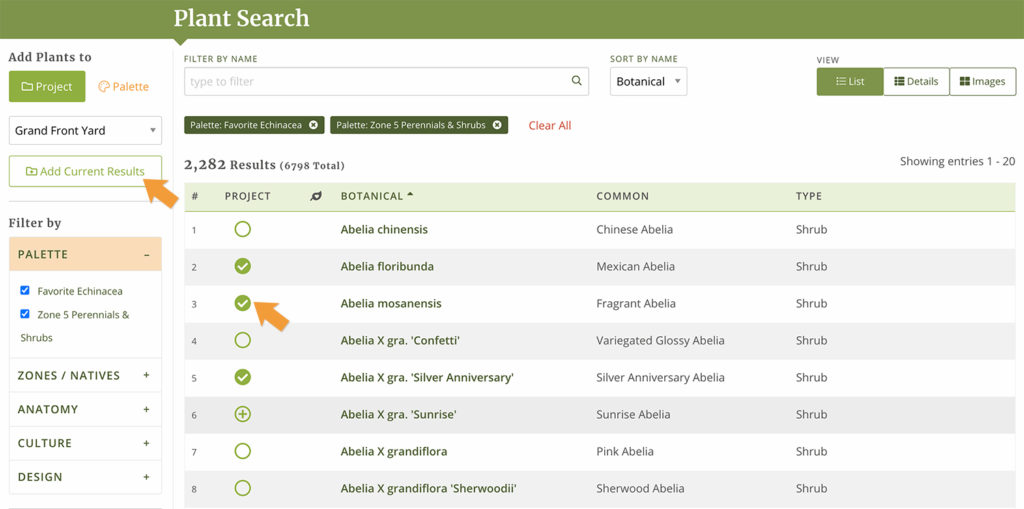
If you already have a project created and want to add the plants from a particular palette – you can do that too! Head to the plant search page. Make sure your current project is selected at the top under “Add Plants to”.

Then select the palettes you want to use from the Filters listed on the left side bar. This will show you ONLY the plants in these filters. Now you can hand select which plants you want to add to your project or you can all the plants from the palette directly into your current project.
How do I delete a palette?
To delete a palette, find the palette you want to remove and click the arrow to the right of the palette name. From the dropdown menu, select “Delete Palette” to permanently delete the palette.

Can I share palettes with another user?
Yes! If you want to share a palette with another PlantMaster user, you can do so easily!
On the palettes page, find the palette you want to export and click on the dropdown arrow to the right of the palette name. From the dropdown menu, select “Share”.
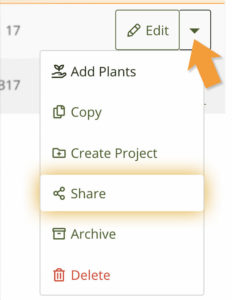
This will pull up a modal window with a code you can share with another PlantMaster User. Copy this code and send in an email to them.

How do I import a palette from another user?
On the palettes page, select “Import Palette” from the left side menu.

This will pull up a modal window. Then type in or paste the code from another PlantMaster user into this space and click “Continue”. Congratulations! You have a brand new palette!

When I import a palette, will it override my existing data?
No. No incoming plant information will override or replace any of your existing information.
Can I add plants from a plant name search?
Of course! Use the search by name AND any of the filters. To get the best results from the name search, don’t type the entire plant name. Just type what is unique about the name. Try typing the common name or nickname first or just the first four letters of the botanical name and browse through the options to find your plant. (The database works to make an EXACT match, so even a small space or letter difference will mean that you not find the plant you are looking for.)
What does archive mean? How do I use it?
Think of archiving as hiding. If you have a bunch of palettes, but only use a few of them frequently – you can hide the ones you don’t use. When you archive a palette, it will still be listed in the list of palettes, but it will be moved to the bottom of the list and the active palettes will remain at the top. When you are doing a plant search, only the active palettes will be options for the filters. So any archived palette will be hidden.
To archive a palette you have two options:
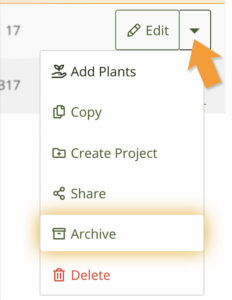
To archive a single palette, select the drop down arrow to the right of the palette name and select “Archive”.
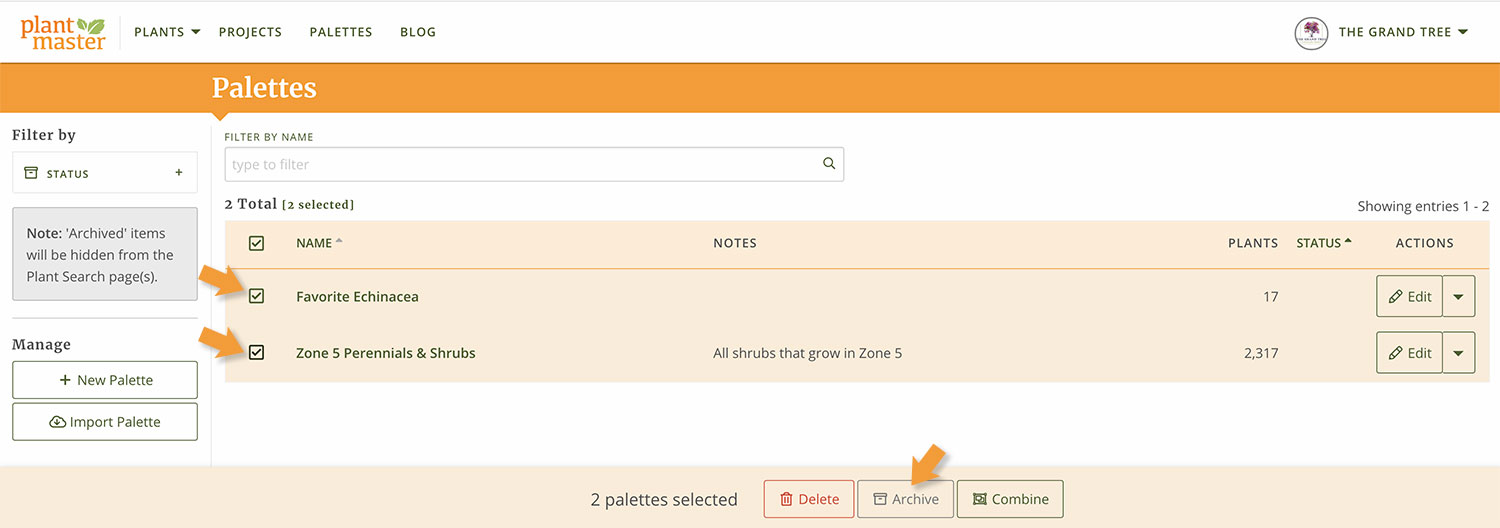
If you want to archive several palettes, select the check boxes of the palettes and select “Archive” from the modal that appears at the bottom of the page. Use the same process to re-activate your palettes.
support@plantmaster.com
805.499.9689
JOIN A VIDEO TRAINING SESSION!
The fastest way to learn how to use PlantMaster is to join one of our video training sessions via Zoom. In one hour you’ll be able to use the software with ease – which is far less time than you’ll spend teaching yourself.


