
25 Feb PRODUCT UPDATE | Areas
ANNOUNCEMENT –
New Areas collage in Interactive Presentation.

Now you can view each Area as a collage of images!
We’ve added an entire section to the Interactive Presentation that displays all your plants selections by their Area. Click on the name of an Area in the left sidebar to view a collage of the plants in that Area! And we have plans to develop this section further! Check it out!
See the Areas collage in action
To see it in action, open a project with Areas, go to the Present section and click to preview the Interactive Presentation!
A few notes:
- The collage displays the images in alphabetical order by Botanical name.
- Images are automatically arranged based on the image size and orientation.
- The order and size of each image is determined by an algorithm. You cannot custom select the order of the images or size of each image in the collage. (We know you want this option!)
- The collage pulls the first image for each plant. If there is room (or if you only have a few plants per Area) the collage will also pull up to 4 images per plant to complete the grid.
- If you don’t have any Areas in your project, this section will be hidden altogether.
FIND TRAINING –
Learn how to use Areas.
As Areas becomes a larger part of your workflow, please take a moment to explore our new training articles. If you want to learn the details of how to create Areas and assign plants to those Areas – read “Using Areas”! If you want to combine old projects into a new project that include Areas – read “Combining Project to Add Areas”. If you need any additional training or have questions, please contact us at support@plantmaster.com. Lastly, the fastest way to learn these tools is to join a video training. You’ll learn more in an hour than you can teach yourself.
USING AREAS >
Read this article to learn everything you need to know about building Areas. In this training, you will learn how to define your Areas, how to assign plants to each Area, and all the different presentations and reports you can send that include Areas. Everything you need to know about defining the Areas in your project and assigning plants to their corresponding Areas in your design.
COMBINING PROJECTS TO ADD AREAS >
If you used to create a different project for each section of your design and send your customer several links, there is an easy way to combine your previous projects into a brand new project with Areas! There are few key steps to take to ensure that all your Areas are intact when you combine these projects. Please read this training article to make combining older projects into new projects with Areas!
COMBINING PROJECTS TO ADD AREAS TRAINING >
Find the next training date >
The fastest way to learn these tools is to join our video training. We will spend 45 minutes walking you through the project section and how to utilize the Areas functionality. If you want to get to work quickly, join one of our training sessions!
SEE AREAS IN ACTION –
Here are all the places that utilize Areas!
INTERACTIVE PRESENTATION
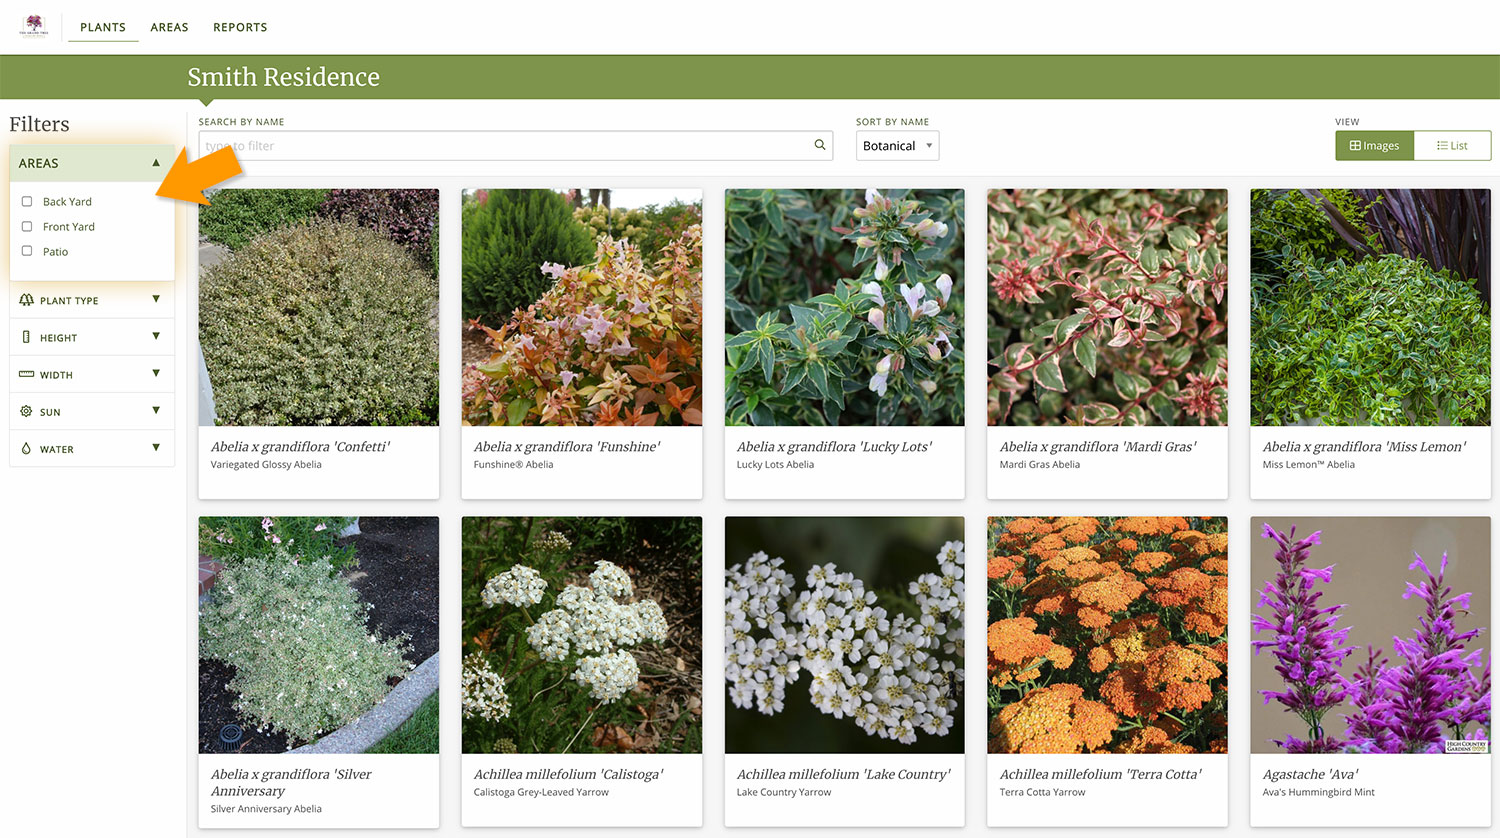
Your customers can filter the plants you’ve selected for them by Area in the Plants section.
Or they can view a collage of the plants in each Area in the Areas section.
SIMPLE PRESENTATION
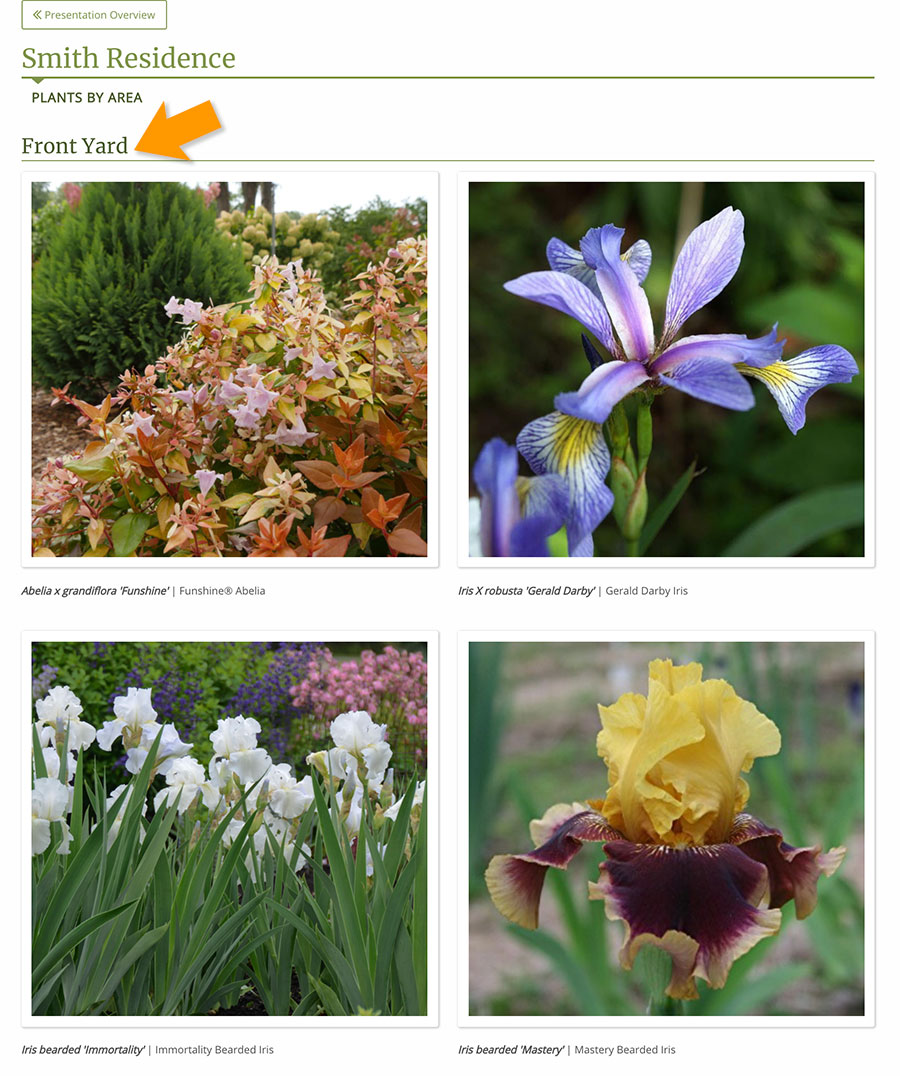
In the Simple Presentation options, you can select the Plant Storyboard as one of your options.
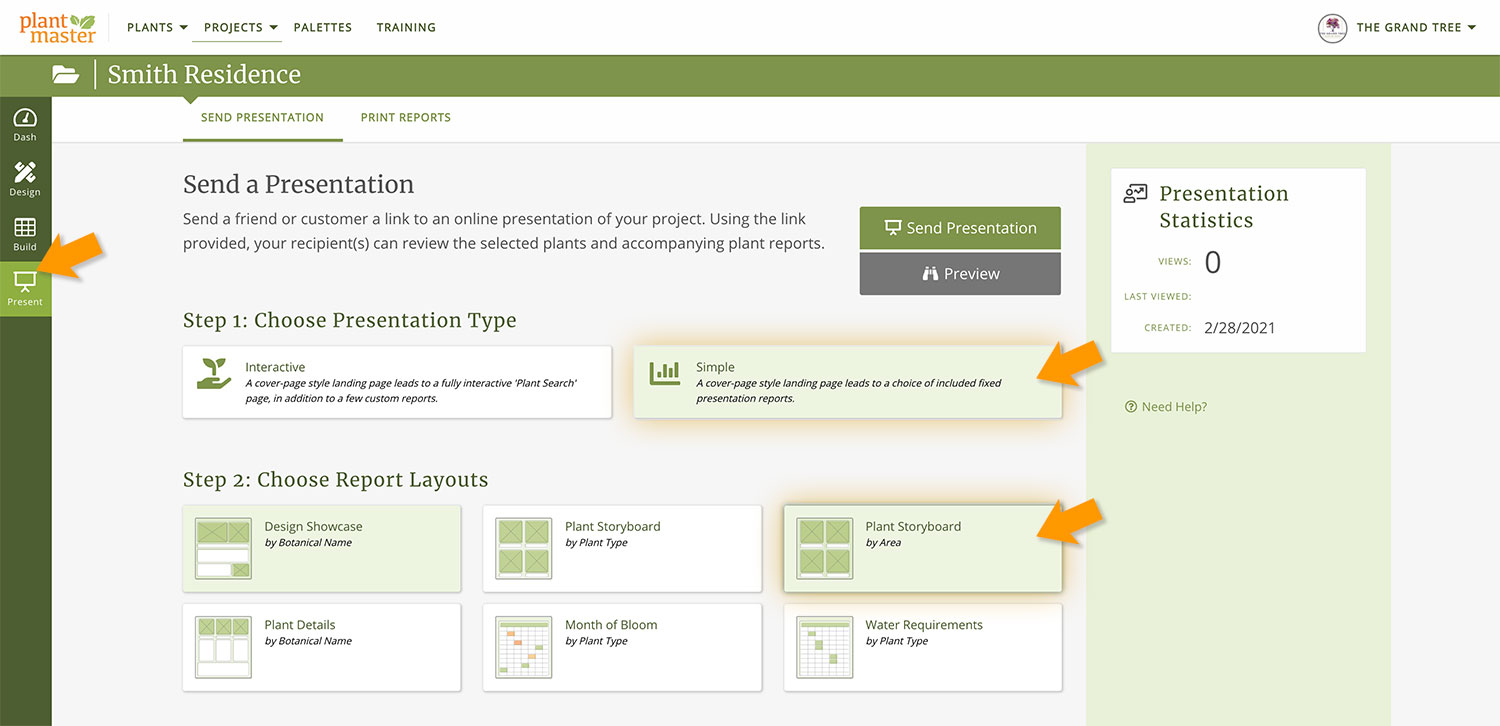
This report is organized by Area and looks like this:
REPORTS
Here are all the reports that can be organized by Area:
- Plant Storyboard
- Single Image
- Plant Details
- Multi IMage
- Plant Briefs

To see the different report options, open your project. Then select “Present” in the project navigation bar (far left of the screen). Just underneath the project name you will see two tabs, select the tab called “Print Reports”.
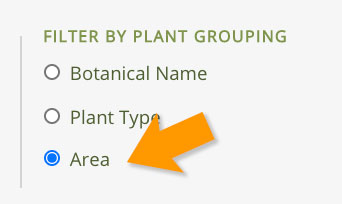
Now you can see all the reports! Make sure to select “Area” in the “Filter by Plant Grouping” section to on the right side of the page to see all the reports that are organized by Area!
Click on this button to quickly visit the Reports section of your project.